Quote line items are used to develop the pricing for your quote. Line items can be entered as either materials or labour, or labour can be entered on each material line by using the UR and Hours fields. Items can be entered individually or as part of an assembly.

Interested in learning through an interactive course in the AroFlo Academy?
Learn about the line item fields
| Field | Description |
|---|---|
(Double line) |
Reorder the line item up or down in the list of line items. |
(Plus button) |
Click the plus button to create an assembly of items under a header row (only available for ad-hoc items), i.e. convert an ad-hoc item to an assembly. See information below for instructions. |
| Item | Enter the primary identifier of the item, e.g. the item name. |
| Part No |
Enter the preferred supplier's part number, or assign your own. If you add your line items by using the Multi-Search Menu or Supplier Catalogue options, the part numbers from your inventory (or from your supplier's catalogue) will be auto-populated in this field. |
Qty or 
|
Enter the quantity of items, or click  to use the measurement calculator. to use the measurement calculator. |
| Type (Material or Labour) | Select either MAT (material) or LAB (labour) to indicate what type of line item this is. |
| Value | Enter the item cost. |
| Markup | Enter the markup percentage. |
| Sell |
An auto-calculated field that represents the product of Value x Markup for a single unit of the item. You can change the value in this field and AroFlo will automatically update the Markup %. |
| Total | An auto-calculated field that represents the product of Qty x Sell. |
| Tax | Select from the default values of GST or FRE, or from any additional tax codes that have been set up for your business. |
| Tracking Centre | Select the relevant tracking centre for the line item. |
| UR (Unit Rate) | This is a way of charging for labour on a material item. See Labour and Expenses on Quotes - Labour line items for more information. |
| Hrs | The tally of the Unit Rate x Quantity of a material item. |
(three dots) |
Click  Optional items are not included in the Quote Total until they are selected (i.e. the checkbox is ticked). To remove the item from being optional, click See the section Setting Line Items as Optional for more information. |
(red cross) |
Delete line item. |
Avoid under-quoting
Line items with a zero dollar value will be highlighted in red, making it easier to avoid under-quoting (see above image).
Line Item Options
There are a number of ways to add quote line items:
- add ad-hoc line items
- use the Multi-Search menu to import items from your Inventory, Quote History, Assemblies, Task-specific lists, SOR Lists, or Task Worksheets
- add option groups
- Bulk Import quote items
- access your supplier online catalogues.

See below for instructions on each option.
Reorder items
Use the  (double line) and simply click and hold and drag to reorder line items. (double line) and simply click and hold and drag to reorder line items. |
 |
 |
Tax-inclusive prices
By default, unit prices are treated as tax-exclusive. If you want to use tax-inclusive pricing, click the Tax Inc checkbox in the totals area before entering prices.
Ad-hoc Items

Ad-hoc line items allow you to enter your own description (up to 1000 characters including spaces) and value of the item. They are generally used for materials not in your inventory, or as a header to create a quote assembly (see Ad-hoc assemblies).
Click Add Line Item and enter in the details manually. See above for a description of the fields.
Long item descriptions
For long item descriptions, a pop-up window will appear for text to be added/edited - simply click OK or anywhere outside of the pop-up window to update text.

Multi-Search menu

Click the Multi-Search menu to access your inventory and more:
Inventory
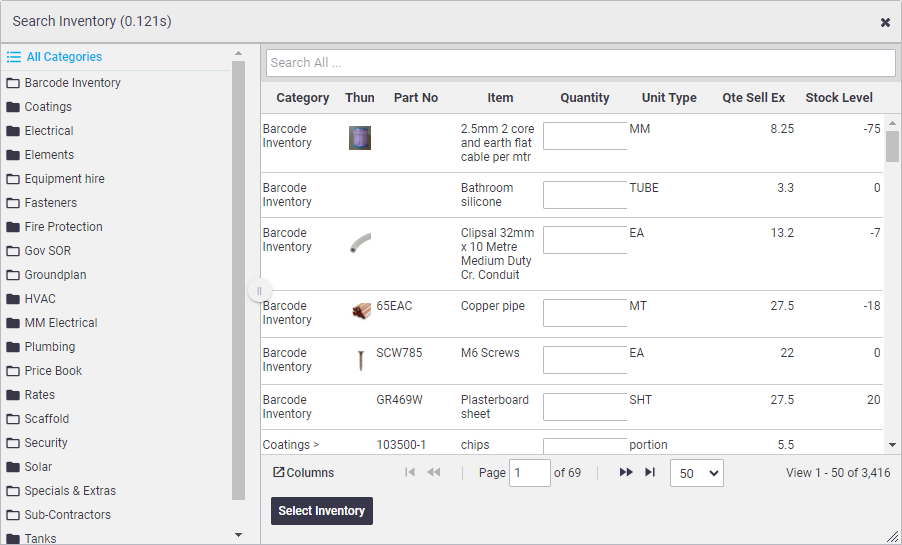
Use Multi-Search > Inventory to add line items from your inventory list.
Use the search box to locate the relevant inventory item, and enter a Quantity to add the item to your quote. Click X to close the Search Inventory window.
Quote History (Simple)
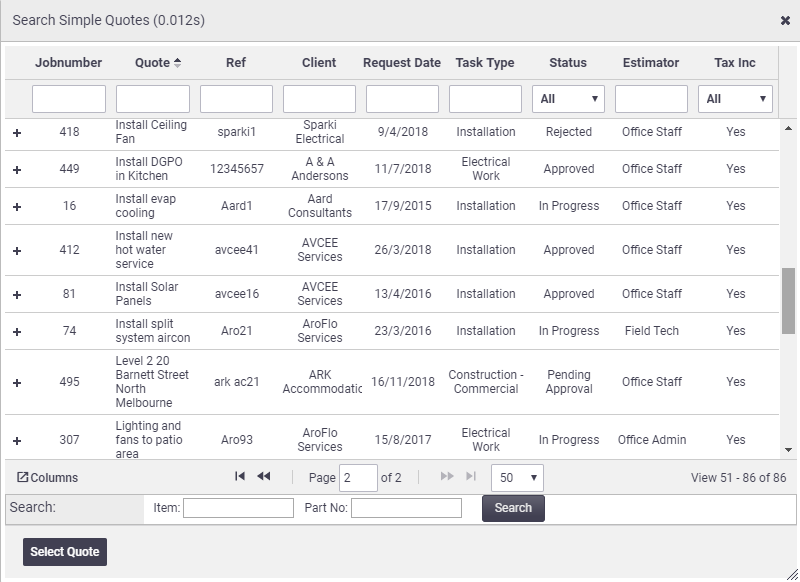
Multi-Search > Quote History (Simple) allows you to add entire simple quotes or parts of previous quotes you've worked on.
Use the filters at the top of the search box to locate the relevant quote.
Double-click the Quote name header to add the entire quote or click the  (plus) icon to expand the quote and select individual items.
Quote History (Detailed)
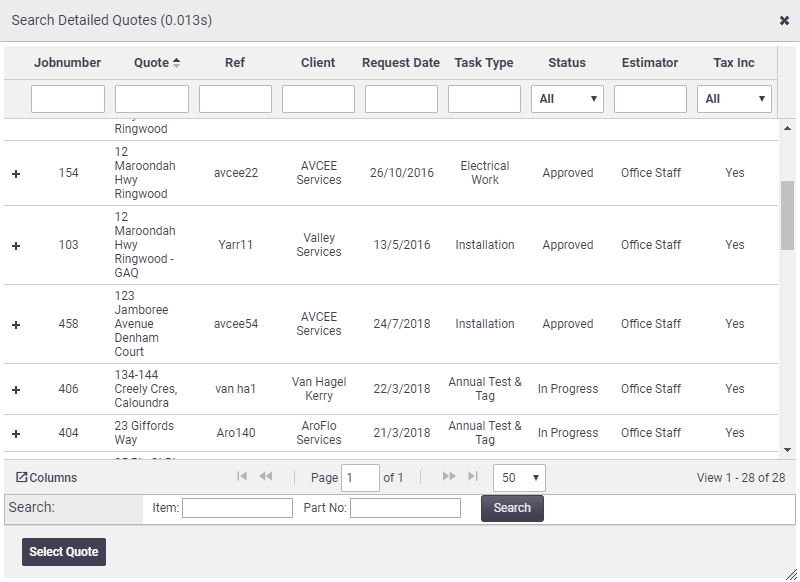
Multi-Search > Quote History (Detailed) allows you to add entire detailed quotes or parts of previous quotes you've worked on.
Use the filters at the top of the search box to locate the relevant quote.
Double-click the Quote name header to add the entire quote or click the  (plus) icon to expand the quote and select individual items.
Assemblies
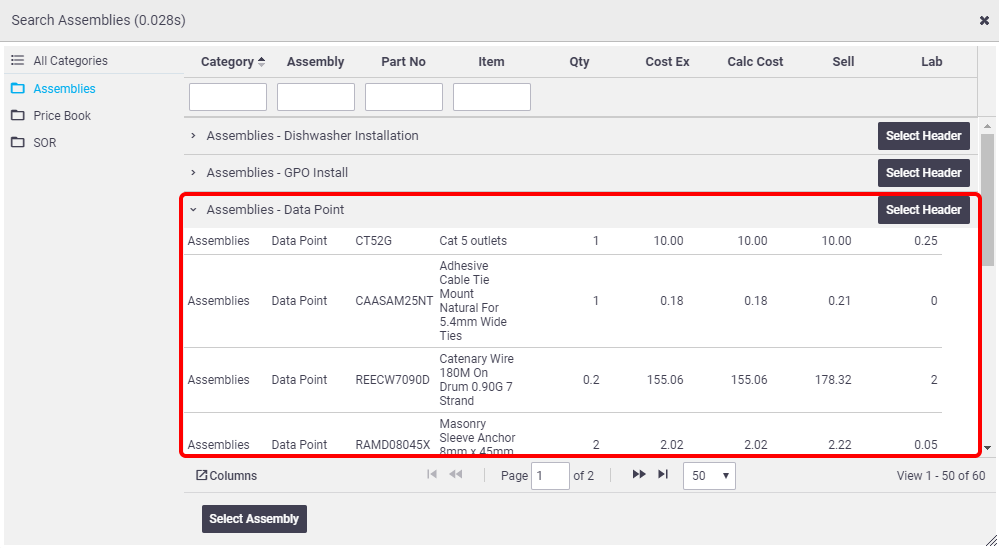
Use Multi-Search > Assemblies to add your pre-built assemblies to your quote.
Use the filters at the top of the search box to locate the relevant assembly.
Click Select Header to add the entire assembly or add individual items within an assembly by double-clicking each item.
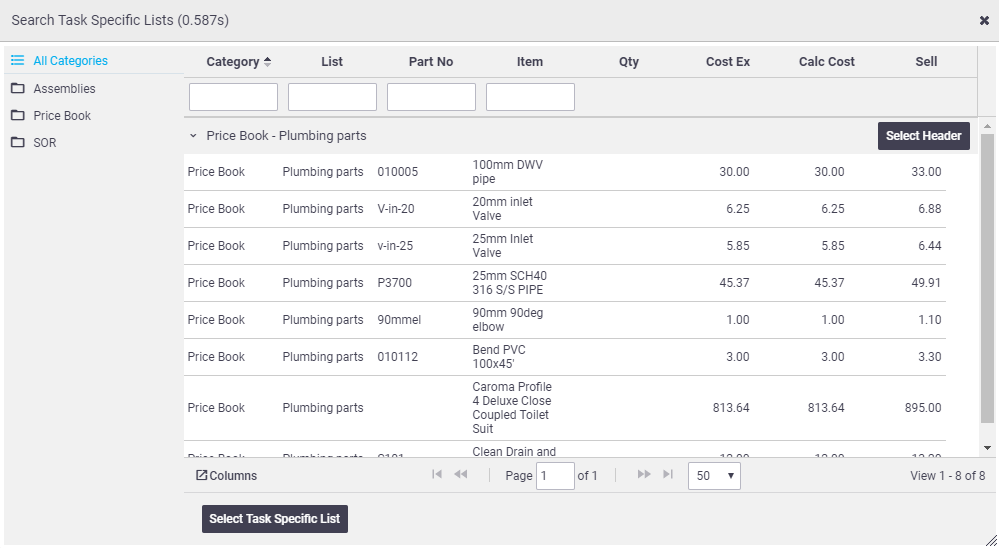
Task Specific Lists
Use Multi-Search > Task Specific List to add multiple inventory items from a task-specific list.
Use the filters at the top of the search box to locate the relevant task list.
Click Select Header to add the entire task list, or add individual items within a task list by double-clicking each item.
SoR Lists
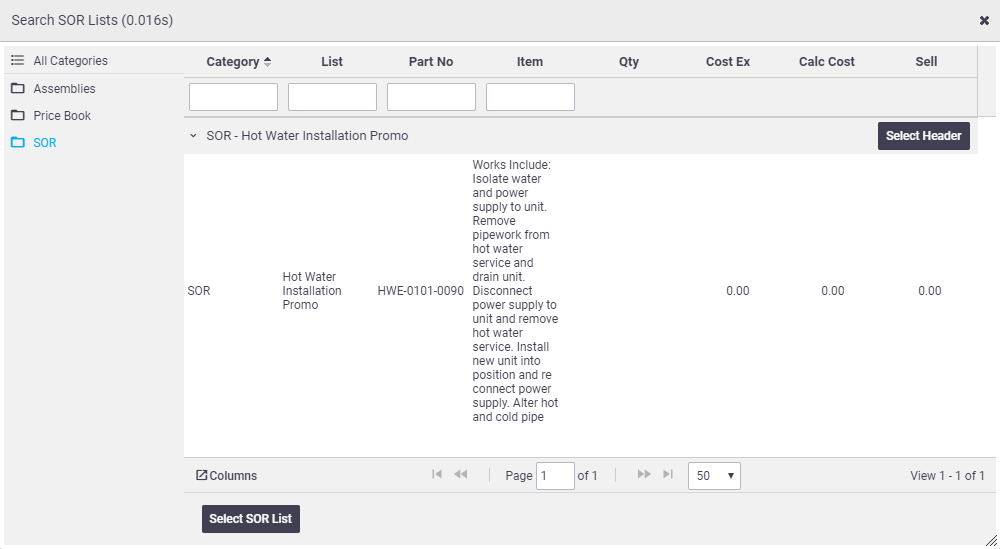
Use Multi-Search > SoR Lists to quickly add multiple items from an SoR list.
Use the filters at the top of the search box to locate the relevant task list.
Click Select Header to add the entire SoR list or add individual items within an SoR list by double-clicking each item.
SoR Items
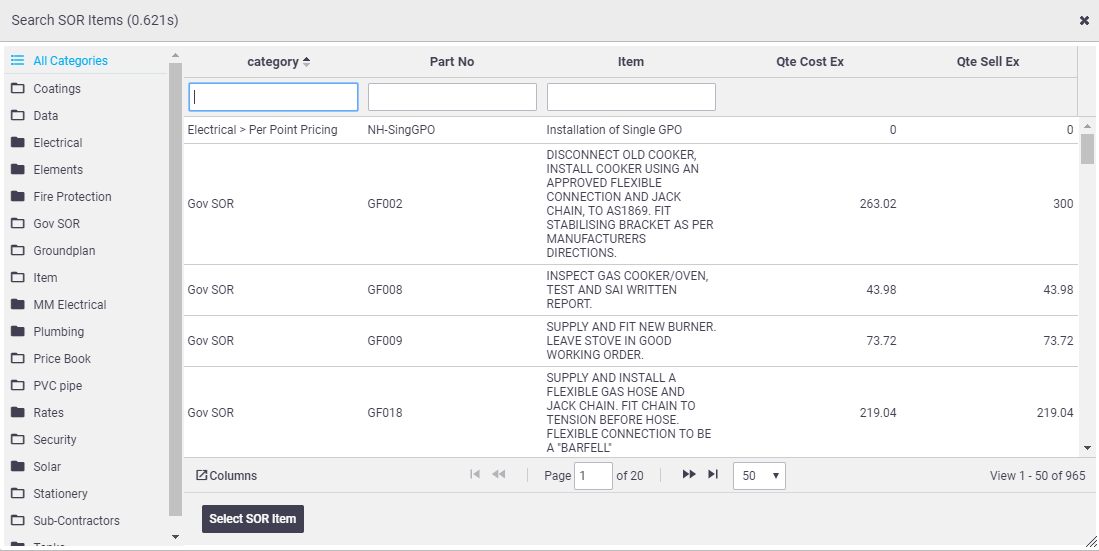
Use Multi-Search > SoR Items to add SoR items from your inventory list.
Use the filters at the top of the search box to locate the relevant task list and double-click each item to add to the quote.
Task Worksheet (This Task)
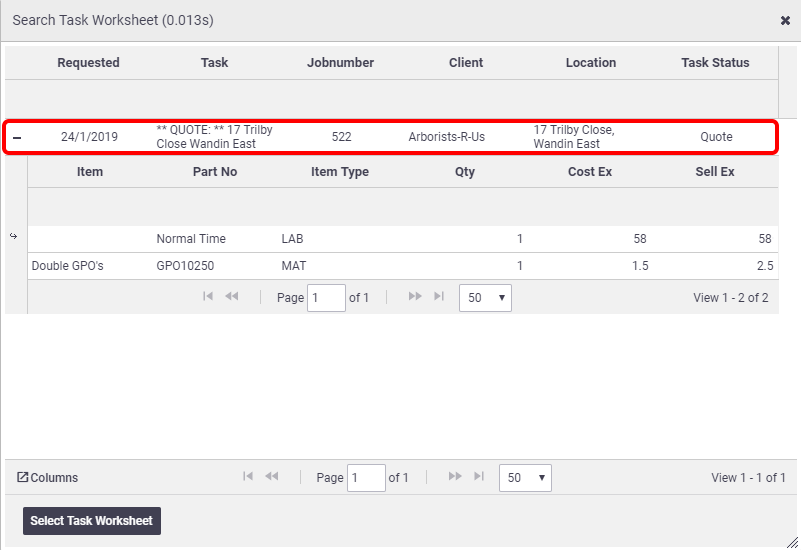
Multi-Search > Task Worksheet (This Task) allows you to add labour, material and/or expense items that were recorded on the Task before it was converted to a Quote, or, labour and expense items that were added to a quote during the actual creation of the quote.
This option is only available when a quote is created from the Task via the Create Quote link on the Task screen, or if you've added labour or expense items during the quote creation process (e.g. time taken for a quote).
Click the  (plus) icon to expand the task items to select individual items or double-click the task name header to add all items to the current quote.
Material and expense items from the task are added as Material line items (Type = Mat). Labour items from the task are grouped by work type and added as a Labour line item (Type = Lab).
Task Worksheet (All)
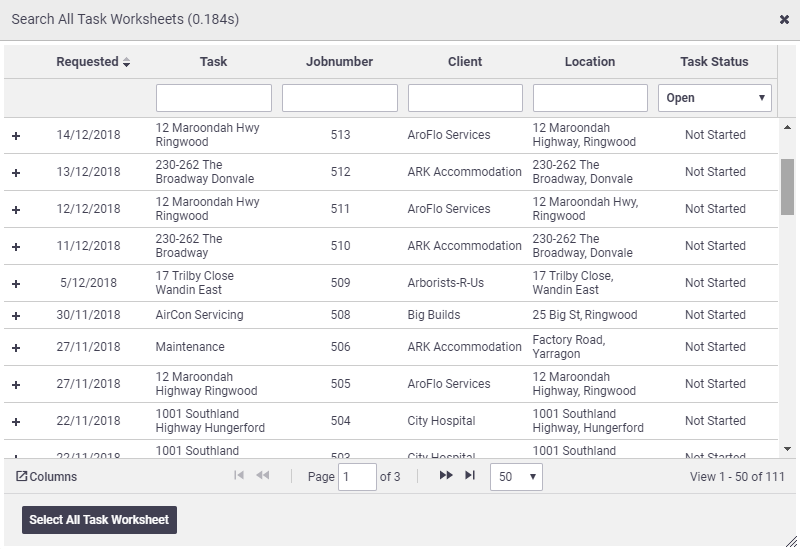
Multi-Search > Task Worksheet (All) allows you to access the entire Task list and add labour, material and/or expense items from selected tasks.
Click the  (plus) icon to expand the task items to select individual items or double-click the task name header to add all items for the selected task to the current quote.
Material and expense items from the task are added as Material line items (Type = Mat). Labour items from the task are grouped by work type and added as a Labour line item (Type = Lab).
Supplier Catalogues

Use the Supplier Catalogues menu to access supplier online catalogues from within AroFlo and import items you've added to the 'cart' directly to your quote. For more information, please refer to our help guide for using supplier catalogues.
Ad-hoc assemblies
Assemblies are separate items grouped together to form a single 'item'.
1 - Click Add Line Item
Add an ad-hoc line item by clicking Add Line Item and enter a description.

2 - Click plus button
Click the plus button  to the left of the line item.

3 - Add items
Add items to your new Assembly either by manually adding line items, using Multi-Search, or Supplier Catalogues.

4 - Set quantity of header
Set the quantity of your Assembly header and AroFlo will calculate the total material and labour costs of all of the sub items.

5 - Save
Remember to Save Quote.
Information on items which can be expanded
If using assemblies (including ad-hoc assemblies), Task Specific Lists, SOR Lists, or takeoff sheets, and you collapse groupings (  >
>  ), these will display as collapsed on your quote layout if using a table in your layout with Quote Screen Layout in the name. See Add or Edit a Table Element - Quote Tables for more information.
Measurement Calculator
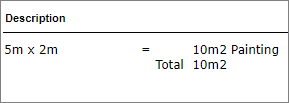
You can quote for a service or item in m2 (squared), lineal metres or m3 (cubed) to accommodate for jobs like painting a room or fencing a property.
To quote in linear measures:
- On the relevant line item, click the measurement calculator button
 (right triangle) next to the quantity field.
 - Define the object, item, or space you're measuring (Area, Linear, Volume)
- Define the unit to measure in and how you want this unit type to display:
Measurement Units by Category


Millimetres Millimetres Millimetres Centimetres Centimetres Centimetres Metres Metres Metres Kilometres Kilometres Kilometres Inches Inches Inches Feet Feet Feet Yards Yards Yards Miles Miles Miles Litres Millilitres - Choose your measurement type to match the space you're measuring using the dropdown.
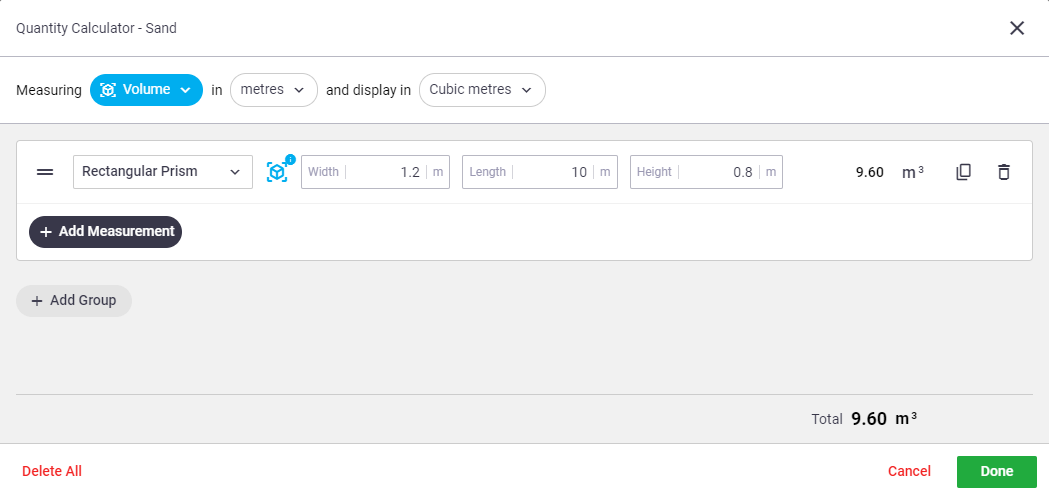
Click the image of the shape to give you more information about how measurements are calculated.
Available measurement types
Area
Measurement types Measurement Use Case Rectangle Width x Length Painting a room. Square Length Fencing the perimeter of a property. Triangle A x B x C Tiling a nonstandard-shaped bathroom. Right Triangle Height/Base Installing wall-mounted cabinets in a nook. Circle Diameter Calculating the cost to clean a tank. Linear
Measurement types Measurement Use Case Line Length A single row of tiles or selling a length of cable Volume
Measurement types Measurement Use Case Rectangular Prism Length x Width x Height Filling an area with sand Cube Length Selling materials (e.g. sand or soil) per cubic metre Cylinder Height x Diameter Calculating the cost to clean a tank. Tube (Height x Outer Diameter) - Inner Diameter Pipe fabrication - Enter a measurement that you have taken in the relevant fields. The total calculation to the right will increase as you do this.
- Click Add Measurement to add another line or Done to close the calculator and continue with your quote.
When you click Done, if you've changed any of the numbers of the measurement or the measurement type (like changing metre to cm), a prompt confirming you want to change the unit type/value for the line item will appear. Click Update Unit Type/Update to continue.
Other Linear Measure Calculator Options
| Option | Function |
|---|---|
 (Duplicate) |
Click to add a new measurement line in the calculator with the same values as above it. |
 (Delete) |
Click to delete the measurement line. |
 (Add Group) |
When you click Add Group, this creates a new group of measurements. This would be useful for breaking up a quote that might be for several rooms of a house or fencing on different parts of a property while maintaining a single line item. Click the field above the measurements in each group that reads ‘Group’ to enter a name. Then proceed from Step 2 above to complete more calculations. Groups can also be deleted or duplicated. |
 |
Click and drag if you need to reorder a measurement line / measurement group. |
Delete All |
Delete all calculations. You'll be prompted to confirm this action as it cannot be reversed. |
View Measurements on a Layout
|
 |
 |
Watch video
Labour break up per line item
When adding line items to quotes, labour on line items is calculated using your default work type set in Site Admin. If you want to set different labour rates per line item, use the  (yellow plus icon) beside the Hrs heading to expand the section and access more fields. See Labour and Expenses on Quotes for more information.

Setting Line Items as Optional
When a Quote line item is set as optional, the cost of that item is not included in the Quote total unless it has been selected (i.e. your customer has chosen to include it). This is useful for presenting additional items to your customer (e.g. optional upgrades) without affecting the base total of the Quote.
When you add an optional item, a checkbox will appear to the left of the item’s name. This checkbox controls how the item displays on the Quote layout and whether its value is included in the Quote total.
Grouping pricing options
Alternatively, you can also group various pricing options under their own header on a quote. See Quote Option Groups for information.
Set as optional
You can set a single line item as optional, an ad-hoc assembly, or just the items inside the assembly using the following method:
- Click the
 (three dots) to the far right of the line item.
 - Click Set as Optional.
- Save your Quote.

Set the behaviour of optional items
Once you're ready to confirm optional items and add to your quote total, click the checkbox to the left of the item’s name. Alternatively, your clients can confirm optional items for themselves if you're using Online Quotes. See next section.

Online quotes and optional items
Optional items within assemblies are currently unsupported for Online Quotes.
Quote totals and layout information
- Leaving the checkbox unticked - shows the line item with an optional prefix in the table of your printed layout
- Ticking the checkbox - adds the total of the optional item to the Quote Total and removes the optional prefix.
- For the optional prefix to appear on your layout, you must have the correct column in your table such as Item - Optional Prefix. Alternatively, you can use the Optional column which displays as Optional or Selected, or Optional Checkbox gives you a checkbox to indicate whether or not an optional item has been selected.
Remove optional
If you need to convert an optional item back into a regular quote item, i.e. an item which will be included in your base total of the Quote, click the  again and Remove Optional.
Optional items and Online Quotes
|
You can set the behaviour of optional items at any stage of the quote lifecycle, except if the quote is Approved and Accepted or Declined. Your client can select optional items using the online quote viewer once your quote has been Approved, provided you've given them the ability to do this. See Online Quotes for more information. Set default You can set this option to be ticked by default in Site Administration. See Quote Settings. |
 |
 |
Use Latest Inventory Pricing
If your inventory pricing has seen some fluctuations since the quote was originally built and you want the quote to reflect your latest pricing, click Use Latest Inventory Pricing, which will update your line items' costs based off your latest inventory pricing.

Things to note when using this feature
- Pricing will reflect as tax inclusive or tax exclusive.
- Items containing price levels will not be updated
- SoR items will not be updated
- Items added as part of an assembly or task-specific list will not be updated, however, if inventory items are added to either an assembly or an ad-hoc assembly, these items will be updated
- Any UR changes made on the item (using detailed pricing) will not be updated.
|
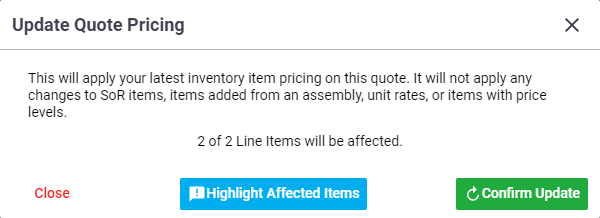
Once you click Use Latest Inventory Pricing, AroFlo will run a quick check to see which of your items are affected. If applicable, click Highlight Affected Items if you want to highlight the items which have since changed in price. Otherwise, click Confirm Update. |
 |
 |
Highlight Affected Items
| This will highlight the items which have had their prices changed since the quote was last saved. |  |
 |
| To preview an updated price, hover over a price field. | 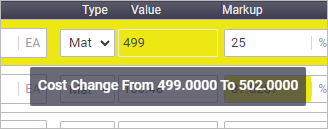 |
 |
If you're happy with the pricing updates, click Use Latest Inventory Pricing again and then Confirm Update.
The next step is to add labour and expenses


