Task-specific lists contain all the items required for a task, and you can either select all or just some of them when adding them to a quote or task.

Task-Specific List vs Assembly
Task-specific lists are very similar to assemblies, however, you may not require all items for a task, and not in a specific quantity, therfore you need to specify the quantity of each item. Assemblies on the other hand is more of a ‘kit’ of items and you select the quantity of the ‘group’ of items.
Task-Specific Lists and SOR Items
You can also include SOR items with price levels within Task-specific lists, however, if you need a different set of price levels, this is where you need to use an SOR List.
Creating a task-specific list
- Go to Manage > Inventory.
- Click the Inventory Lists tab.
- If you haven't done so already, set up Categories for your Inventory Lists, in the same fashion as your regular Inventory items. See Manage Categories for more information.
- Click Add Inventory Lists.

- Select the Inventory List Category by clicking the
 (magnifier) icon.
 - Enter a name for your task-specific list.
- The List Type defaults to Task Specific List; leave it set to this, or use the dropdown to select a different list type.
- Save.
Adding items
|
Find the task-specific list you just created and click the The Inventory List Items window appears. You can add items in two ways:
|
 |
 |
Moving or deleting items
Change the order of the listed items by dragging the  ('reorder' handle) and moving the item to where you need it.
Delete an item from the list by clicking the  (rubbish bin) on the right of the entry.

When you've finished adding items, click Save and then X to close the Inventory List Items window.
Using a Task-specific List
- Go to the area you want to add materials to, e.g. a task or quote
- In the relevant materials section, click Multi-Search and select Task Specific Lists.
For a task
- Click the name of the list you want to use,
- Enter the quantity of each item and Save.For everywhere else
- Use the categories if necessary to find the list you want to use,
- Click Select Header to select the entire list or alternatively, double-click individual items to add them.
- Enter the quantity of each item and Save. - Adjust any details you need to, e.g. quantities, markup. AroFlo will re-calculate, based on your changes.
- Save
- (if on a task) Click the name of the task to return to the task worksheet.
Copy a Task-specific List
You can make a copy of a task-specific list, including saving the copy in another business unit.
- Go to Manage > Inventory.
- Click the Inventory Lists tab.
- On the task-specific list you want to move, click the
 (pencil icon) in the Edit Inventory List column
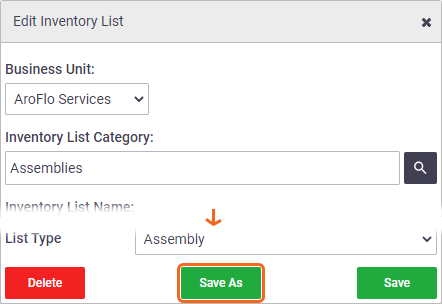
 - Make any changes that will apply to the copied Task-specific List (such as a different Name, Category or Business Unit)
If no change is made to the Task-specific List Name, the copied version will be saved with 'COPY OF' inserted before the task list name.
If there are items within the task-specific list that do not exist in the chosen business unit, AroFlo will automatically link those items to the chosen business unit. A warning message will appear first, so you have the choice not to proceed if you don't want those items added. 

- Click Save As.

Moving a Task-specific List
You can move a task-specific list from one business unit to another.
- Go to Manage > Inventory.
- Click the Inventory Lists tab.
- On the task list you want to move, click the
 (pencil icon) in the Edit Inventory List column
 - Click the Business Unit dropdown menu and select the business unit you need.
If there are items within the task list that do not exist in the chosen business unit, AroFlo will automatically link those items to the chosen business unit. A warning message will appear first, so you have the choice not to proceed if you don't want those items added.
- Save.