|
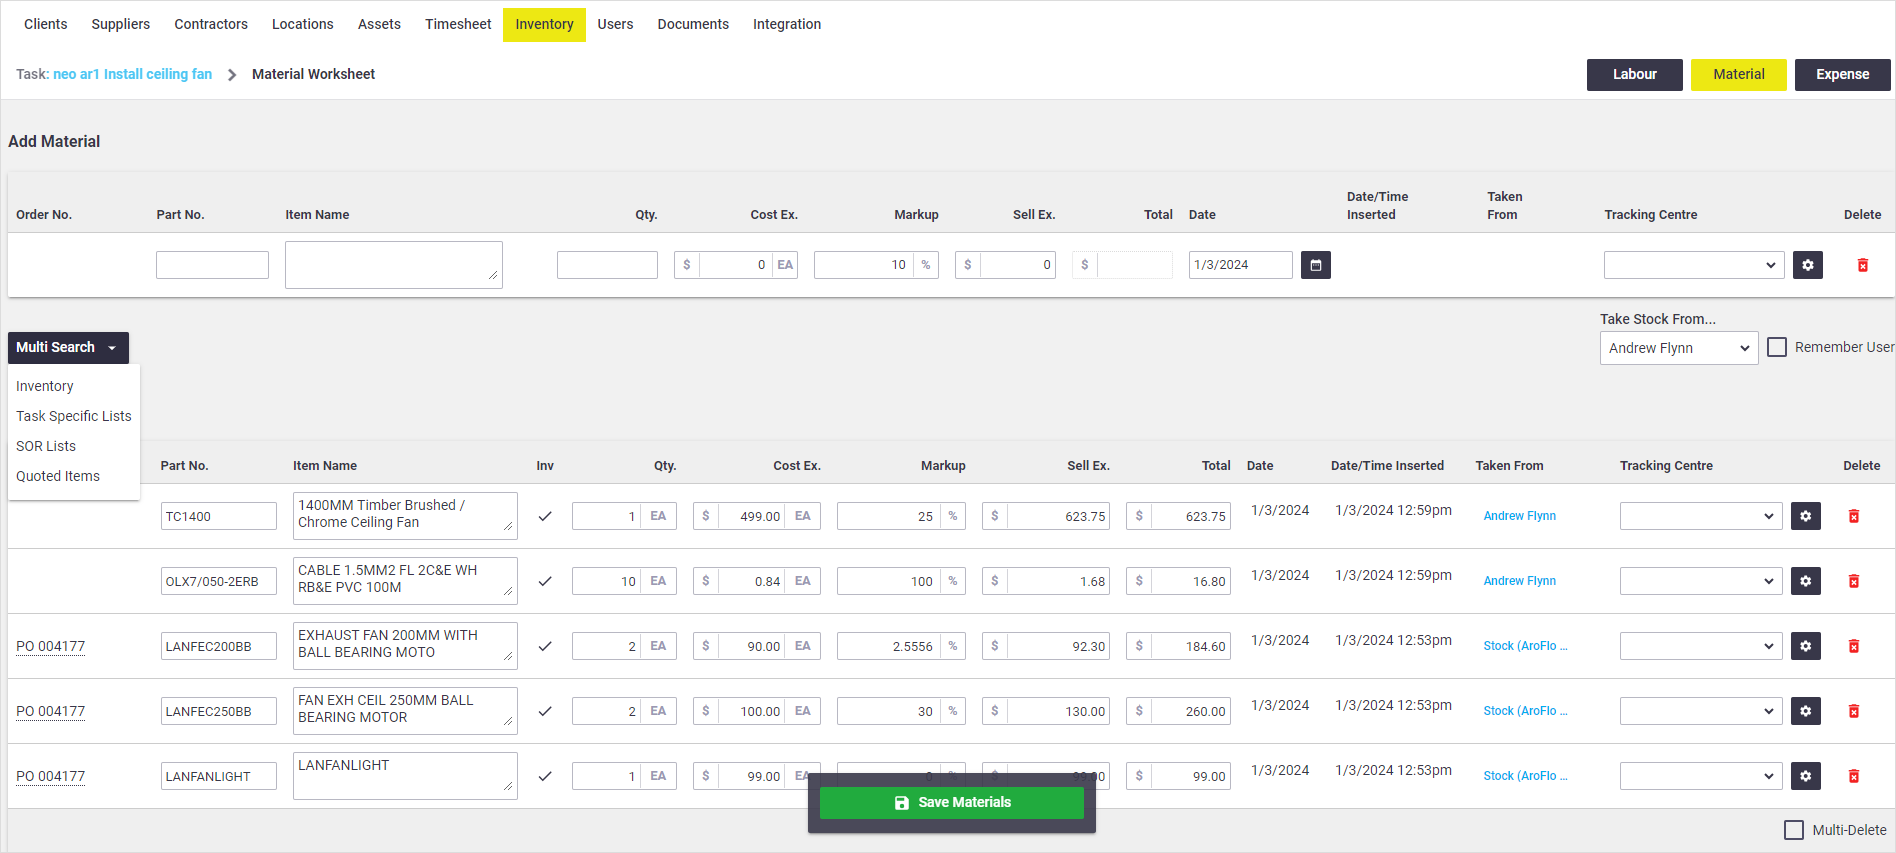
The Task Worksheet (Materials) screen displays all of the materials that have been recorded or ordered against the open task. Office staff can make corrections if needed, and also record materials on behalf of employees. Materials can be edited or added even after the task status has been moved to 'Completed'. Materials can be added to a task manually (suitable for ad-hoc items) or automatically by searching your inventory, task specific lists, or SOR lists. Use the tabs below to learn about each option. |
 |
 |
Feature Access settings
How items display depends on your Material and Expense visibility set within your Feature Access Settings, e.g. whether or not prices are showing.
Interested in learning through an interactive course in the AroFlo Academy?
Line Item Methods
Add an ad-hoc item
|
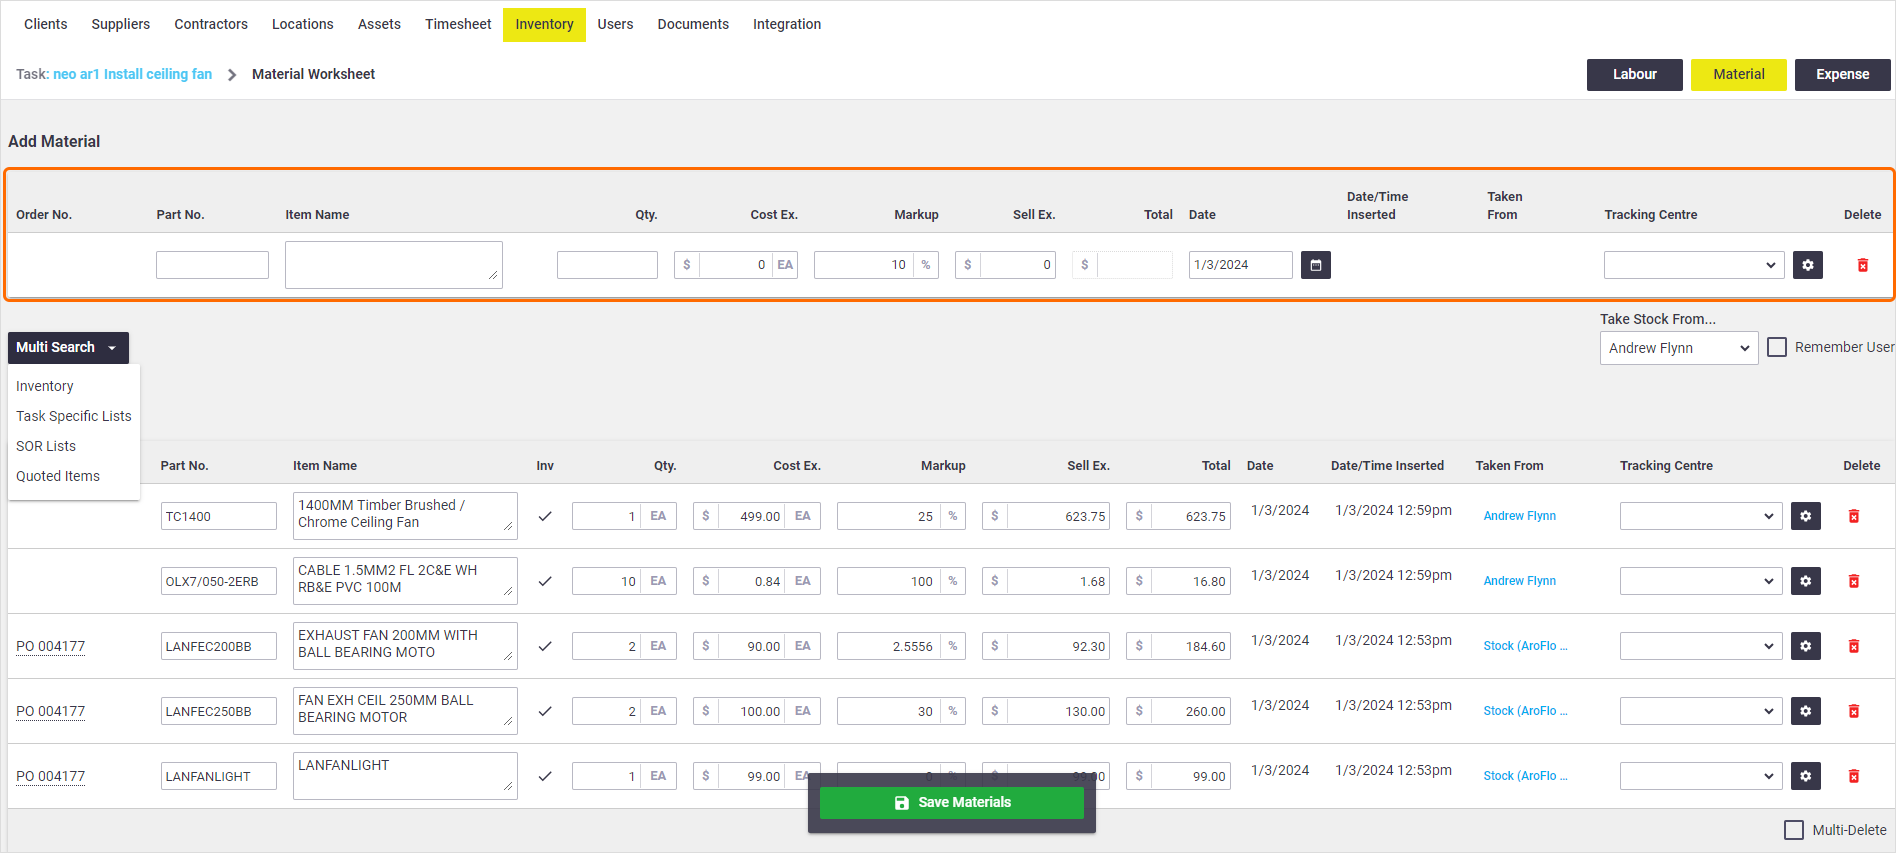
Ad-hoc items are those that don't exist in your inventory. From the Task Worksheet, click Material and complete the blank fields to record the item.
|
 |
 |
Add an item from inventory
Click Multi Search to access your inventory items.
|
 |
 |

Task Specific Lists
Task specific lists are short lists of commonly used items, or assemblies, which have been set up to enable users to quickly find the inventory items they need. For more information, see Task Specific Lists.
- Click Multi Search and select Task Specific Lists.
- Click a list name.
- Enter (on Task Specific Lists) or edit (on Assemblies) the Quantity Used for each item.
- Select where the stock was taken from from the dropdown list.
- Click Save.

SOR lists
SOR lists allow you to charge different price points for goods or services. For example, you may have a loyalty scheme with different rates for VIP, Return Customers, and Seniors. For more information, see SOR Lists.
- Click Multi Search and select SOR Lists.
- Click a list name.
- Enter the quantity used.
- In the Sell Ex field, click
 (dollar sign) and select an SOR price level.
 - Click Save.

Add Quoted Items
This option will only be available from a quoted task, i.e. from a quote which has been approved.
Use this option to add materials from your quote worksheet.
Input the quantity of each item and Save to add the items to your task. Alternatively, to add all items to the task, tick Add all and Save.

Project Materials
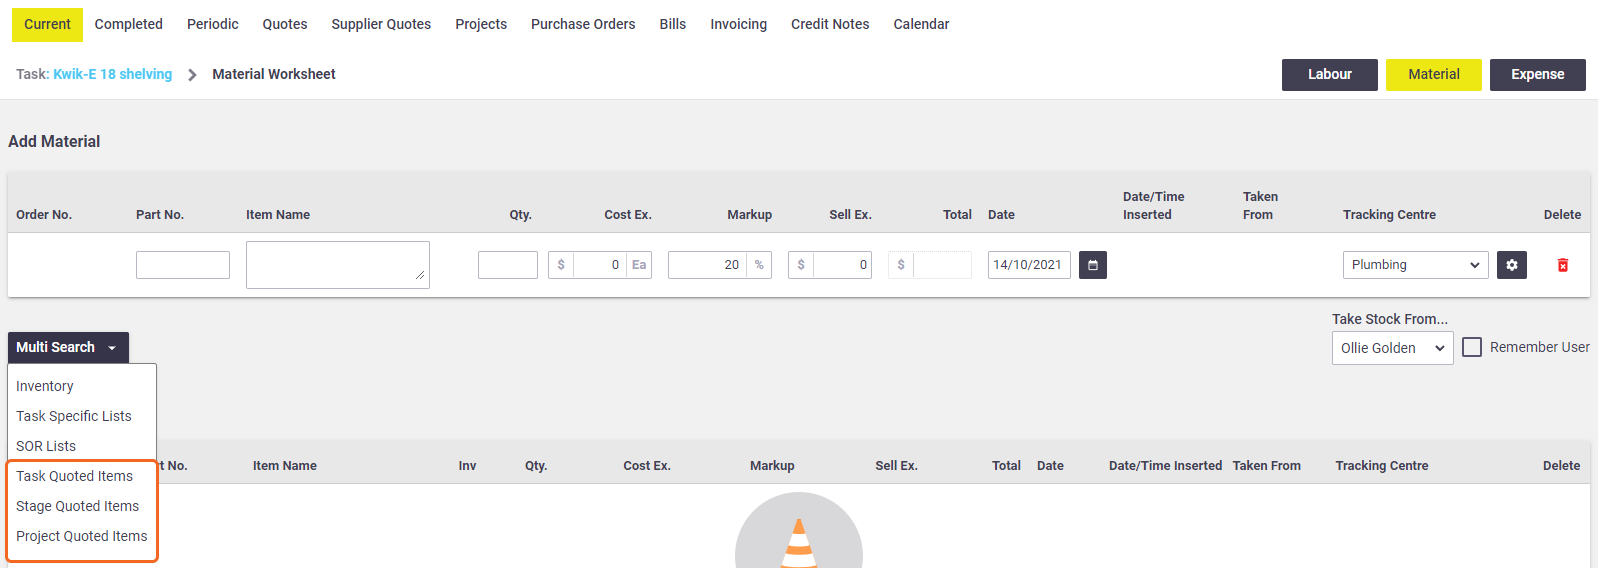
If working on a task within a project created from a detailed quote, you may have the following three options to add materials. When using these options, adding materials to the task behaves in the same way as Add Quoted Items, above.

| Option | Description |
|---|---|
| Task Quoted Items | If the task has a quote linked to it, use this option to add items from the linked quote. |
| Stage Quoted Items | Appears if the task is linked to a stage. Use this option to add quoted items from the stage the task belongs to. |
| Project Quoted Items | Similar to Stage Quoted Items but allows you to add quoted items from all stages within the Project. |
Ordered Materials
|
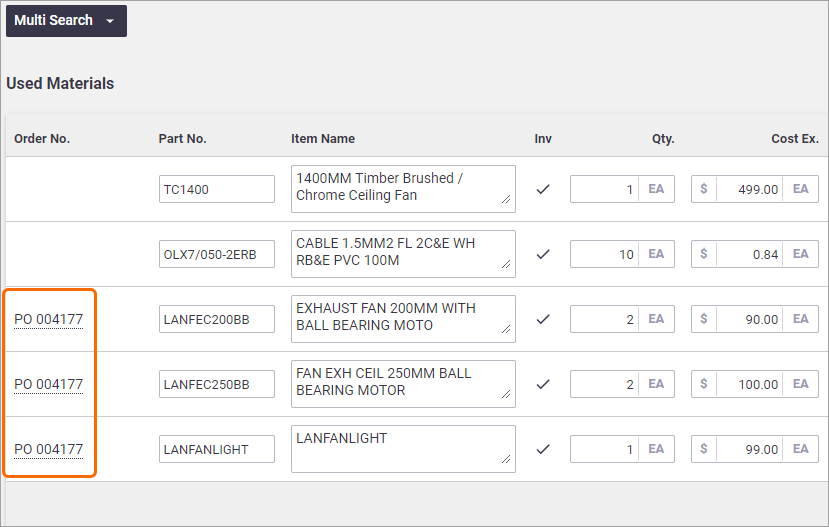
Materials added from Purchase Orders or Work Orders will also appear here under Used Materials and will contain a link to their respective orders with a prefix beside it (PO = Purchase Order, WO = Work Order). Credited Items If purchase order items have been credited and the option to credit task items was chosen, they'll appear as a negative quantity with a link to the credit note and be marked as ‘Task Returned’ when looking at stock activity (see screenshot below). |
 |
 |
Automatically add New Items to Task
If the setting Automatically add New Items to Task in Purchase Order settings and Work Order settings has been unticked, entries will appear here but with a quantity of 0. You'll need to edit this value either from here or on the purchase/work order if you want these job costs to be included on the task.
Negative quantity
You can also add a negative quantity for items, or edit items already added to a task to a negative quantity, for scenarios where you no longer need the items recorded on the task. This will return the items to your inventory and mark them as ‘Task Returned’.
Show this

Update Stock Taken From
|
When you record material items on a task, they are also 'taken from' a Stock Holder. Stock Holders could be general stock, a user or a custom holder (such as a van). Stock holders and levels appear in Inventory Stock Activity. To change where stock was taken:
|
 |
 |
Delete line items
To delete a line item, click  (red trash can) against the item you want to delete and Save Materials.

To delete multiple line items, click Multi-Delete, select the line items you want to delete, or click the 'Select All' checkbox at the top of the column, and click Save Materials.