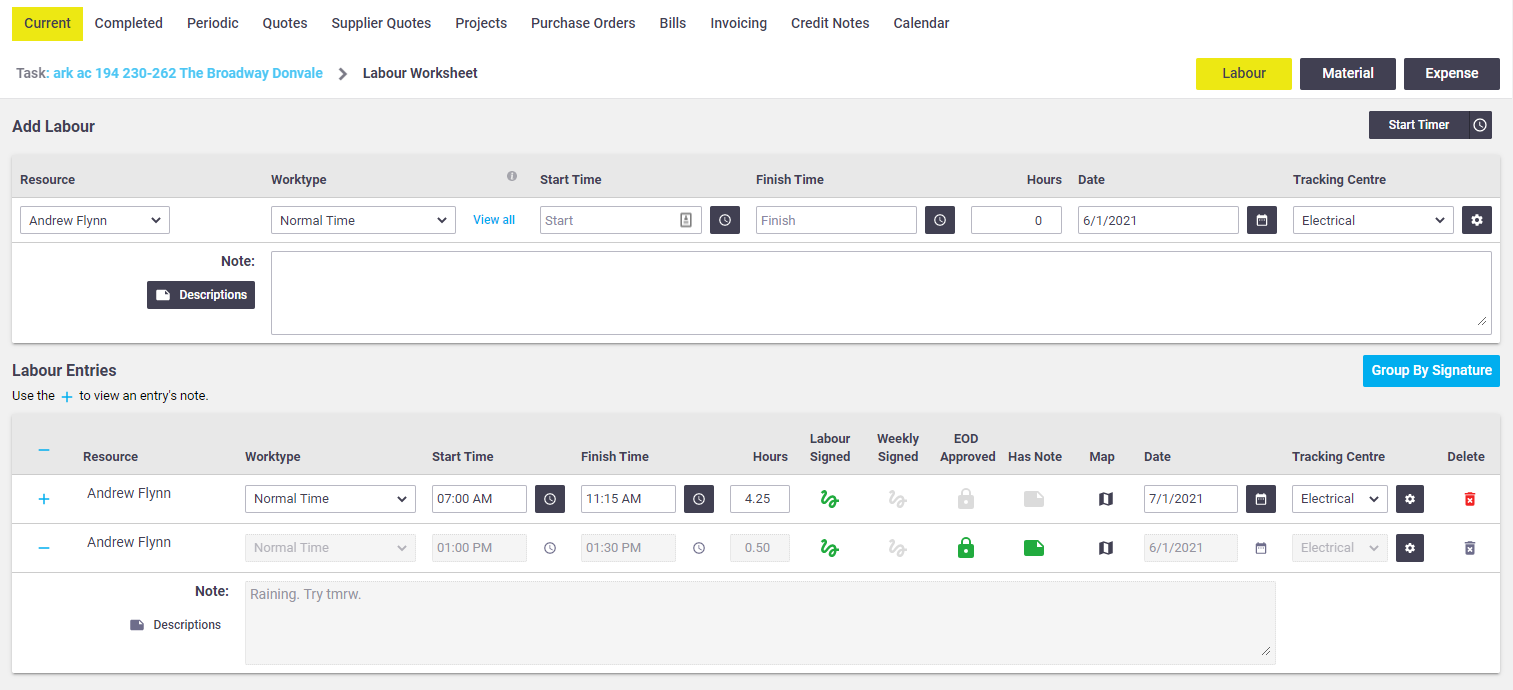
The Task Worksheet (Labour) screen displays all of the timesheet entries that have been recorded against an open task. Office staff can adjust these hours if needed, and also record labour on behalf of employees.
Once the task status has been moved to 'Completed', this screen is no longer accessible, to prevent any changes that may affect invoicing.
Likewise, once staff timesheets have been signed off for the day or the week, labour entries cannot be added or edited for that day/week.
Any user can view their own timesheets and enter their own labour records. Managers, Supervisors (and those with permission) can also view timesheets for other resources and enter labour on their behalf.
Custom permission groups
For custom permission groups, Site Administrators can enable this via:
- Permission Groups > Users > Filters > Current User (set to unticked)
- Permission Groups > Timesheets > Fields > Users > View (set to ticked)
- Permission Groups > Task > Filters > Labour Created by or Assigned to User (set to unticked)
Feature Access settings
How labour items display once saved (e.g. whether or not prices are showing) depends on your Labour visibility set within your Feature Access Settings.
Interested in learning through an interactive course in the AroFlo Academy?
Record a new labour entry
These can be recorded in two ways:
Manual entry using the Add Labour fields
From the Task Worksheet, click Labour. Complete the fields that appear under 'Add Labour'.

This can be used to create an entry at any time, including after the event.
Using the Start/stop timer
From the Task Worksheet, Labour Worksheet, or Task Preview, using the start / stop timer.

This is like a stopwatch. It can help you remember the time you started and provide an accurate timesheet entry. However, the timer must be started at the beginning of the event. To make this easier, you can set up your checklist items to automatically start or stop the timer. See Checklist Templates for instructions.
Record an entry using Add Labour fields
|
 |
 |
Manage timesheets with GPS
Management users are able to access tracking information for GPS timesheet entries by clicking the  (map icon). For more information, see Manage Timesheets with GPS.
Record labour using the timer
Start the timer
When you start working on the Task:
- Access the Task Worksheet, Labour Worksheet, or the Task Preview
- Click Start Timer on the top right of the screen. The timer will start. Elapsed time will be displayed on the button.
From Task Worksheet

From Labour Worksheet

Can't see the timer?
The timer button will not be visible if you have an active timer running on another Task. To see if you have an active timer on another Task, go to Manage > Timesheet. Your timer will appear on the top right of the screen.
Permission Groups are also required to see the timer. Site Administrators can create a custom permission group and enable the timer via: Permission Groups > Tasks > Fields > Labour Timer (set to ticked).
Alternative: Start Timer Automatically
If there's a checklist item that users always complete at the start of a job, e.g. 'Arrived on site', you can set this item up to automatically start the timer. See Checklist Templates for details.
Stop the timer
Once you have finished the Task:
- Access the Task Worksheet, Labour Worksheet, or the Task Preview
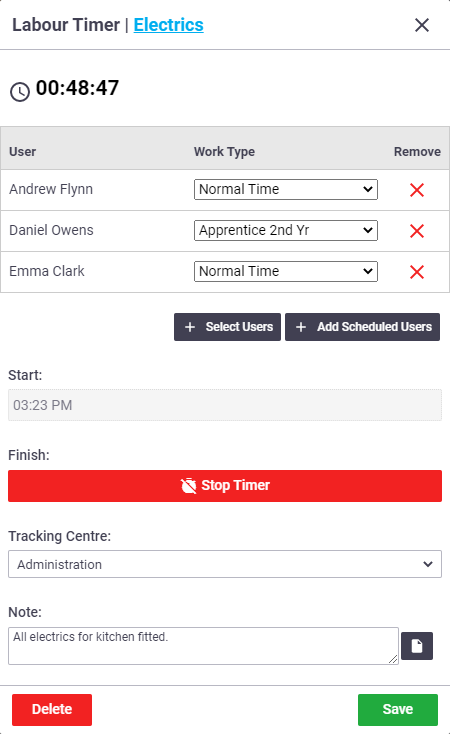
- Click the elapsed time on the top right of the screen. The Labour Timer window will open.
- Click Stop Timer.

Alternative: Stop Timer Automatically
If there's a checklist item that users always complete at the end of a job, e.g. 'Left site in clean state', you can set this item up to automatically stop the timer. See Checklist Templates for details.
Create an entry from the timer
|
You can preset any details below (like the labour note) while the timer is still running. From the Labour Timer Window, confirm the fields required for a labor entry: Labour Timer WindowClick the elapsed time on the timer button to access the labour timer window. 
|
 |
 |
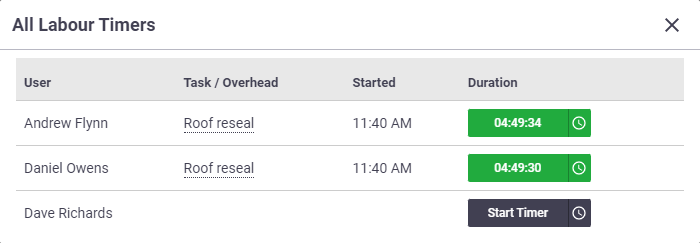
View all active timers on a Task
Managers, Supervisors (and those with permission) can use this to view active timers on a Task.
Custom permission groups
Site Administrators can create a custom permission group and enable the timer via: Permission Groups > Tasks > Fields > Labour Timer (set to ticked)
To see the active timers across all Tasks (and Overheads), use the Active Timers button found in Timesheets.
You can also start a timer on behalf of other users who are assigned or scheduled to the task. |
  |
  |
Work Order Labour
To view labour added from Work Orders:
- From the Task Worksheet, click Labour.
- Click the Contractor Labour tab.

Work Order link
Click the Order Number or Resource (Contractor name) to view the work order this entry relates to.
Automatically add New Items to Task
If the setting Automatically add New Items to Task in Work Order settings has been unticked, entries will appear here but with an amount of hours as 0. You'll need to edit this value either from here or on the work order (Task Quantity column) if you want these job costs to be included on the task.
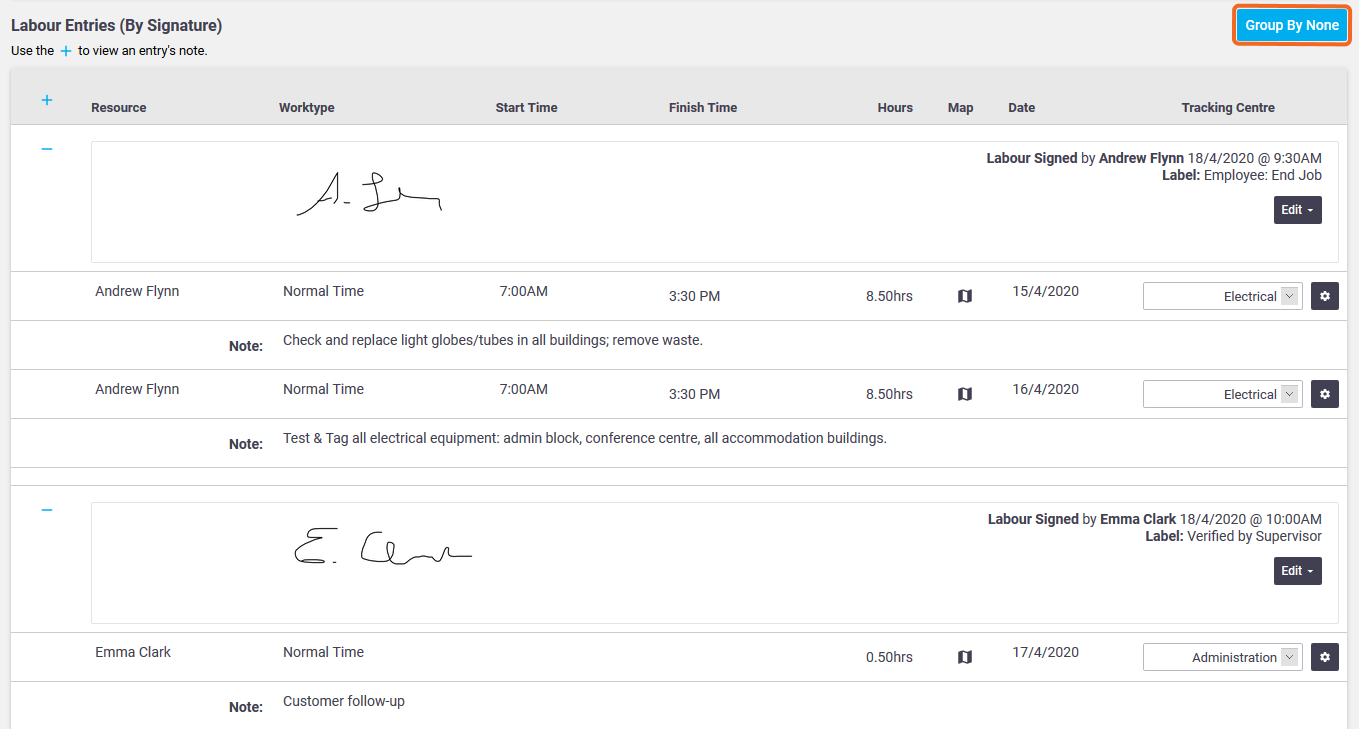
Capture a signature
To record a signature against a timesheet entry:
|
 |
 |
To view the signatures, click Group by Signature. To return to the standard view, click Group By None.
Show me

Edit a labour entry
Staff can edit their own labour entries, as long as their timesheet has not been signed off for the day or week.
If daily or weekly sign-off has been completed, it will need to be reversed to allow for any entries to be altered. See Add Timesheets for more information.
To edit a labour entry that you have created:
- Open the task.
- Click the Labour button.
- Make the necessary change.
Editable entries appear darker than those that have been daily or weekly approved.
In this example, the first two entries are editable

- Click Save Labour.
 (clock) icon. You can also just enter the number of Hours, without giving a start or finish time.
 ) if you need to remove any resources.
 (green squiggle) icon in the Weekly Signed column indicates that the timesheet has been signed off for the week. That means individual timesheet entries are locked and cannot be deleted or edited unless the sign-off is reversed. See