If you're performing work on an asset that has been allocated to a client in AroFlo, you can add the asset (or multiple assets) to the task to keep track of the service history.
Adding assets to Quotes
In AroFlo, Assets are primarily designed to be added to Tasks for things like asset maintenance and service history. You can still add assets to Quotes and view them in AroFlo Field, however, you won't have as many options available as the below instructions, which focus on Assets being added to Tasks. See Assets on Quotes, below for the differences.
How many assets are you adding?
If you're only adding one asset to the task (e.g. a piece of equipment is being worked on for a job), the easiest way to do this is to Create a Task and fill out the Asset field.
Alternatively, if you're browsing assets, you can create a task for an asset either from the asset list, or the asset card.
Return to this page to find out more info (e.g. changing the list filter).
If adding multiple assets to a task, follow the below instructions.
|
To add assets to a task:
View asset details Once added, simply tap the name of the asset to open the asset card. |
 |
 |
What information displays beside assets?
|
 |
 |
Additional information
 may appear underneath assets, depending on what information is included on the asset card and the last checked status. See the table below for an explanation. The image to the right shows an asset that contains more information than the one in the section above which contains the bare minimum. Tap
|
 |
||||||||||||||||
 |
Change the list filter
|
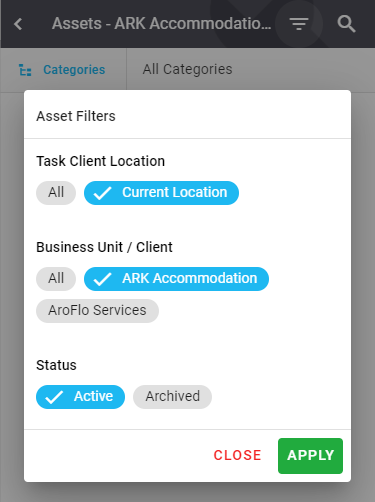
When adding assets to a task, by default, the list will display all assets, e.g. assets belonging to all clients and to your company/business unit. To view assets belonging to the task's client, or just your business unit, follow the instructions above, up to and including step 3, then tap Remember selection AroFlo will remember this selection, even if viewing other tasks, i.e. if you change to view assets belonging to the selected client, the next task you view will have that same filter until you change it again.
|
 |
||||||||||||||||||||||
 |
|||||||||||||||||||||||
Asset options
|
Tap
|
 |
||||||||||||||||
 |
Display Settings
|
You can change what appears on the page by using the the cog (
|
 |
||||||
 |
Asset Checklist
|
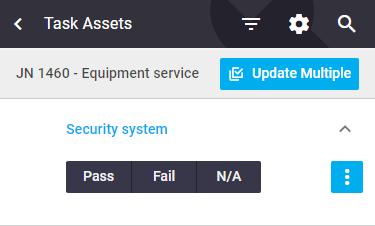
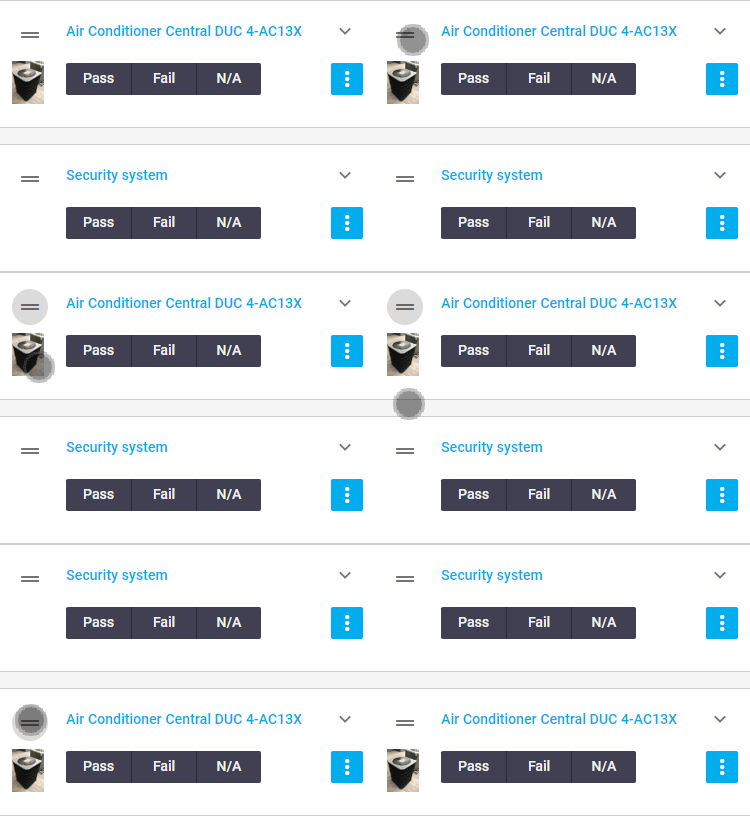
Much like checklists on a task worksheet, you can select a response (Pass, Fail, or N/A) for assets added to tasks. Scenario You inspect all the air-conditioning units at your client's premises. You can Pass units that don't require a service, and Fail those that do. Tap Save Assets to confirm. Once saved, tap Last Checked If the asset Passed or Failed when it was last added to a task and the task was marked as completed, this will display underneath the checklist so it's easily visible. Note that this can also be overridden on the asset card. Subsequent checks If the Last Check status of an asset is Passed or Failed and then in a subsequent check marked as N/A or simply not filled out, this will not change the Last Check status and it will remain as Passed or Failed. |
 |
 |
Capture GPS information
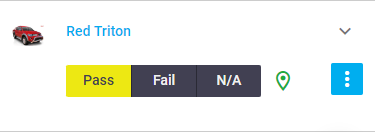
If an asset contains the option to capture GPS coordinates when the asset checklist is completed (Get GPS on Task Asset Checklist), this will be captured after making a selection. After saving, tap the  (green map marker) to review the checklist information, as well as view the location using your device's maps application. (green map marker) to review the checklist information, as well as view the location using your device's maps application. |
 |
 |
Select All
|
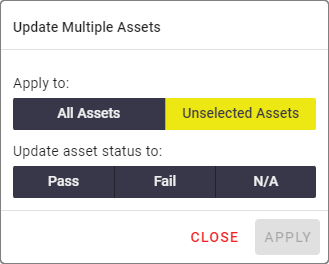
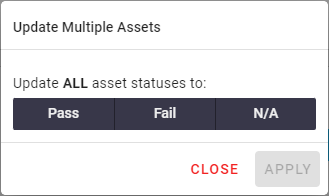
If you have a long list of assets to select a response for, tap Update Multiple to mark all assets as passed, failed, or n/a, as opposed to selecting a response for each one. If you have already selected a response for some assets, Save Assets prior to doing this. |
 |
 |
Workflow
|
If some assets already have a response and the task has been saved, you'll have to make a choice as to what you want to do:
There are two ways in which you can use this function:
|
 |
||||||
 |
All assets have a response
|
If all assets in the list have got a response and the task has been saved, you won't be able to edit the response for some assets and use Update Multiple to select only the unedited ones. This means you can either:
|
 |
 |
Task Asset Fields
|
If you're using Task Asset Fields, fill these fields out and Save Assets.
|
 |
 |
Search and Filter Task assets
|
If you have several assets added to the task, and you want to narrow down what's being displayed, use the search or filtering options. Filtering the list of assets can be used in conjunction with the Generate Quotes feature. See the below section. |
 |
 |
Search
Clear search Tap the x next to a keyword to clear your search. Alternatively, tap
|
 |
 |
Quick Filters
|
Use the Task Assets dropdown to filter which task assets are displayed in the list, e.g. assets that have failed an inspection, or have yet to be assessed. You can also choose from your list of custom views, if you've set any up (see next tab).
Managing Custom Views Tap
Tap |
 |
 |
Create Filters
|
To filter the list of assets:
Creating Custom Views Use cases Creating custom filters is really helpful if you regularly use a set of filters, or perhaps different people in your business are in charge of different assets, e.g. one user may want to see failed assets from one asset type, and another user may want to see assets yet to be assessed from another asset type. To create a custom view:
Use the Task Assets dropdown (see previous tab) to apply your custom view and/or make changes to it. |
 |
 |
Generate Quotes for Assets
If you need to generate a quote for assets, for example, assets that have failed an inspection, use the Generate Quote(s) function.
- Tap Generate Quote(s)
- Select the assets you'd like to add to the quote from the list that displays
Further info
The assets which appear in the list are dependent on the filtering options you have selected. For example, if showing assets that have been marked as passed, only these assets will show up in this list. To view/select assets in other statuses, use the filter at the top right of the window.
If not using any filtering options, only assets that have been marked as failed will display and will be selected. Use the filter at the top right of the window to view/select assets in other statuses.
Option Description All Statuses Displays all assets on the task Unselected Displays assets without a response selected Pass Displays assets marked as passed Fail Displays assets marked as failed N/A Displays assets marked as n/a - Select:
- Generate single quote for all assets - to add all assets on a single quote, or
- Generate individual quotes for each asset - to generate a separate quote for each asset
- Tap Generate Quote(s).

How do I know that a quote hasn't already been raised for this asset?
There are two ways you can tell if a quote has already been raised for an asset:
- When you tap Generate Quote(s), each asset will have a counter next to it, letting you know if quotes already exist and how many. Tap
 (three dots) to view and access linked quotes.
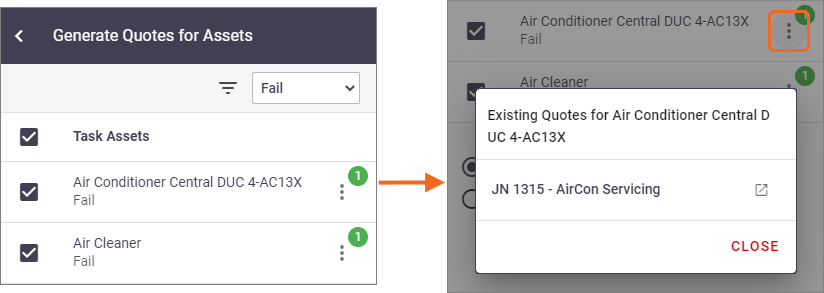
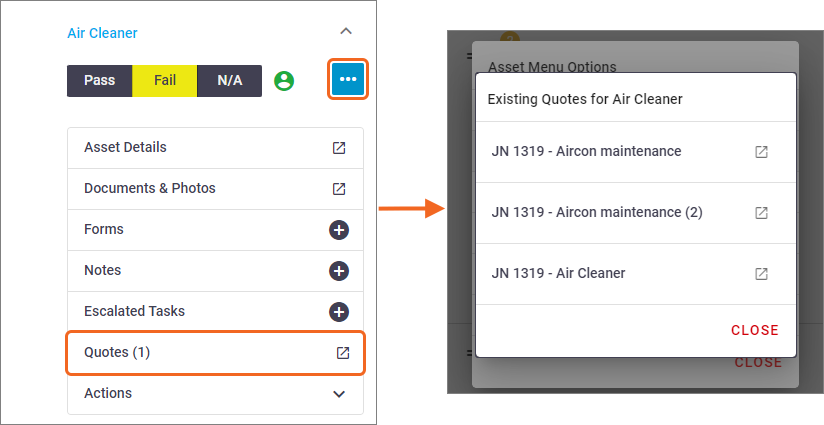
- Linked quotes will also be visible from the Asset options in the asset list. See View Linked Quotes, below.
View Linked Quotes
|
Once a quote is created, it will be available in your Quotes List. Alternatively, from the task you generated a quote(s) from, the asset options for each asset will tell you if quotes have been created for this asset. Tap Quotes (x) to view the list of linked quotes against this asset and access them from there. |
 |
 |
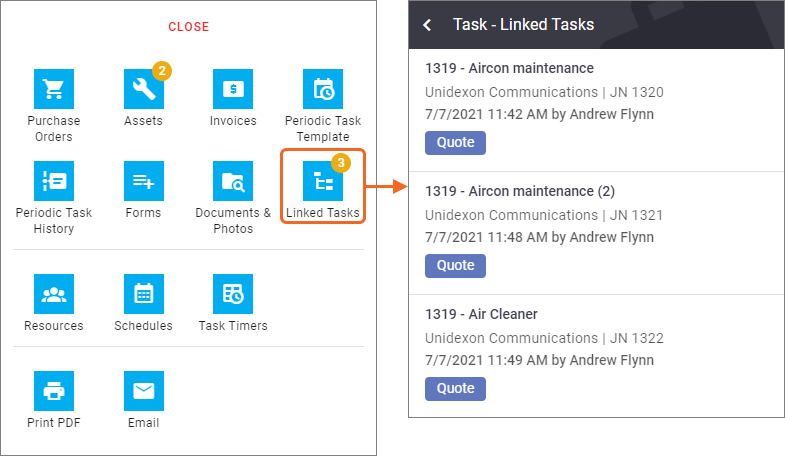
The quote(s) will also be linked to the task in the More tab. See Linking Tasks for more information.
Show image
Name of generated quote
The name(s) of the generated quote(s) will be:
- (original JN) - (original task name) - if using a single quote for all assets
- (original JN) - (asset name) - if using individual quotes for each asset.
If multiple quotes are generated and the quote name already exists, a number in brackets will be added at the end (see image).
What appears on the quote
|
Quote items will automatically be added to your quote:
In this example, the first quote item was from an asset with no linked inventory, and the other two are linked inventory items from another asset. |
 |
 |
Assets on Quotes
|
While you're able to view and add assets to Quotes in AroFlo Field, you won't have all options available to you as compared to on Tasks. The table below gives more information.
|
 |
||||||||||||||||||
 |
 (filter by). You also may need to use the filter if a location was selected for the task. See Change the list filter, below.
 ) to locate assets by Asset Name, Customer ID, Serial Number or
  (up arrow) to hide the additional info for an asset.
 to add a new one.
 ) at the top of the screen:
 beside each asset so you can drag to reorder them in the list.
 (green person icon) to review who completed the checklist and at what date and time.
 (scan barcode) to
  Edit a custom view's name and/or filters (see next tab)
 Delete a custom view
 (plus) to create a new custom view (see next tab).
 (triangle with lines)