This page gives you some examples of how you can use service actions to save your users time on every job. For detailed setup instructions, see Service Actions.
Streamline asset servicing
By combining service actions with periodic task templates, you can create an efficient way to record all the info you need against each client asset during a service call, including invoicing for parts or special services.
Example
You service fire safety equipment. A unit has failed testing and a recharge is required. By applying a Recharge service action, you can instantly:
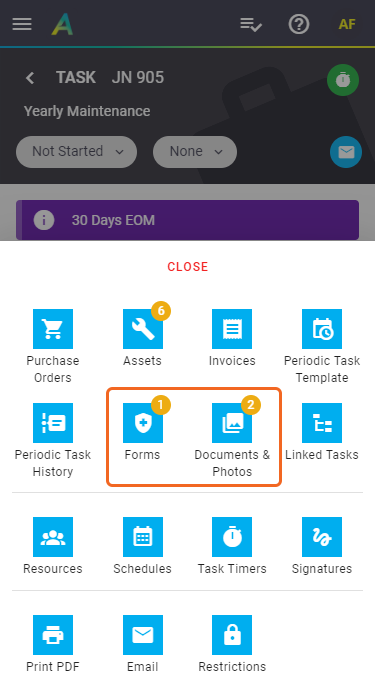
- add any necessary compliance forms or documents to the task
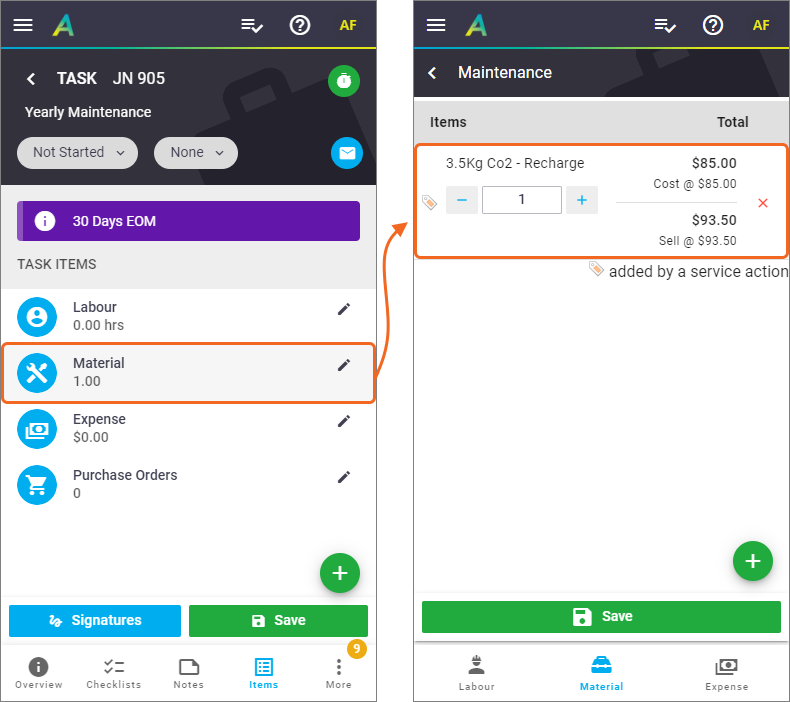
- apply the relevant material or service charges.
Show these
Add any necessary compliance forms or documents to the task
Apply the relevant material or service charges
Here's how you'd set this up:
- Create a service action group for each type of equipment you service, e.g. 'Extinguishers 3.5kg'.
- Within each group, create individual service actions for the different types of work that may be required, e.g. Pressure Test, Recharge, Replacement.
- Work through the tabs that appear
Compliance Forms

Documents

Inventory

- Link the service action group to each asset that it will be used for.
Show me how
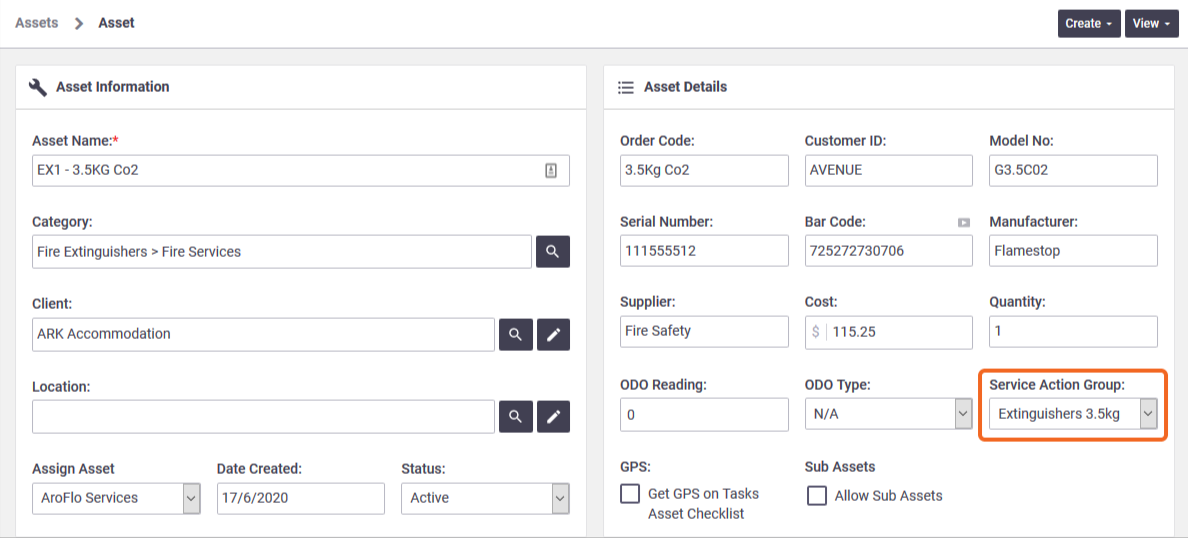
In AroFlo Office, go to Manage > Assets and locate the asset you want to link the service action group to. In the asset card, click the Service Action Group dropdown and select from the options listed. Save the asset card.
- Link the asset to the periodic task template that will generate the service jobs, and on the asset, select the Service Action Group that applies.
Show me how
In AroFlo Office, go to Workflow > Periodic and open the periodic task template you need. Click the Assets tab and click Add Assets. Click the dropdown menu in the Service Action Group column and select the group you want for each asset.
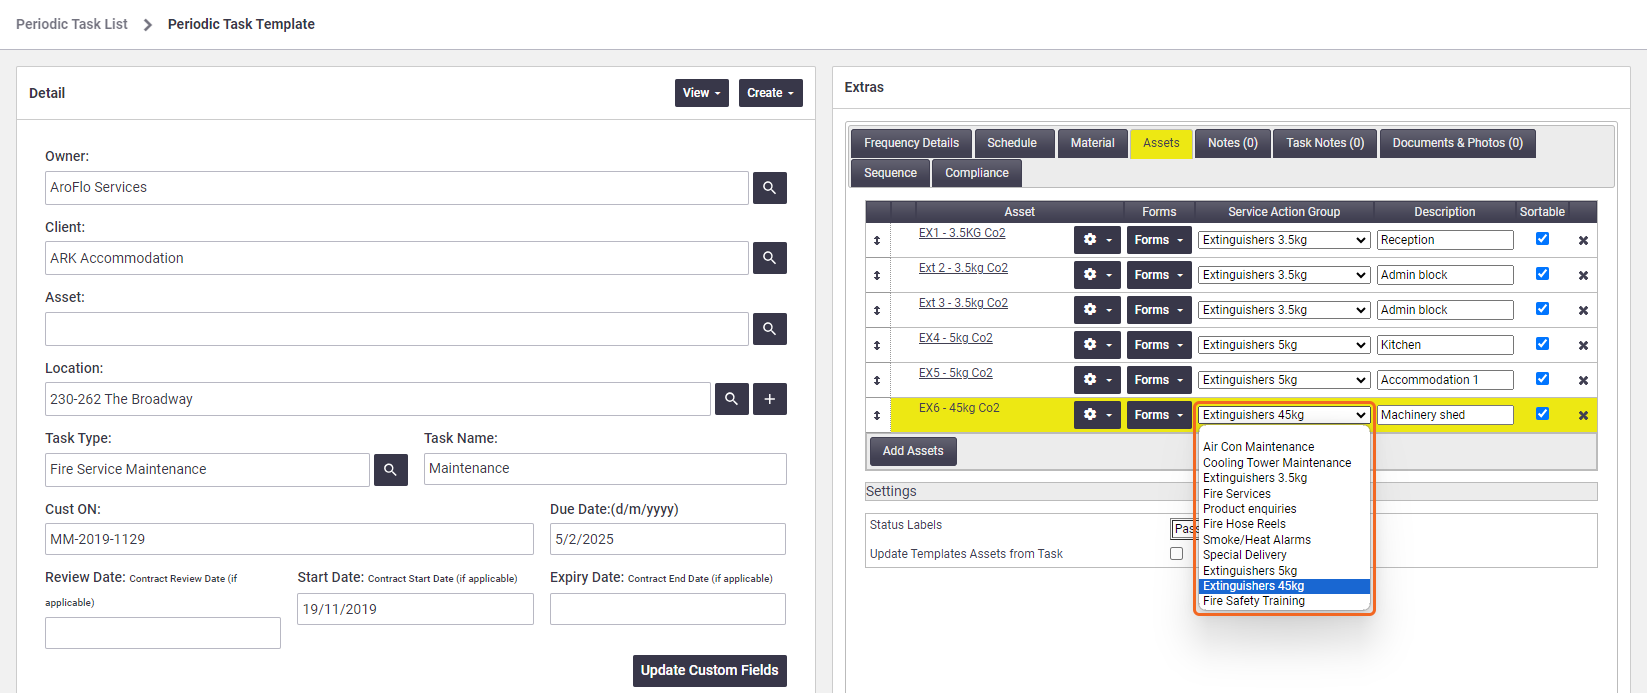
All new jobs generated by that periodic task template will automatically list those assets, and each asset will offer the service actions.
|
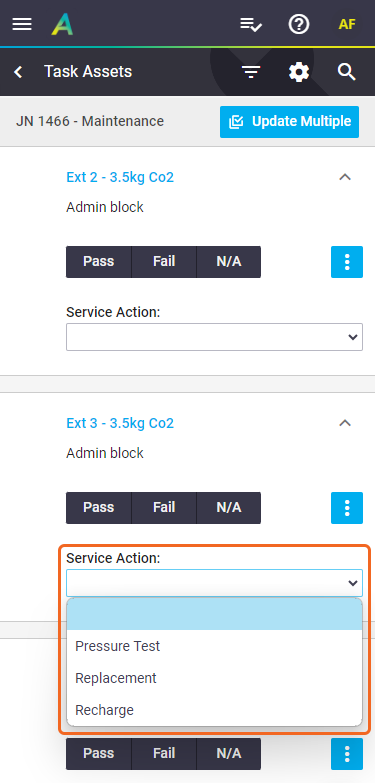
In AroFlo Field, open the asset checklist and tap the dropdown underneath Service Action and select the one you need. If you've recorded barcodes against your assets, you can use your mobile device to scan the asset in front of you and go straight to the right asset in the list. |
 |
 |
Slash search times
Give your staff a handy shortcut to just those documents, forms and materials they need.
Example
Suppose you want to give your Sales staff quick access to only the information they're likely to need for a particular type of product enquiry, rather than making them search through all your resources for each job. You could:
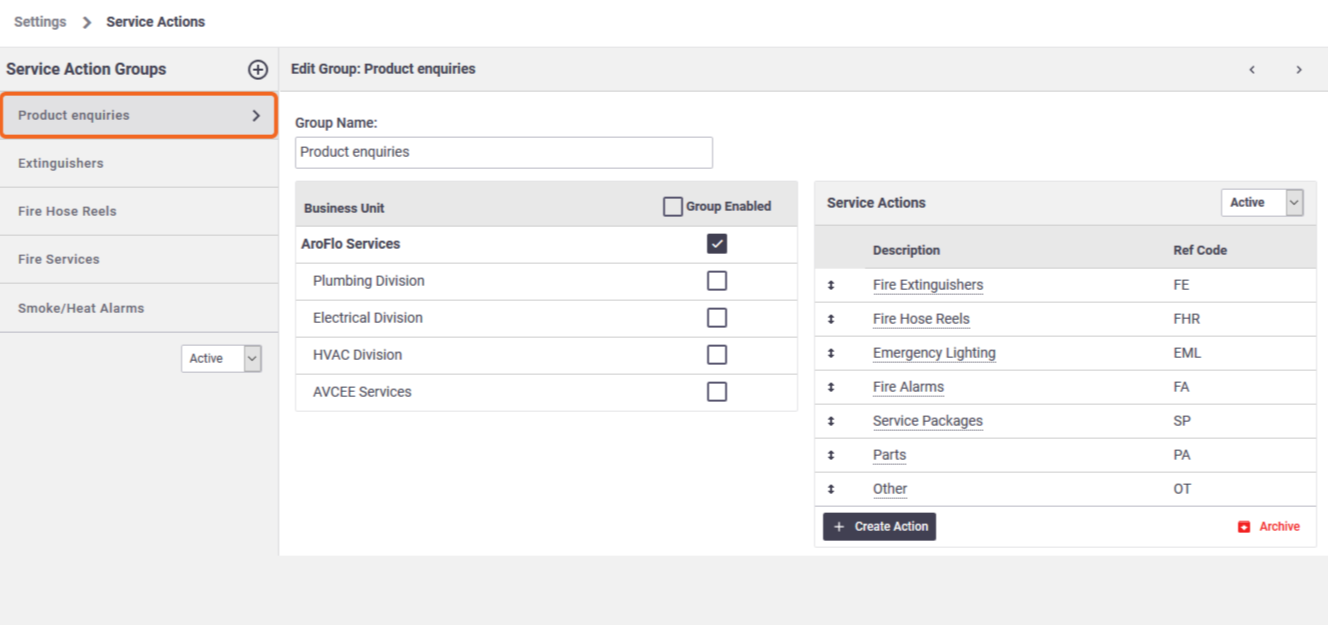
- Set up a service action group called Product Enquiries.
- Within the group, add individual service actions named for the different types of products, e.g. Fire Extinguishers, Fire Hose Reels, Emergency Lighting, Fire Alarms, Service Packages, Parts, Other.
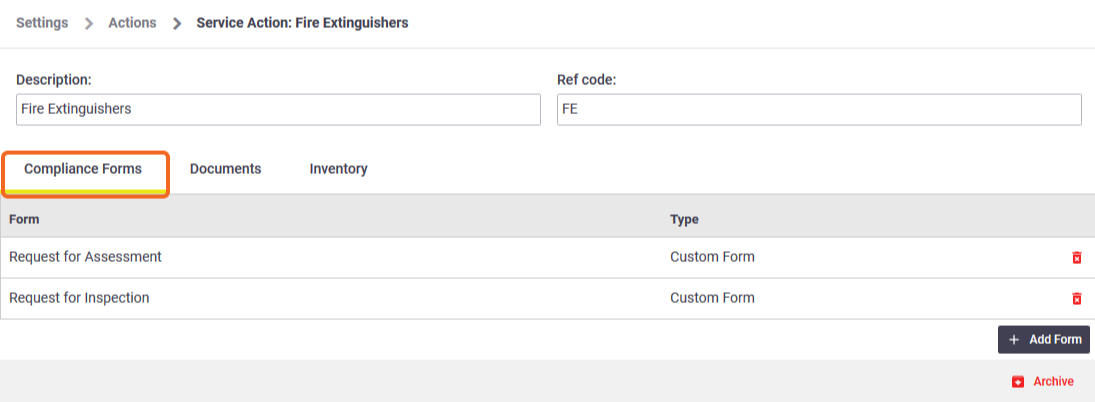
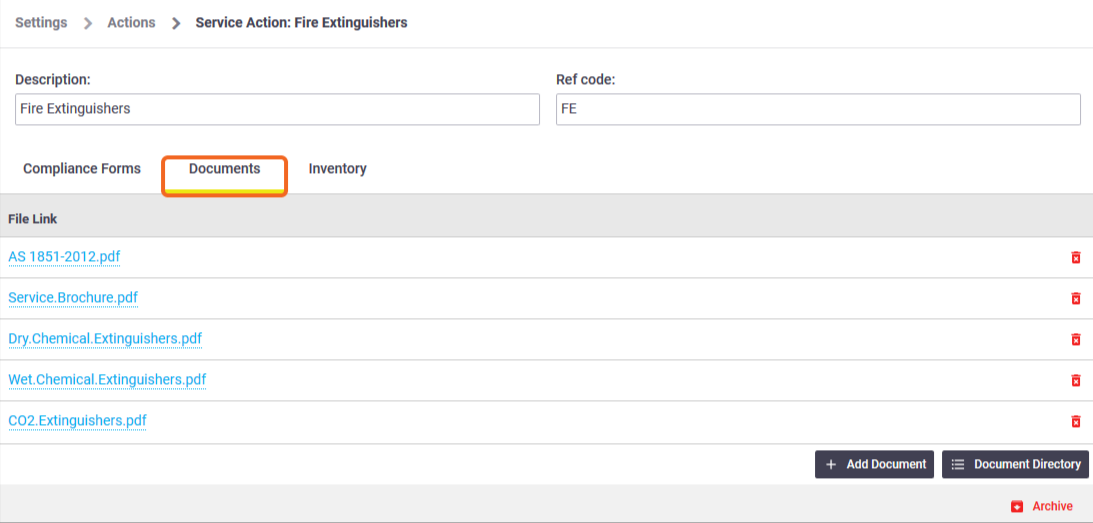
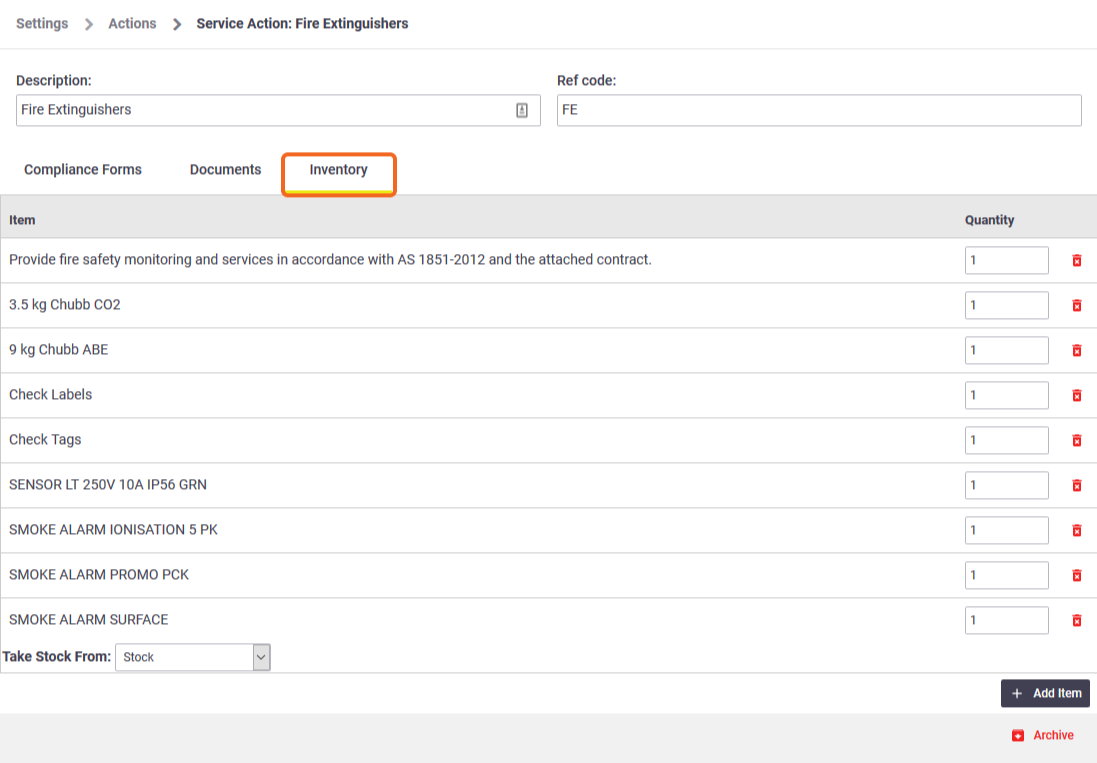
- On each service action, work through the tabs that appear.
Compliance Forms
Documents
Inventory
- Link the Product enquiries group to the relevant task checklist. That will make each service action within the Product enquiries group available from each checklist item within the chosen task checklist.
Show me how
In Site Admin > Settings > Tasks (or Quotes) > Checklists, click on the template you want and scroll to the bottom. Click the Service Action Group dropdown and make a selection, then click Save Checklist Template.
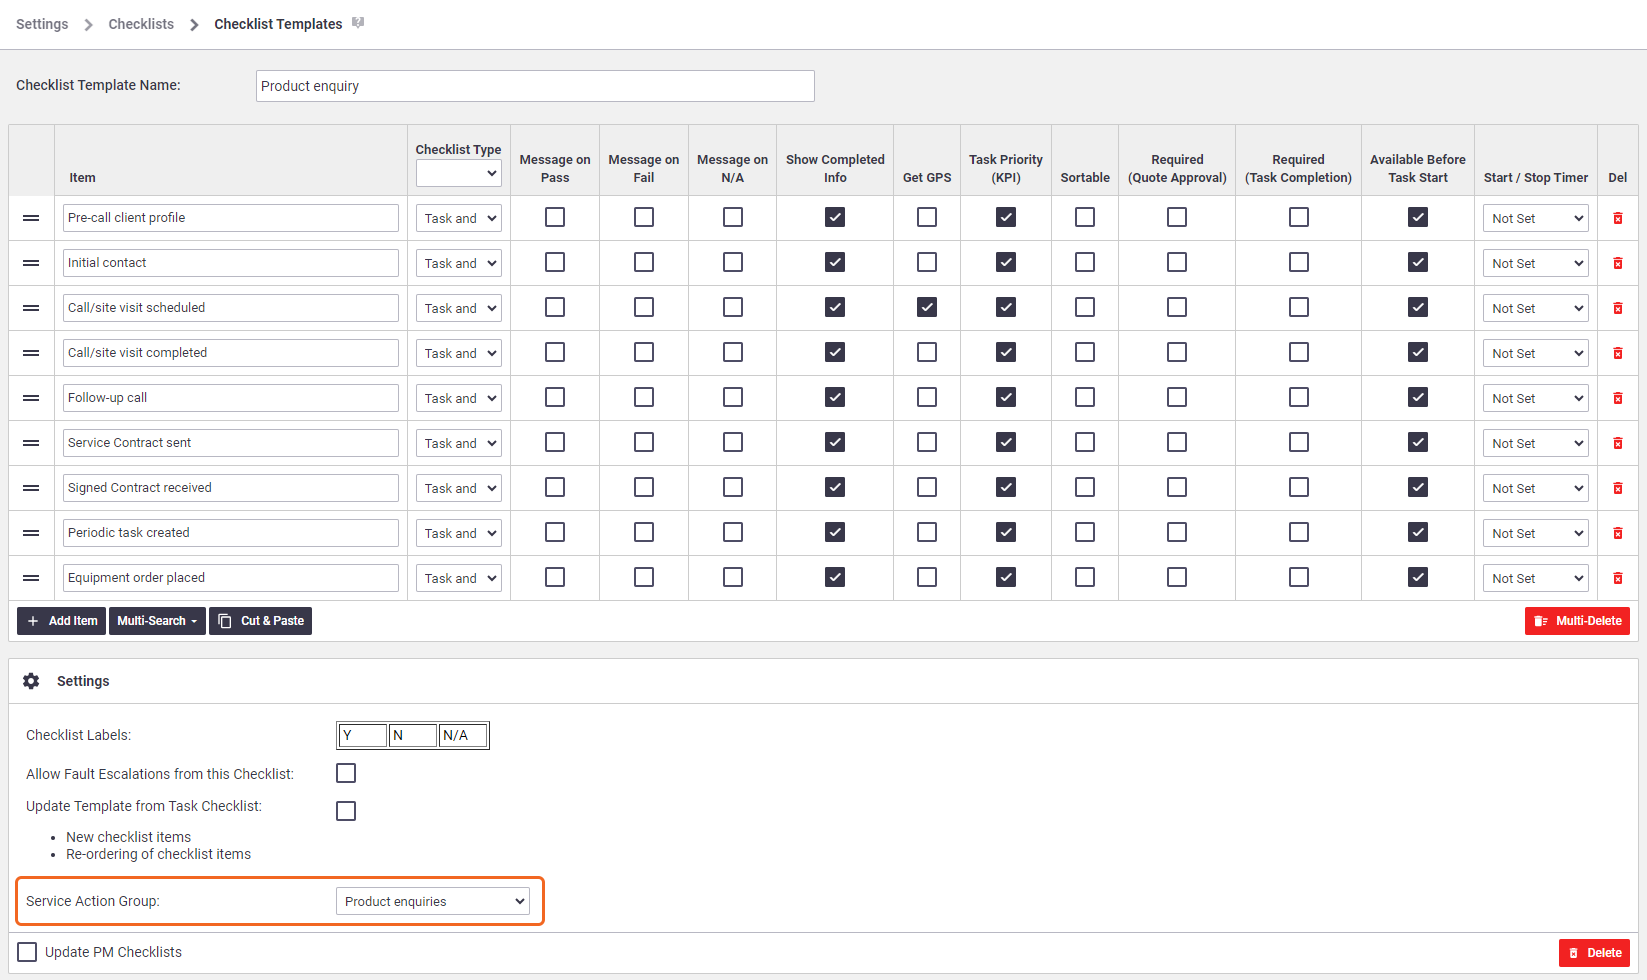
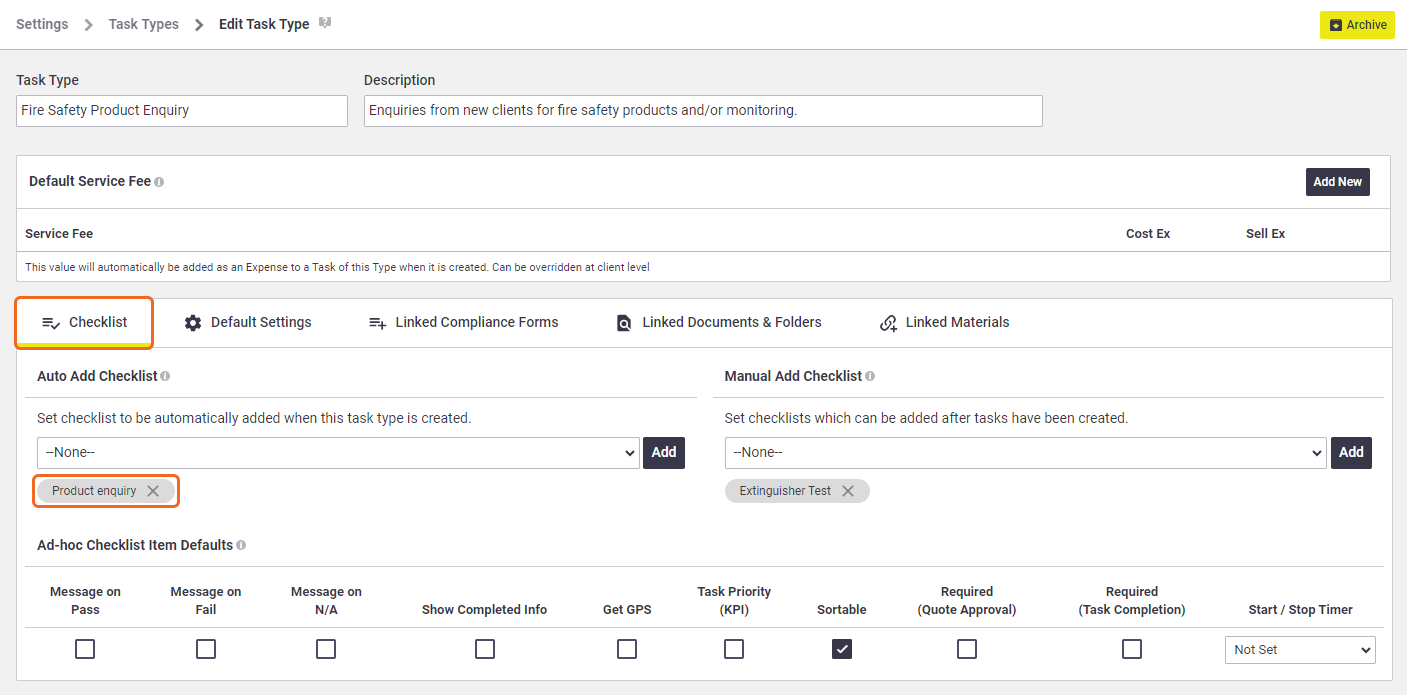
- Link the task checklist to the relevant task type. Your service actions (i.e. forms, documents and inventory items) will then be available from the task checklist whenever your staff use that task type.
Show me how
In Site Admin > Settings > Tasks > Task Types, click to open the task type you want. On the Checklist tab, under Auto Add Checklist, click the dropdown and select the checklist that you linked your service action group to. Click Add > Save Task Type.
Easily add extras or discounts
Using service actions, you can add extra charges, or apply discounts, without having to search through your inventory list.
Example
You want your Field staff to be able to apply additional delivery charges on the spot where necessary, quickly and easily. You can:
- Set up inventory items that have the additional charges you need, e.g. charges for delays, after-hours delivery.
- Set up a service action group called Special Delivery.
- Within the Special Delivery service action group, create a service action called Extra Charges.
- On the Inventory tab of the Extra Charges service action, link the inventory items that contain the extra charges you need.
- Link the service action group to the relevant task checklist.
- Link the task checklist to the relevant task type.
When you use that task type, select the Extra Charges service action from any checklist item and the extra charges you've set up will be added to your Materials list. You can then simply delete the charges you don't need for that job. The charges that remain will be added to the task invoice.
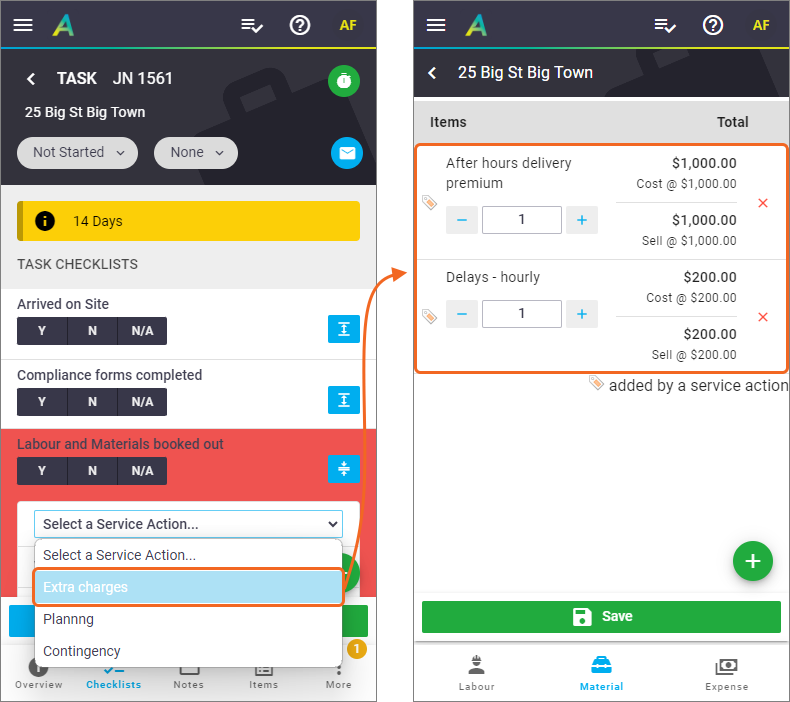
The  (tag) icon indicates that the item has been added to the task by a service action.