Create an Asset

Learn how to add to your asset register on the go in AroFlo Field

Updated on February 29th, 2024

I want to create…

a company asset

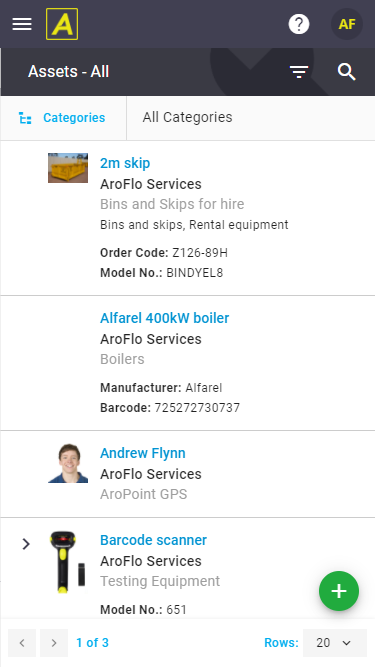
To create a company-owned asset, navigate to the Assets list:

Tap Main Menu > Manage > Assets.


a client asset

If you're creating a new asset directly against a client:

  1. Tap Main Menu Manage > Clients.
  2. Select a client from the list.
  3. Tap Assets to bring up the Assets list for that client.


an asset on a Task

If you're performing work on a new asset:

  1. From the Task Worksheet, tap the Assets tile, or the More tab > Assets.
  2. Tap (green plus button) to bring up the Assets list for the client.


Select a Category

Before you can create an asset, you will need to select a category.

Categories

  • If you don't select a category before tapping Create Asset, you'll need to do this on the Create Asset page. See next section.
  • New categories can only be created in AroFlo Office. See Create Asset Categories.
 

From the Assets list:

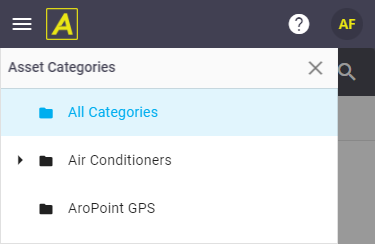
  1. Tap Categories to select an appropriate Category and Sub Category if applicable
  2. Tap (green plus button) > Create Asset.


Complete asset details

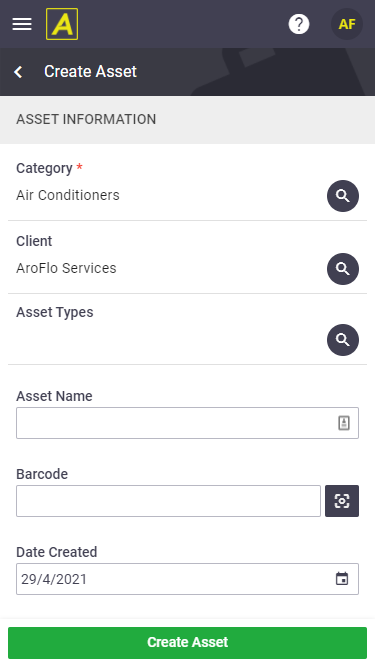
Once you see the Create Asset page, complete the relevant details and tap Create Asset.

Asset Information

Field Description
Category

Categories are used to group common assets together. Some examples might be air conditioners, emergency lights or vehicles.

If you selected a category in the previous step, the category will be prefilled. Tap (magnifier) if you need to change it, or if you didn't select a category in the previous step.

New categories can only be created in AroFlo Office. See Create Asset Categories.

 
Client

Defaults to the current business unit or client if creating a client asset. If you need to change this, tap the   (magnifier) to search and select from the client list.

Asset Types

Used for linking asset types to this asset. Tap (magnifier) to add an asset type to this asset, or tap if you need to remove an asset type from this asset.

Asset types let you specify which custom fields should appear on the asset.

 
Asset Name

This is the primary identifier for the asset.

It is good practice to include a serial number within the asset name to help make it easier to identify the correct asset.

 
Barcode

Record the details of a barcode associated with the asset. See Barcode Scanning.

To use browser scanning, tap the (target icon) to populate the Barcode field and any custom fields that have been set up as 'Barcode' fields.

If you're using an external barcode scanner paired to your device, tap into any field for which you have a barcode, e.g. Model No or Serial No, and scan the item.

 
Date Created The date the asset was commissioned or entered into production/usage.
Allow Sub Assets

Allows you to add sub assets that are part of the primary asset. If ticked, an option to View/Add Sub Assets will appear once the asset is created.

For example, an asset might represent a large machine that consists of smaller components that are maintained and serviced on their own separately.


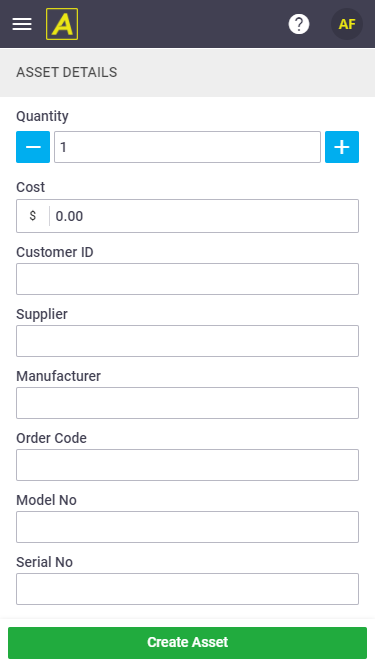
Asset Details

Field Description
Quantity Used to record the quantity of assets if part of a collection of assets to help identify the grouping.
Cost Used to record the original cost of the asset.
Customer ID Used to capture the internal reference number that the client has for this asset.
Supplier Used to record which supplier the asset was purchased from.
Manufacturer Used to record the company who manufactured the asset.
Order Code Used for referencing an order code for purchasing.
Model No. Specific model number details for this asset.
Serial No.

Used for recording the serial number of the asset.

Service Action Group

Select a Service Action group, if applicable. Service action groups can be associated per asset. See Service Actions for more information.


Once the asset has been saved, you'll have further options available. See Asset Card for more information.