The two main scenarios for raising a purchase order are:
- Stock purchase orders to replenish stock or keep stock levels up to date
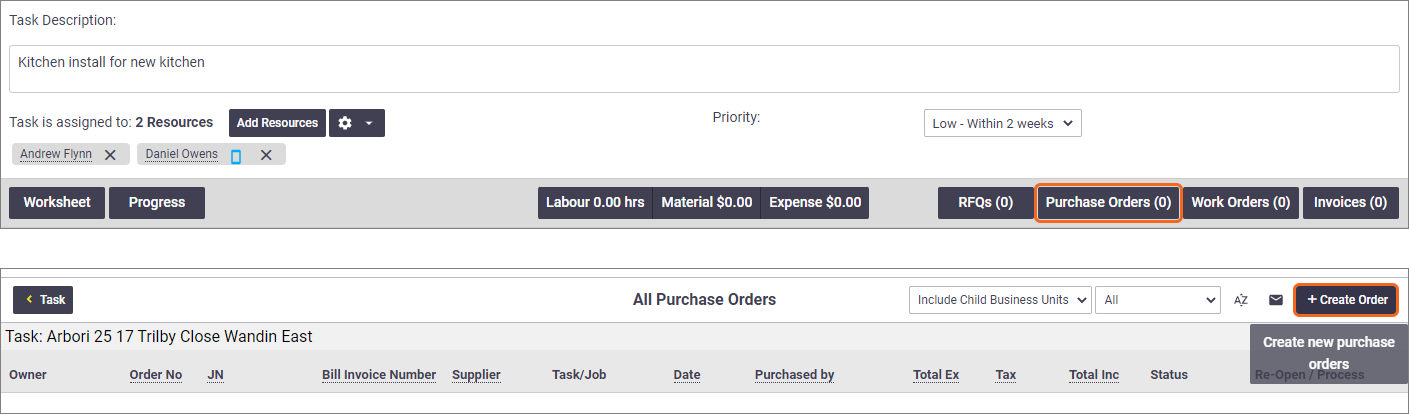
- Creating purchase orders on a specific task, which may include quoted items
The process for both scenarios is much the same; the only difference is how to get to the purchase order screen.
Interested in learning through an interactive course in the AroFlo Academy?
Create a Purchase Order
Are you ordering materials for general stock or for a specific Task?
|
 |
|
|
The quickest way to create a purchase order for general stock is:
|
 |
|
Alternative methods
Purchase Order menu
- From the main menu, click Workflow
- Click Purchase Orders
- Click Create Purchase Order.
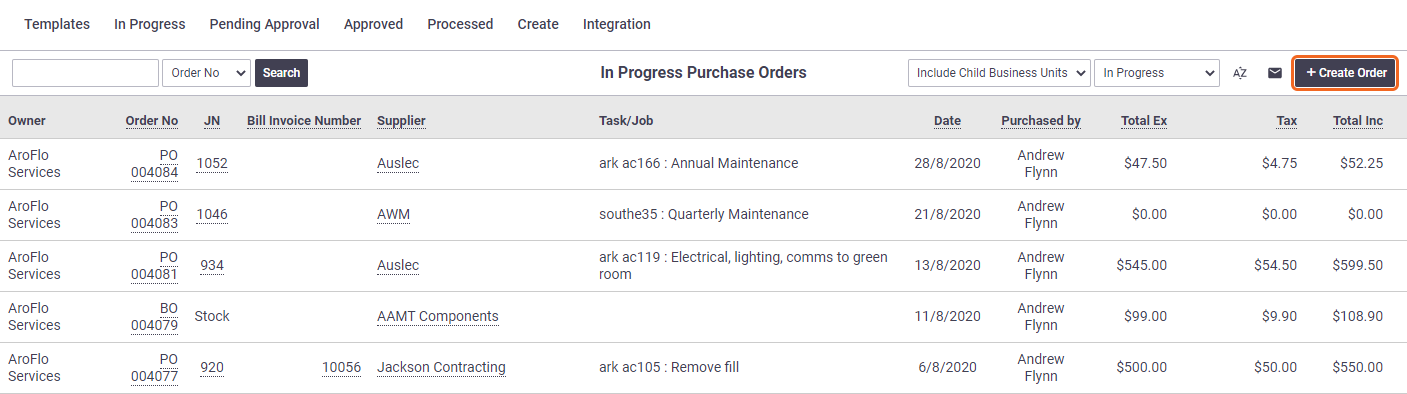
Purchase Order list
- From the main menu, click Workflow
- Click Purchase Orders
- Select a list of purchase orders from the Purchase Order Menu, for example: In Progress Purchase Orders.
- Click Create Order.
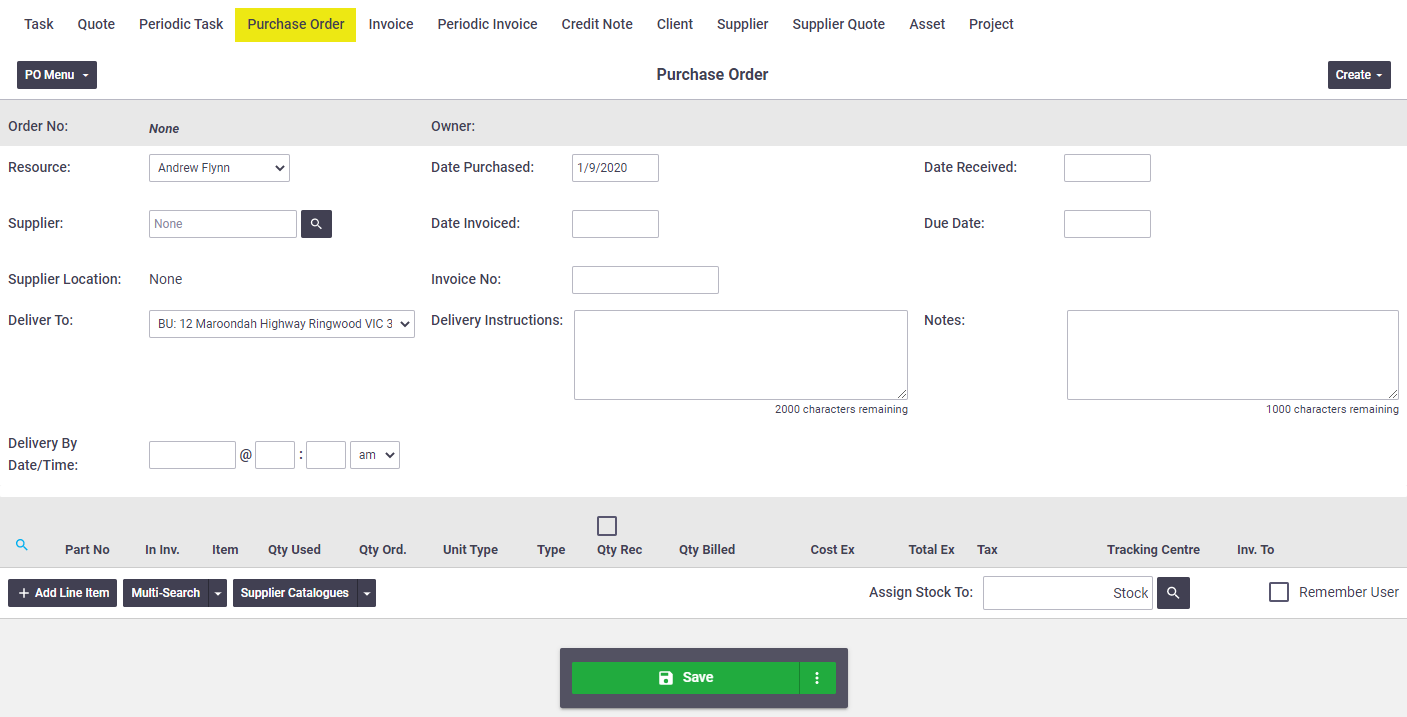
Enter order details
Once you save, you may have a coloured banner at the top of the purchase order. Show me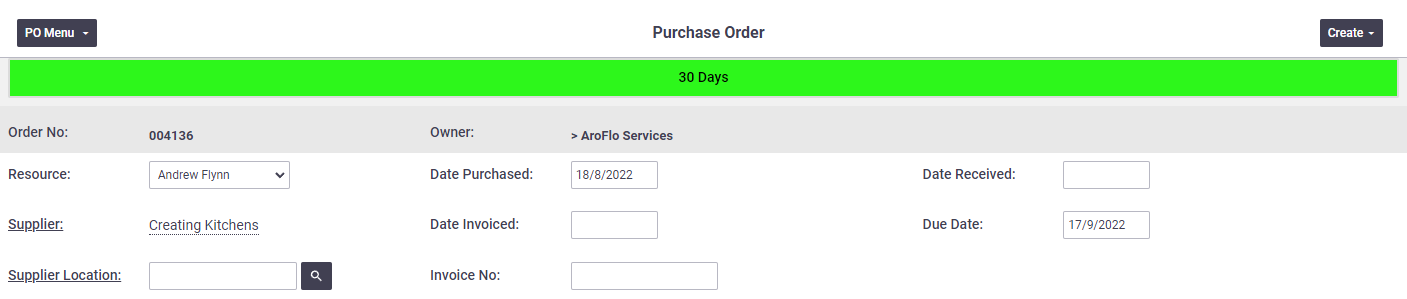 See Transaction Terms for more information. |
 |
|
 (magnifier) to search and select from your supplier list.
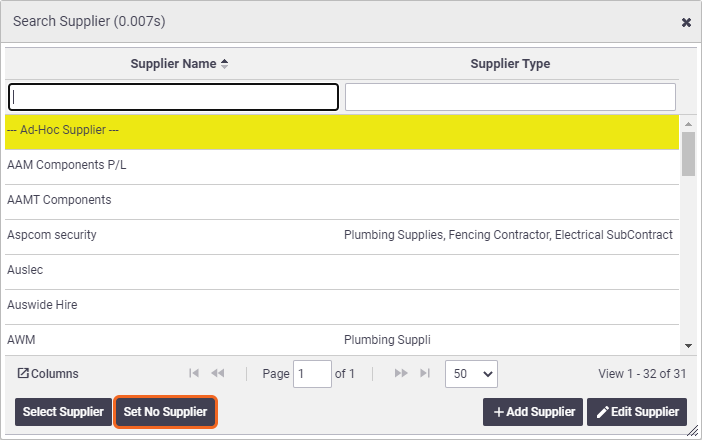
 (magnifier) to search and select from the location list.
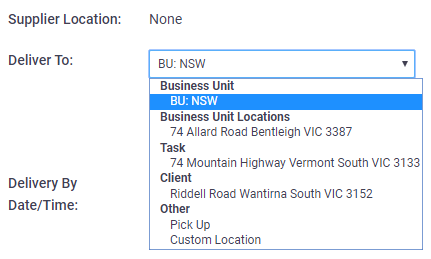
Other fields
Field |
Description |
|---|---|
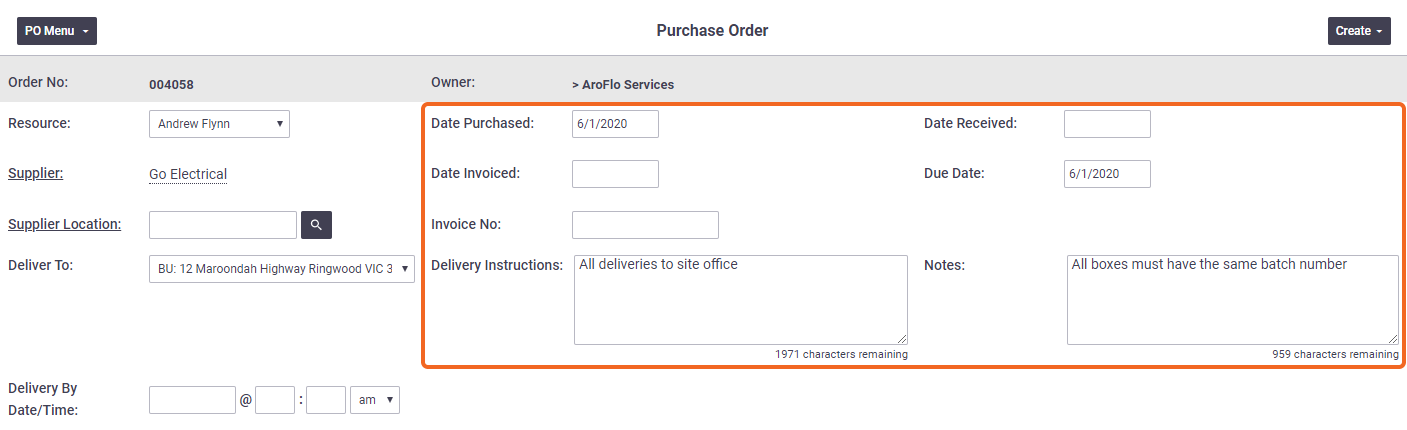
| Date Purchased (Required Field) | When the items are required from the supplier (auto populated with the current date). You can change the date if you need to. |
| Import Email Address | Only visible if you have Supplier Invoice Imports set up. This field displays your configured email address for this import. |
| Date / Time Imported | This field is only visible if you have Supplier Invoice Imports set up. It is automatically populated when a supplier invoice is imported. |
| Delivery Instructions | Record any additional delivery details, e.g. 'All deliveries to site office'. |
| Notes | Record any special instructions relating to the order, e.g. 'All boxes must have the same batch number'. (Information in this field will transfer across to the Bill.) |
Bill-related fields
The following fields are used for recording the bill details once the items have been received. Information in these fields transfer across to the Bill once one has been created.
Once a bill has been created, these fields will no longer display on the purchase order as they need to be completed for each relevant bill instead.
Field |
Description |
|---|---|
| Date Received | When the items were received from the supplier. |
| Date Invoiced | Record the date on the supplier invoice. |
| Due Date | When the Invoice payment is due. This field will auto-populate based on the terms set in the Supplier card. If the supplier has no payment terms, the default will be the same as Date Purchased. If the supplier is changed after creating the Purchase Order and the Date Invoiced has been saved, the Due Date field will automatically update based on the new supplier's payment terms. |
| Invoice No. | Record the Supplier Invoice number. |
What to do next
Once you've created your purchase order and filled out the order details, the next step is adding the items you want ordered. See Add Purchase Order Items.
