Tracking centers are used for categorizing or grouping labor, materials, freight and/or expense items for reporting purposes. Once set up, tracking centers are automatically assigned to items on a quote, purchase order, task and/or invoice to enable flexible and refined reporting on different areas of your jobs, projects or across your entire business.
See some examples of tracking centers that may be useful
| Industry | Examples of Tracking Centers |
|---|---|
| Construction | Construction phases such as Site Preparation, Slab, Frames & Trusses, Roofing, Brickwork, Rough in. |
| Facilities Management | Building Safety & Compliance, Insurances, Pest Control, Cleaning, Building refurbishment, Grounds maintenance. |
| Multi-trades | Administration, Electrical, Plumbing, Carpentry, Roofing, Data & Comms. |
To set up tracking centers:
- In Site Admin, go to Settings > General > Tracking Centers.
- Click Add New Tracking Center.
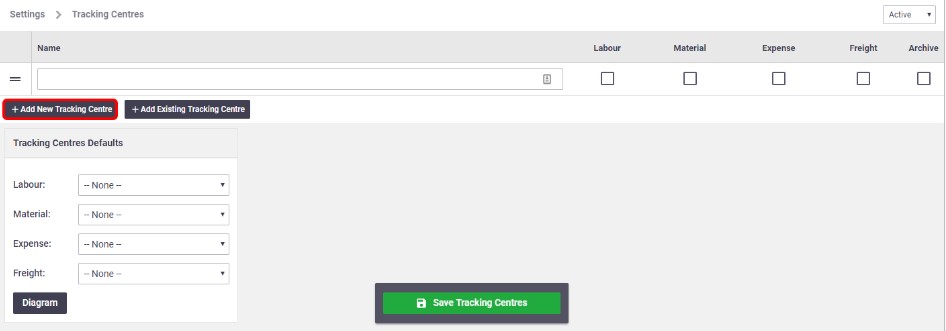
- Enter the Name of the tracking center and check the box for the relevant item type where it will be available for selection, i.e. Labor (LAB items), Material (MAT items), Expense (EXP items) and/or Freight (FRE items).

- Repeat the above steps until all tracking centers have been added and Save Tracking Centers.
Once your tracking centers are set up, this will become the master list and will be available for selection across all areas where tracking center fields exist.
Tracking Centers and multiple Business Units
To add an existing tracking center to another Business Unit:
- Click Add Existing Tracking Center.
- Double-click the name of the tracking center you would like to add.
- Click Save Tracking Centers.
To check which tracking centers are currently being shared between Business Units, click the number next to the name of a tracking center.

Set Tracking Center Defaults
To ensure accurate reporting, tracking centers will need to be allocated to every item on a quote, task, purchase order or invoice. To simplify this, you can set up default tracking centers in Site Admin at various levels, i.e. Business Unit, Task Type, Work Type, User, Inventory item.
- Where these defaults are set will depend on your business and how refined you want your reporting to be. For example, you might want to report down to specific Resources (Users) on some jobs, and Work Types on other jobs.
- You don't need to set a default at every level.
The default tracking center the system assigns to an item is determined by the following hierarchy:
| Tracking Center Defaults Hierarchy | ||
|---|---|---|
| Type: Labor (LAB) Items | Type: Material (MAT) |
Type: Expense (EXP) Items & Freight (FRE) Items |
| User | ||
| Work Type | Inventory Item | |
| Task Type | Task Type | Task Type |
| Business Unit | Business Unit | Business Unit |
When setting up default tracking centers or modifying tracking centers on items, you can click the Diagram button to view the Tracking Center Defaults Diagram, which shows the hierarchy of defaults that have been set up for your company. The tracking center shown in bold on the diagram indicates that it is the top-level default that the system will assign to items.
Business Unit
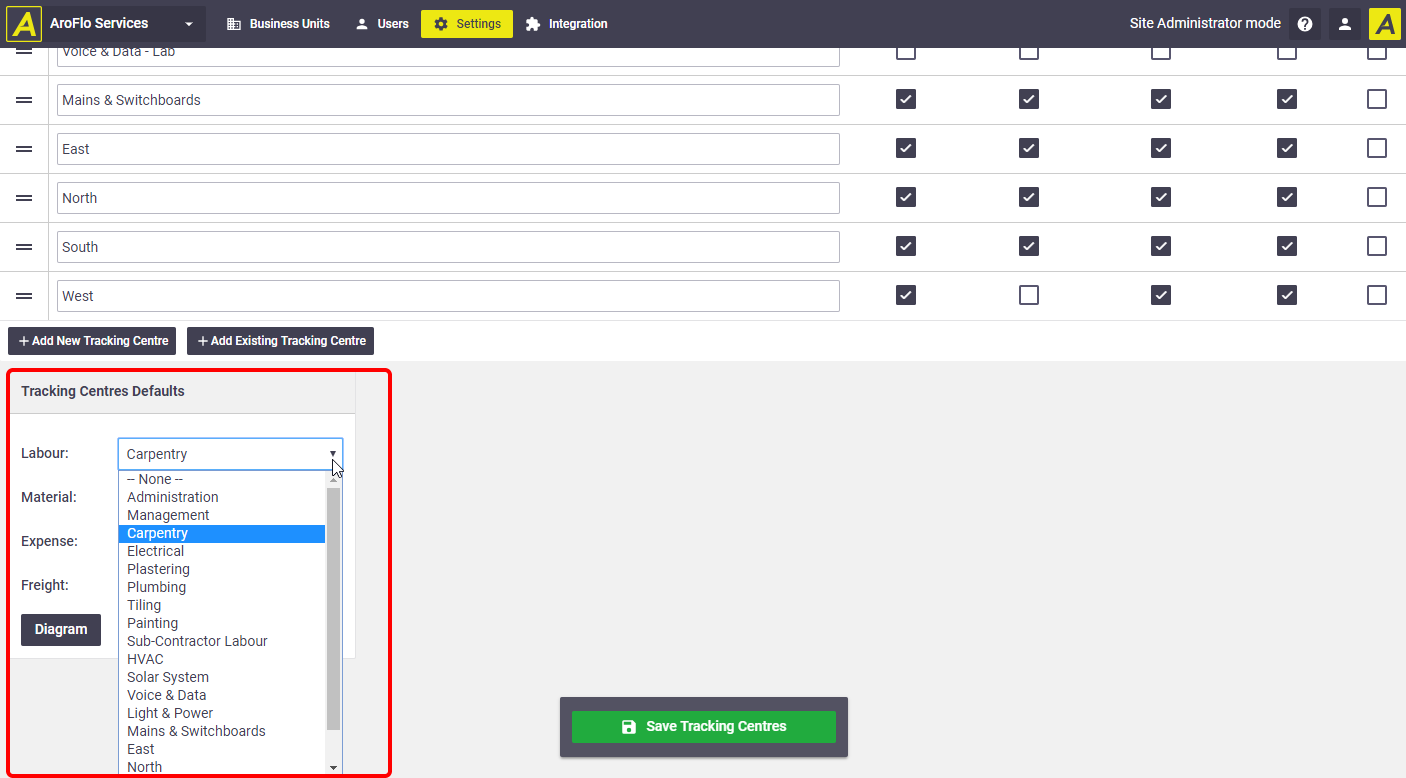
- In Site Admin, select your Company (top-level Business Unit) or the relevant Business Unit (if multiple business units exist), then click Settings > General > Tracking Centers.
- In the Tracking Center Defaults section underneath the list, select the appropriate tracking center from the dropdown list to be set as the default for Labor, Material, Expense and Freight items.
- Once all defaults have been set, click Save Tracking Centers.
Task Types
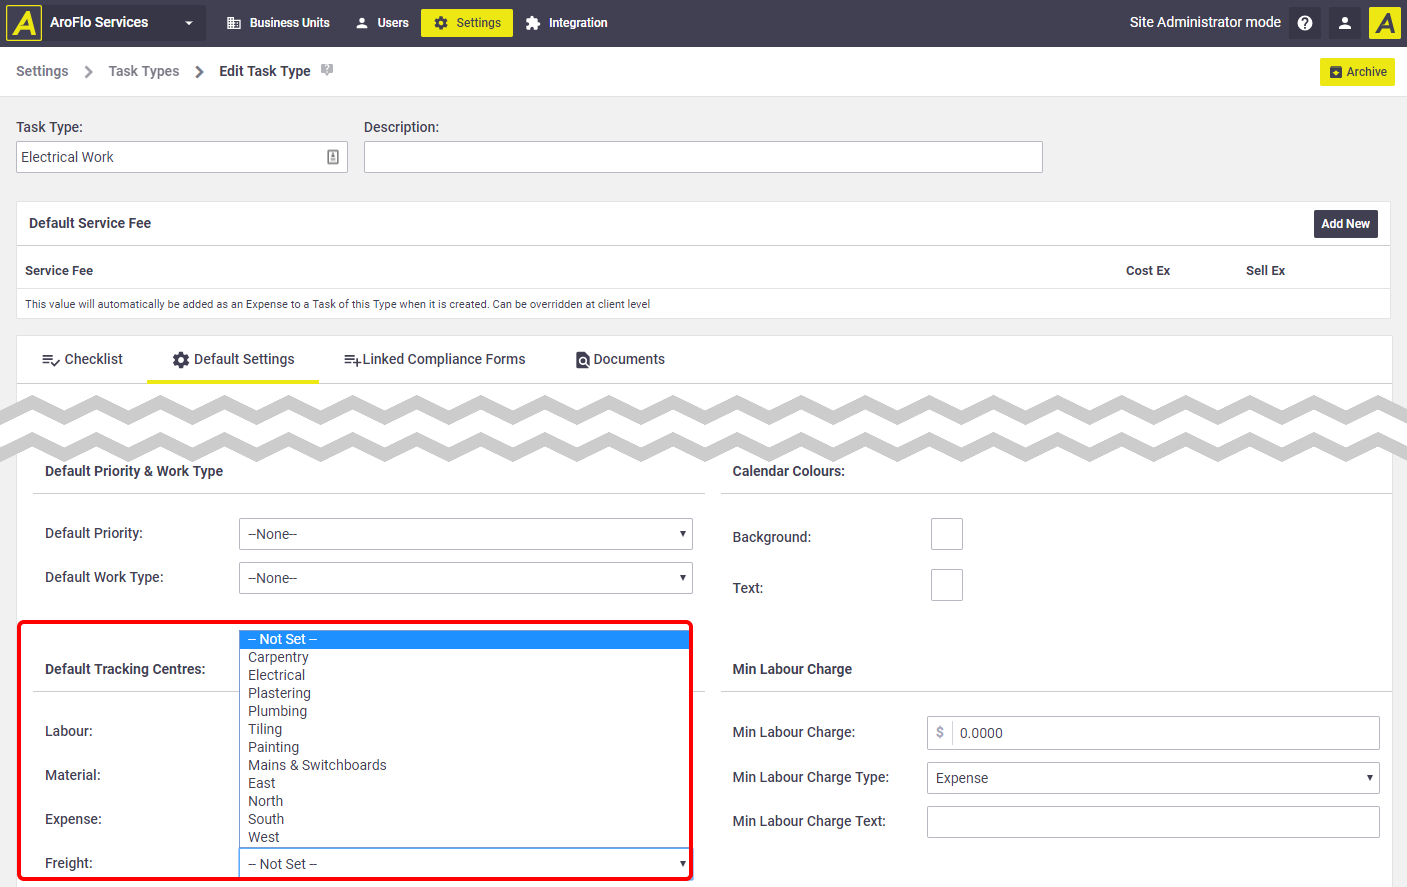
- In Site Admin, go to Settings > Tasks > Task Types and click the task type name to view details.
- In the Default Tracking Centres section, select the appropriate tracking center from the dropdown list to be set as the default for Labor, Material, Expense and Freight items for this task type.
- Once all defaults have been set, click Save.
- Repeat the above steps for each task type as required.
Work Types
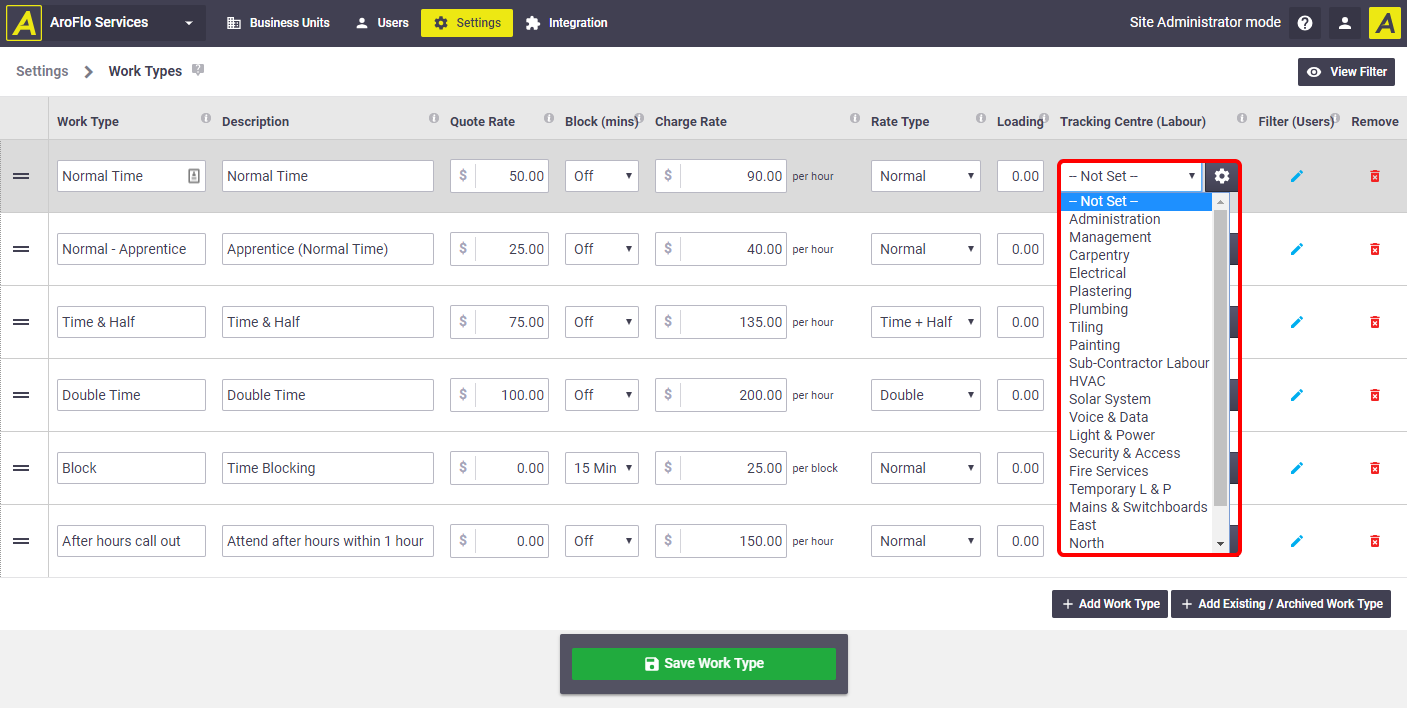
- In Site Admin, go to Settings > Timesheets > Work Types.
- Select the appropriate labor tracking center from the dropdown list to be set as the default for each Work Type.
- Once defaults have been set for all work types, click Save.
Inventory Item
- In AroFlo Office, go to Manage > Inventory.
- Hover your mouse over a category, then click the
 (edit) icon when it appears on the right.
Parent-level categories (shown by a solid folder
 ) do not contain the option to add tracking centers; you must choose a child-level category (shown by an outline of a folder
  ).
). - Click Edit Settings > BU and Alerts.
- Under Assign to Business Unit, select the appropriate tracking center from the dropdown list to be set as the default for the inventory category and its associated inventory items

- Click Save.
- Alternatively, tracking centers can be assigned to inventory items individually.
![]()
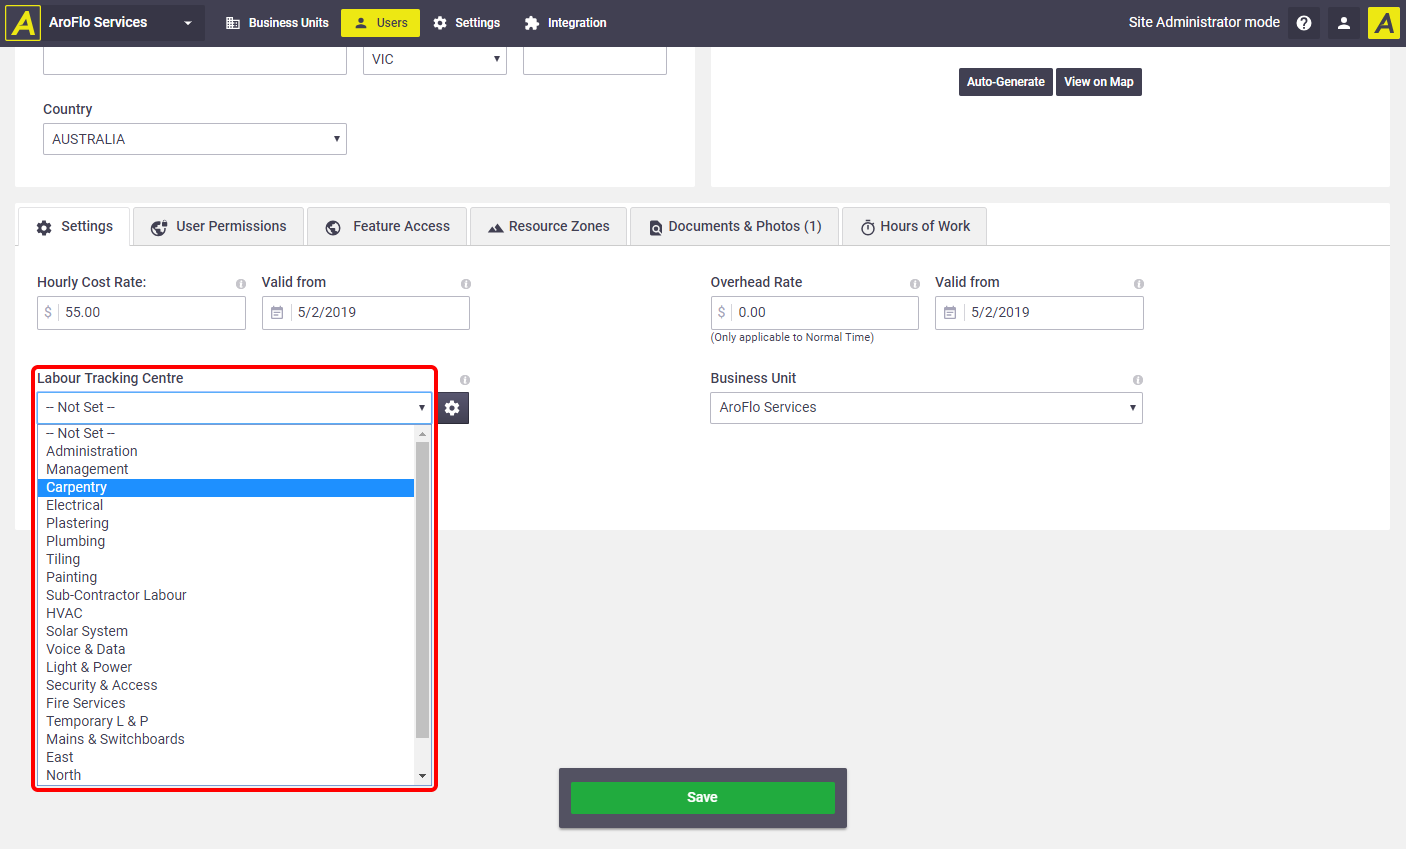
User
- In Site Admin, go to Users.
- Click a user's name to view details.
- On the Settings tab, select the appropriate Labor Tracking Center from the dropdown list to be set as the default for this user.
- Click Save.
View our Tracking Centers feature page on our website