After you've sent a purchase order and received stock or a supplier invoice, you should compare what was ordered against what was received.
Depending on your preferred workflow, there are two ways to do this:
- Record the details of your first supplier invoice or initial items received on the purchase order, using the bill-related fields. This information will then transfer to the first bill you create.
- Simply create a bill whenever you receive items or a supplier invoice and record the information on a bill.
Automated Imports
If using supplier invoice imports, AroFlo will automatically create a Bill for you, based on your imported invoice from the supplier, and link it to the purchase order. You do not need to record items received or supplier invoice details.
Similarly if you uploaded a bill using the AI Bill Scanner or our Bulk Upload Bills feature, this will also create a Bill for you and you don't need to record items received or supplier invoice details.
Any adjustments to quantities are done on the Bill. See Review outstanding items.
How can I tell if a bill has already been created?
There are a few ways you can tell if a bill or multiple bills have been created for the purchase order you're working on:
Bill-related tabs
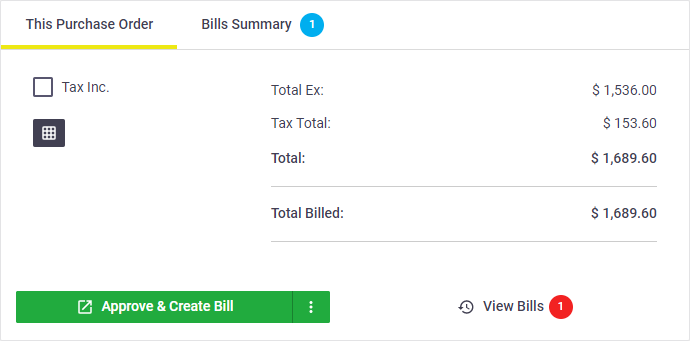
| Any bill-related tabs, e.g. the Bills tab will contain a counter, telling you how many bills are attached. Click View Bills in the summary section (bottom right) to open the Bills Summary tab, which gives you information about each bill and allows you to access each from there. See Create a Bill - Bill Summary for more info. |  |
 |
Total Billed amount
| You'll have a Total Billed amount which you can use to compare the value of your current purchase order to what was billed. |  |
 |
Record items received
If you prefer to enter your quantities received on a bill, you can skip this step.
When you receive the first batch of ordered items from your supplier, you can update the quantity received for each item ordered using the Qty Rec field and Save your purchase order.
If the quantities ordered and the quantities received are an exact match, tick the checkbox above Qty Rec which will input the same figures from the Qty Ord. field. This will save you from typing the same figure for each item.

Unable to edit Qty Rec?
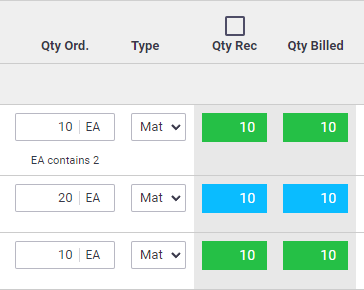
The quantity received field becomes colour-coded and read-only once a bill has been created for this purchase order. This is because the quantity received is then recorded against each bill linked to an order. If you need to edit quantities, you can do this on the bill. See Managing Bill Line Items.
If any of your quantities received are less than what was ordered, you'll have an option to create a back order for the remaining items not received.
Record Supplier Invoice Details
If you prefer to enter supplier invoice details on a bill, you can skip this step.
When you receive the first order invoice from your supplier, the following fields can be used to record the details. Information in these fields transfers across to the Bill once one has been created.

Can't see the bill-related fields?
These fields will not be visible once a bill has been created for this purchase order. This is because supplier invoice details are then recorded against each bill linked to an order.
| Field | Description |
|---|---|
| Date Received | When the items were received from the supplier. |
| Date Invoiced | Record the date on the supplier invoice. |
| Due Date | When the Invoice payment is due. This field will auto-populate based on the terms set in the Supplier card. If the supplier has no payment terms, the default will be the same as Date Purchased (Enter order details) If the supplier is changed after creating the Purchase Order and the Date Invoiced has been saved, the Due Date field will automatically update based on the new supplier's payment terms. |
| Invoice No. | Record the Supplier Invoice number. |
Create Bill
|
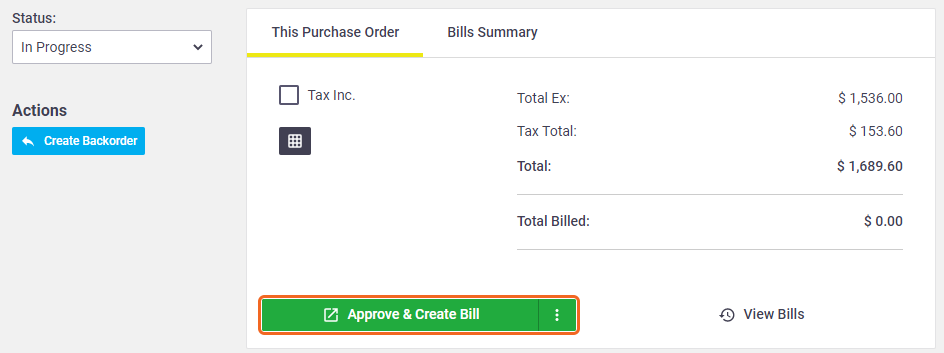
The next step is to create a bill for the items you've marked as received. Click Approve & Create Bill to create a bill and approve the purchase order at the same time. If you recorded any received items or invoice details, these will transfer onto the bill. |
 |
 |
If you want to keep your purchase order in progress, simply click the  (three dots icon) next to the button and click Create Bill.
Continue to Create a Bill.
Create Bill Options
|
If you're creating a bill with no new quantities received, you'll have to make a choice as to what you want to do: Scenarios
|
 |
 |
| Option | Description |
|---|---|
| Add Outstanding Items |
This will create a bill and include only the line items on the purchase order which haven't already had a bill created for them (i.e. quantity ordered - quantity billed). Quantity billed You'll need to record your quantities received on the bill. |
| Add All Items |
This will create a bill and include all line items on the purchase order, regardless of whether they've been received or not. You may need to check/edit your quantities on the bill for these items. This is helpful if you want to quickly mark all of your items as being received, e.g. for subsequent purchase orders where you know the items received are an exact match with what was ordered. |
| No Items | A bill will be created with no line items. You can still manually add the purchase order items if necessary. |
Review outstanding items
Once a bill has been created for the purchase order, the quantity received will be read-only as this is now entered on the bill. It will also be colour-coded:
- Green indicates that the quantity received matched or was more than the quantity ordered
- Blue indicates that the quantity received was less than the quantity ordered.
