Once you've created your Bill, you'll likely want to manage your Bill line items.
Check Items
Checking your items involves checking to see that your quantities are matching up and also checking that your costings are as expected.
Purchase Orders: Set quantities
If you created your bill manually and set quantities received, the line items from your purchase order will flow through to the bill.
Check Quantities
Purchase Orders: Supplier invoice imports
If using supplier invoice imports, you won't need to do this step as your line items as well as their quantities received will automatically import across from the Supplier Invoice.

Edit your quantities received and billed if necessary. See the table below for an explanation of each column.
Field |
Description |
|---|---|
| Total Qty Ord | Total Quantity Ordered. This is the quantity of items ordered from the supplier (from the purchase order). This field is read-only and cannot be edited from the bill. |
| Total Qty Rec | Total Quantity Received across all bills. This field is read-only and cannot be edited from the bill. This field is colour coded:
|
| Qty Rec | Quantity Received for this bill. Add all Tick the checkbox at the top of the field if the quantities for all line items are an exact match with the Total Qty Ord field. This will save you from typing the same figure for each item. Show this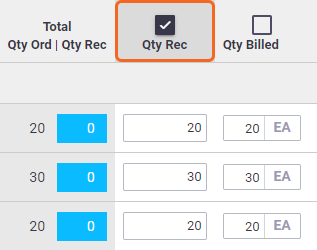 Stock levels Marking your stock as received will update your stock levels once the bill is saved. Stock levels increase for the stock holder listed in the Inv. To column. |
| Qty Billed | Quantity Billed. This is the quantity of received items from a supplier which are being billed for on this bill. Enter a value here/edit this value if necessary. Add all Tick the checkbox at the top of the field to input the same quantities as the Qty Rec to save you from typing the same figure for each item. Show this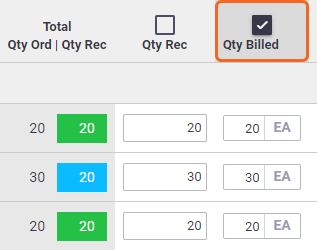 |
| Inv. To | Inventory To. defines the inventory stock holder that will change based on the quantity received. You can change the stock holder by clicking the field and selecting a different stock holder. |
Purchase Orders: Quantities
Entering the quantities on the purchase order first is useful for the following scenarios:
- Your supplier sends you a monthly invoice but you want to raise a bill for each shipment received within the month
- Partial delivery scenarios, i.e. you can have one purchase order but raise a bill once each item is received, thus having multiple bills on the one purchase order.
Add or remove line items
|
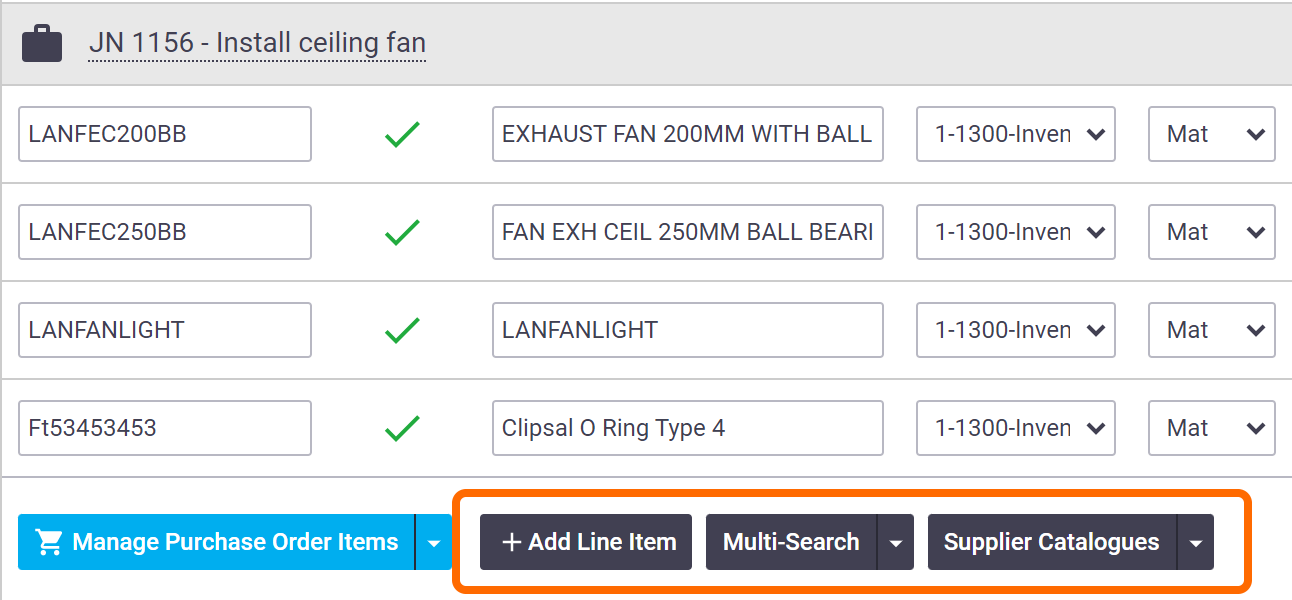
You still have the option to add line items, if necessary, using the available options. This is useful if entering something that was not listed on the order. Supplier Catalogues The Supplier Catalogues option is only applicable to Bills created from a Purchase Order. For more information on using these options, see Add line items (for Purchase Orders) or Add labor and materials (for Work Orders). See Delete a Bill for information on deleting bill line items. |
 |
 |
Manage Purchase/Work Order Items
|
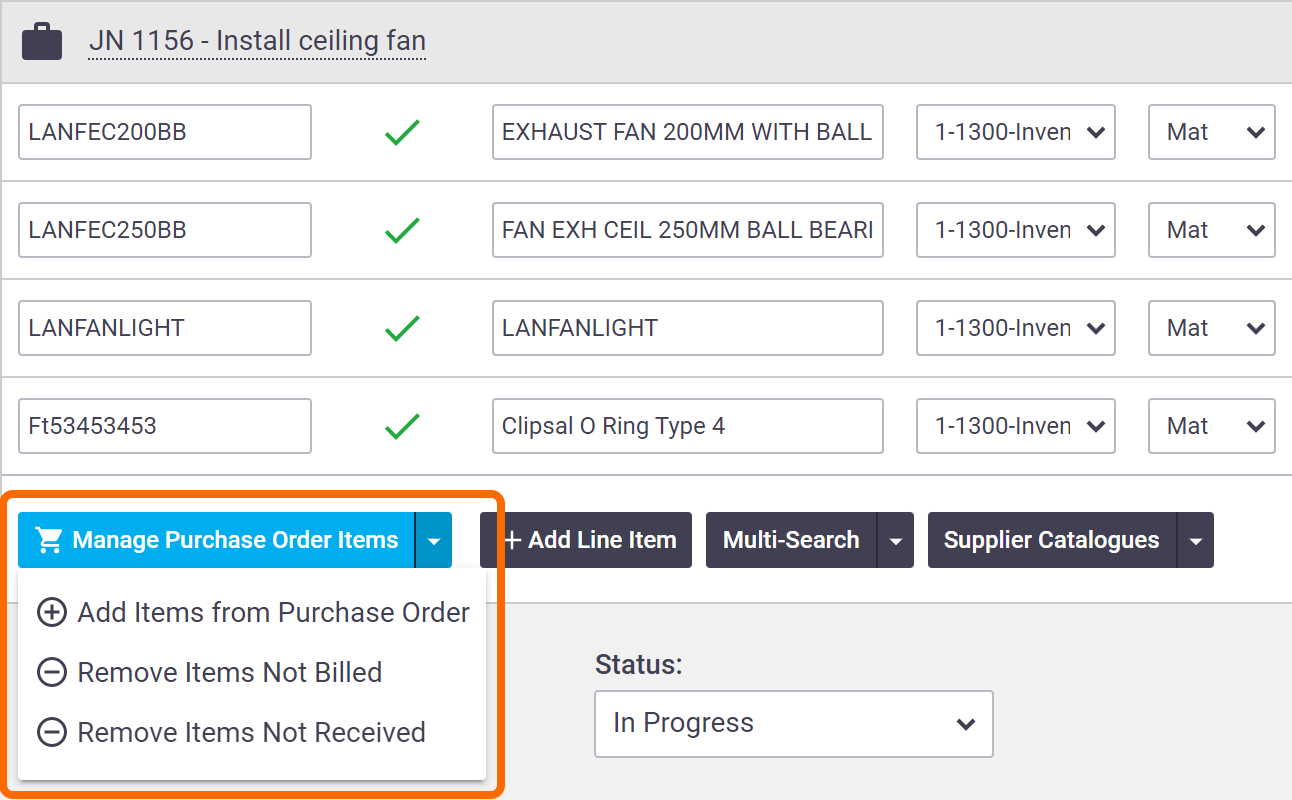
Use the Manage Purchase/Work Order Items dropdown to add items from your order or remove items that are not received or not billed:
|
 |
||||||||
 |
|
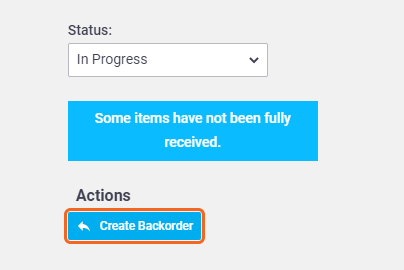
Once your quantities are all matching, proceed to check your items' costings. For bills created from a purchase order, if your quantities are not matching, you'll get a warning in the form of a banner after saving, and you'll have the option to create a back order for the remaining items not received. You can also raise a back order from the purchase order and then raise a bill on each purchase order. |
 |
 |
Check Costs
Check that your costs entered on the original order match those on the bill.

What if the cost is different?
If the supplier charge does not match a line item, you can update inventory costs. For more information, see Update Inventory Pricing from Bill.
If using Preferred Suppliers, changes to the item cost will automatically update the listed supplier's price on the inventory card.
Updating inventory pricing for ad hoc items
|
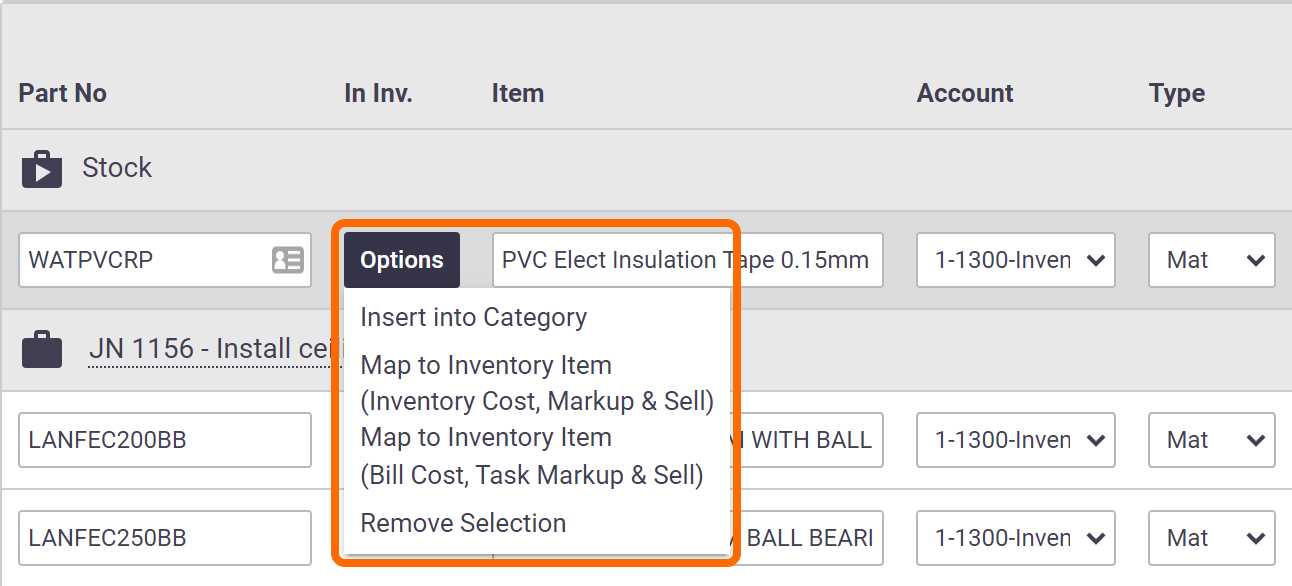
As part of the check items process, you might like to add any ad hoc items into your inventory or match them against existing inventory items. Purchase Orders: Automated Imports If you're using supplier invoice imports or the AI Bill Scanner and an imported item doesn't match on the part number and/or description, the line item will display as an ad hoc item. |
 |
 |
The Options button next to ad hoc items gives you options in terms of updating your inventory pricing:
Option |
Description |
|---|---|
| Insert into Category | This will save the item to your inventory. Make a selection and enter the unit of measure, if applicable. |
| Map to Inventory Item (Inventory Cost, Markup & Sell) | Maps this item to an already existing inventory item and uses that inventory item's cost price. |
| Map to Inventory Item (Bill Cost, Task Markup & Sell) | Maps this item to an already existing inventory item and uses the bill's cost price. |
| Remove Selection | Cancels your selection. |
In Inv.
Once the bill has been saved, the item will display a tick ( ) in the In Inv. column, indicating that the item is an inventory item.
Once you're happy with your costings, save and mark the bill as approved.
When the cost or part number of an item is modified on the bill, AroFlo will let you know of the discrepancy. See Bill Discrepancies.
Imported items
Purchase OrdersIf using automated imports (supplier invoice imports or AI Bill Scanner) and an item is imported onto the bill from the supplier invoice, the original purchase order will reflect this and show an imported icon Work OrdersIf a contractor adds an item to an invoice and sends you the invoice via AroConnect, creating a bill for you, the original work order will reflect this and show an imported icon If there are discrepancies between what's on your purchase/work order and what's on your bill, AroFlo will let you know. See Bill Discrepancies. If you need to update your inventory items as a result, see Updating inventory pricing for ad hoc items above. |
 |
 |
To find out more about the Bill Worksheet including checking information, see Bill Worksheet
 (arrow pointing left) next to the part number.