You can add the following types of elements to your RTF layouts:
- Images, such as photos, logos and electronic signatures.
- Barcodes, including BPAY details and the Get Paid Faster QR code.
- Tables, including tables with sub tables, used for linked task items on your invoice, or through project progress claims.
Add an image
When adding image elements to a document template, the size of the image is based on the width and height settings in the element properties.
- Company logos use width and height from the element properties
- Signatures and images use width from the element properties - not height - to maintain aspect ratio.
Here are some examples of image types and settings you can manipulate when adding to your layout:
Logo size
Image size

Signature size

Logo, image and signature
Add images from Documents and Photos
Images that have been uploaded to Documents and Photos can also be added to Document Templates.
Images must be set with filter 'Show Client' or 'Show All' to appear on layouts. You can also set a filter for multiple files at once in most areas of AroFlo. See Documents and Photos - Set document visibility for more information about document filters.
Show Filter

Click here for a step-by-step guide on adding an image table
1. Add Table
|
On a custom layout, add the Table which has the image you want. Tables to select might include Task Documents (Images), Client Documents (Images) etc. For examples, see Add Images to Layout. |
 |
|
2. Add or modify Table Settings
| Add or modify the table settings to include the Columns you want (e.g. Small, Medium or Large photos, with or without comments). |  |
|
3. Edit Column properties
| Click the |
 |
|
4. Export Fields
| If required, Export Data Fields so you can copy and paste them into a document template (MS Word or .RTF). |  |
|
5. Create a table
| In your document template (MS Word or .RTF), you will need to create a table to match the AroFlo layout structure and paste in the required image elements. | 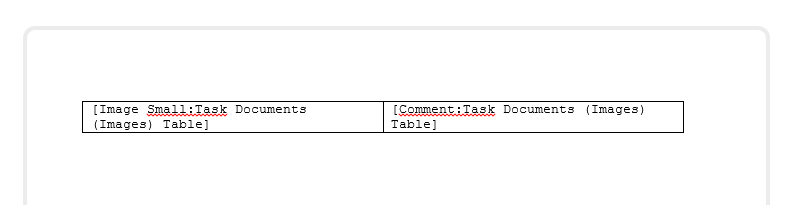 |
|
6. Save and upload
| Save and upload the document template in .RTF format using the instructions found in RTF Document Templates - Upload the document template (.RTF) |  |
|
7. Finished product
| The size of the images inserted into the custom layout and document template will be based on the size parameters defined within the element properties. | 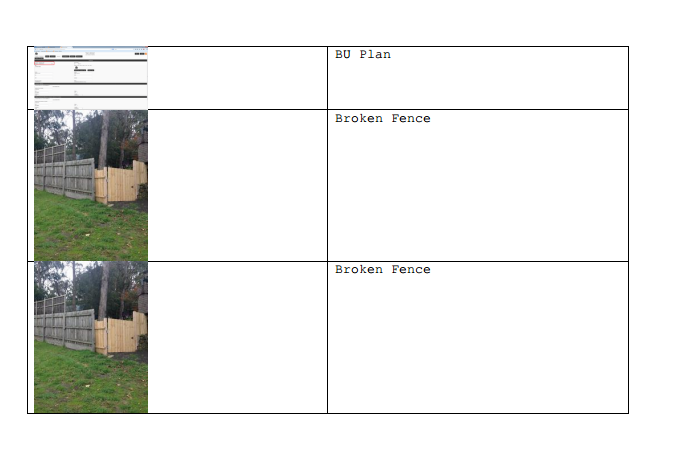 |
|
Add a barcode
|
To add a barcode or QR code to an RTF layout:
You can alter the size of the barcode by clicking the [Barcode] element in your layout to open the Properties box. From here, click Setup > Manage Barcodes and enter the height, width and margin you want (in pixels). Save Barcode. Show me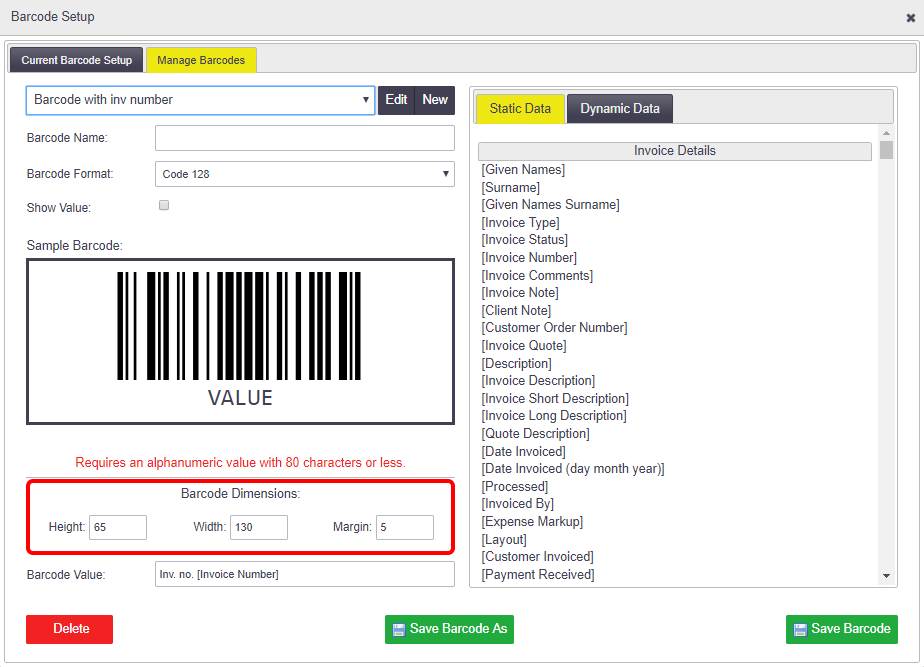 |
 |
|
Add a table
|
 |
|
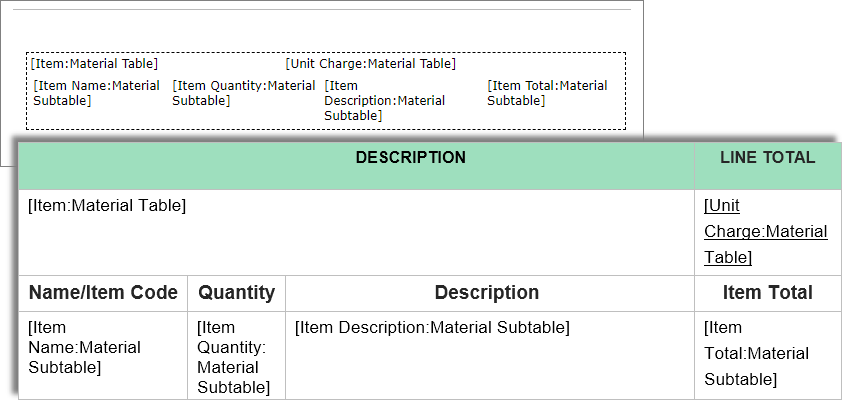
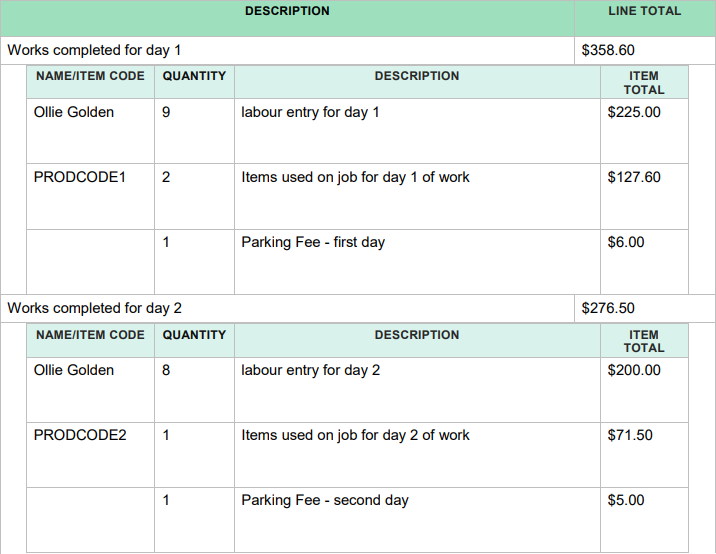
Table with Sub Tables
|
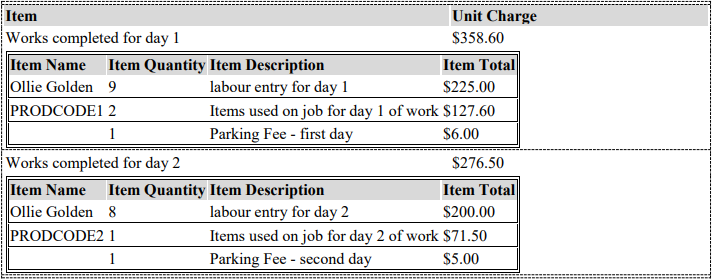
If you're using a table that includes a sub table (for example, if you're using linked task items or doing a project progress claim), you can also display this on your RTF. Use the above instructions as a guide, however:
|
 |
|
Export to copy method examples
Nested sub table example
Adjacent sub table example
Double-Click to Copy method example
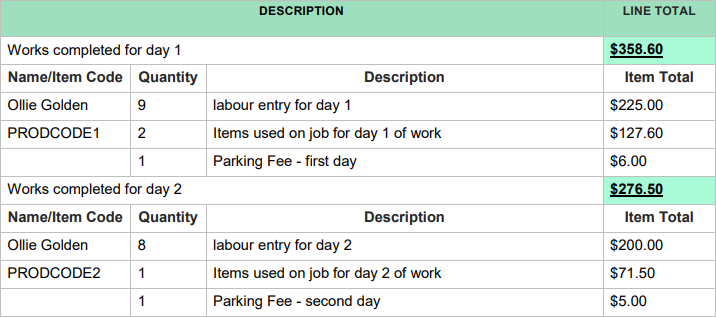
Simplified table example: