AroFlo lets you send event invites to your staff using emailed calendar invites. Events can include task schedules, overheads and ad-hoc events.
- Sending event invites allows staff to accept or decline a scheduled event, much like the calendar invites you receive in your email today.
- Using invites allows everyone to see which attendees can or cannot attend an event in your calendar. Event invites include an ICS file (a universal calendar format), meaning an event is also saved in the user's email calendar (e.g. Google / Outlook / Apple Calendar).
- Event invites do not require an AroFlo Subscribe Calendar to a Third Party Program or Google Calendar Sync to work.

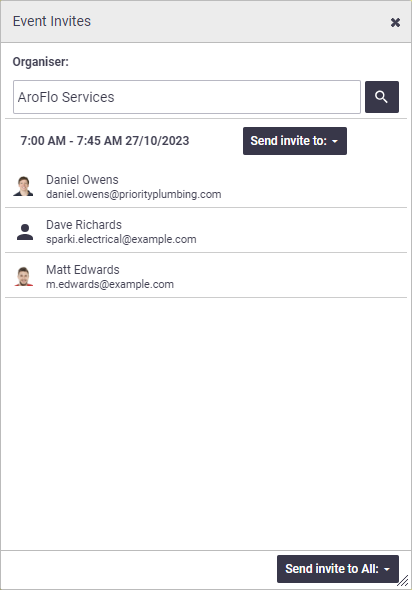
Send an event inviteTo send an event invite from within a scheduled event:
|
 |
||||||||
 |
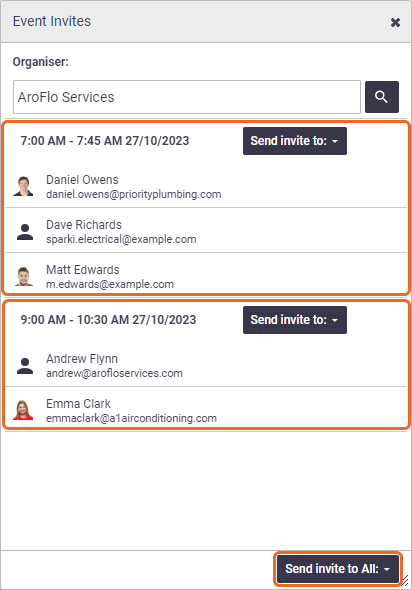
Send invite to All
|
At the bottom of the Event Invites window, you can find the Send Invite to All button. This will save you time when you've got resources on the same task with different start and finish times. In this example, you could use the Send invite to All button, rather than having to hit Send invite to twice. Using the Send invite to All > All Existing Attendees button sets the status of all attendees to 'not responded'. This could be useful if the list of attendees, or other details of the event, has changed substantially and you want to give people the chance to re-confirm their acceptance. |
 |
 |
Send invites with multiple start/finish times
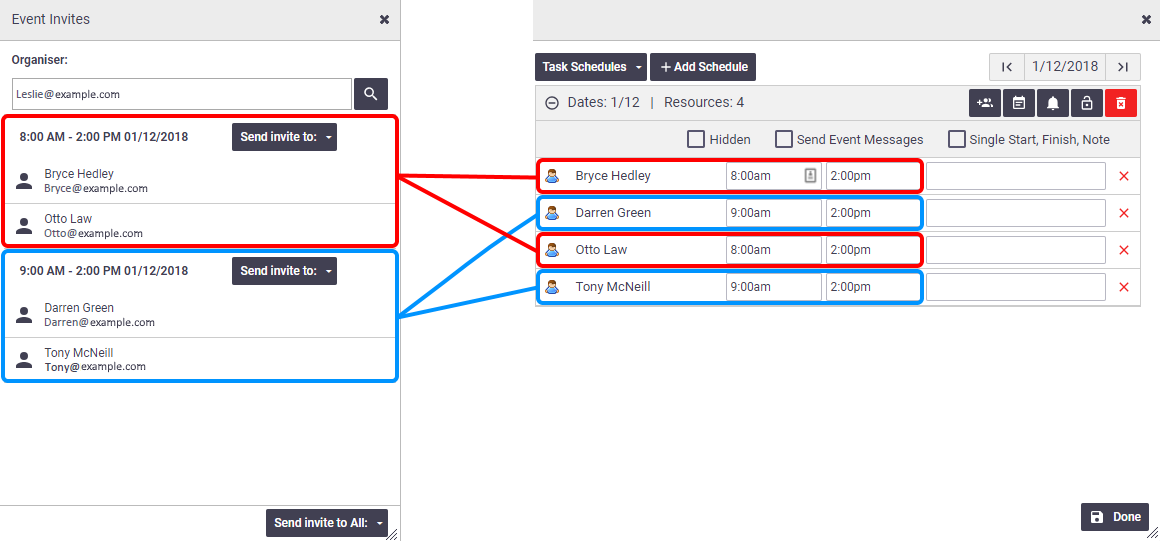
Where the resources on a schedule have different start or finish times, AroFlo will group them by those times when sending event invites. You can use the Send invite to button to send each grouping's invite separately or use the Send invite to all button to send all the invites at once.
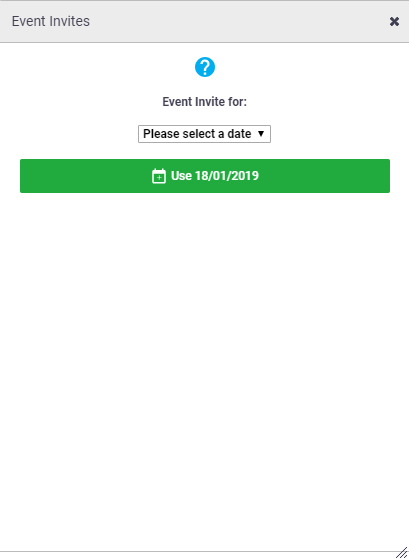
Send invites for multi-day eventsDue to a limitation with ICS files (used universally for email calendar invites), if an AroFlo event is scheduled over multiple days, you need to send an event invite for each day individually. To do this:
|
 |
 |
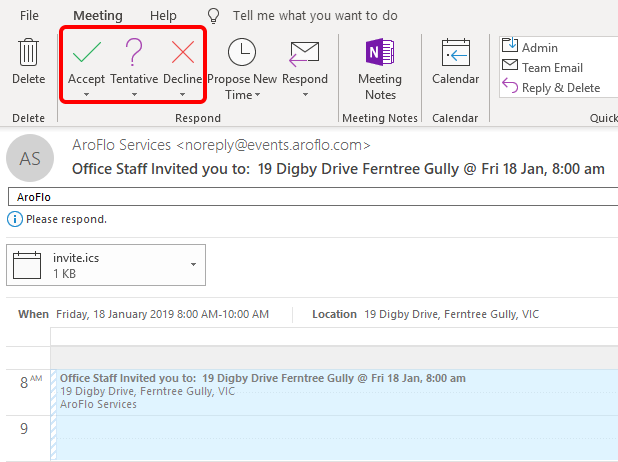
Respond to an event inviteDifferent email/calendar systems handle invitations in different ways and AroFlo has no control over this. The instructions below are based on receiving an event invite email into Outlook 365, but the principles are similar for all systems. Open the email you've received from AroFlo and check the details. You can either accept, accept tentatively, or decline the invitation. |
 |
 |
|
If your email system allows it, it's best to send a response with your acceptance, tentative acceptance or rejection of the invitation so that your attendance status is updated in AroFlo. In Outlook 365, click the arrow below the three options and select either 'Edit the Response before Sending', or 'Send the Response Now'. Not all external calendars will show the updated status. |
 |
 |
Track attendee statuses
|
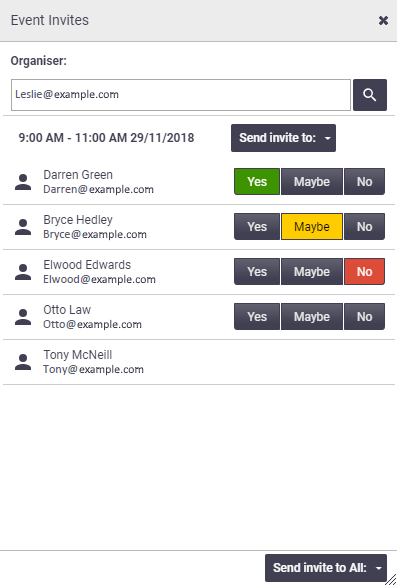
The possible attendee statuses are shown to the right. The attendee status is updated automatically when the attendee accepts, tentatively accepts, or declines the invite. You can also manually update the attendee status by clicking on the relevant status button in the Event Invites window. Changes are saved automatically and each attendee receives an email when any attendee's status is changed. |
|
||||||||||||
|
Example
|
In this example:
|
 |
 |
| You can see each attendee's status at a glance by opening the calendar entry. | 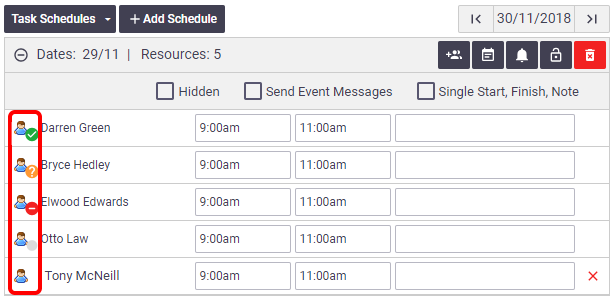 |
 |
Changes to calendar schedules
If you drag and drop a schedule onto a new resource or date, or change the time or duration of a scheduled event, AroFlo will:
- reset the invite status of all resources on the schedule to 'Has not responded'.
- ask whether you want to send an updated event invite (or cancellation, as applicable). Simply click OK if you want to send one.
Changes to timesheets
If you go to Manage > Timesheets in AroFlo Office and update an overhead (e.g. you change the date of a toolbox meeting from a Monday to a Tuesday), AroFlo will ask if you want to send an updated event invite. If you do, simply click OK when you see the message.
Updating an event to hours only will cancel it. An event must have a start and finish time for the system to send an event invite.
What if I have an external calendar subscription?
You don't need an external calendar subscription for AroFlo to send event invites, but if you have one, AroFlo will check to see whether event invites have been sent for an event, before syncing the event with your external calendar. Any events for which invites have been sent will not be synced. This is to avoid duplicating calendar entries.
 (magnifier) icon and double-click on a user name to select it.