|
Color settings let you customize the colors used to differentiate between the various types of schedules within your calendar. To access the color settings for your calendar:
|
 |
|
 (three dots icon).
'Color Schedule By' options
Use this dropdown to choose the color scheme of your schedule tiles.
- Select your preferred option from the Color Schedule By dropdown list.
- Save.
You may need to refresh your browser for changes to take effect.
| Option | Description |
|---|---|
| None |
Choose this option to apply the colors set for Default Schedule Colors for all schedules. Show me If you choose this option, the ‘Background’ color you set for specific event types displays as a label. Example |
| Tasks | Each task schedule has its own unique color. |
| Resources | This uses the colors set up for each resource. See Resources. |
| Tasks / Resources | Each task schedule will have a distinct color, with the schedule border color indicating the resource (the 'border' color set up for each resource. See Resources.) |
| Project | All task schedules within the same project will have the same color. |
| Tasks / Projects | Task schedules within the same project will have a shared background color, with unique border colors for each task. |
Task Type label colors
You can also customize the task type label colors (similar to the above Example images) in Task Type settings. To display these, ensure you have the ‘Task Type’ schedule label set up as a 'Header Label'.
Change schedule colors
You can customize the colors for task schedules, including background, border, and text color.
For timesheets, ad-hoc events, and periodic or completed tasks, you can change the background and text colors only.
To change your schedule colors:
- Click the
 (three dots) icon to access the calendar settings.
 - Click the Colors sub-section.
- Make a selection from the Color Schedule By dropdown list.
- Click into the field you want to change:
- To change the background color, click Background
b. To change the border color, click Border (for Tasks only)
c. To change the text color, click Text.See an example
In this image, the dark purple that forms the top and edges of the tile is the Border, the palest mauve is the Background, and the Text color has been left as white. The yellow background to the 'Meeting: Timesheet' entry is AroFlo's default color for timesheet entries. 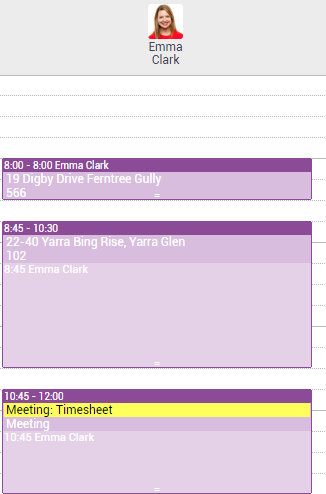
- To change the background color, click Background
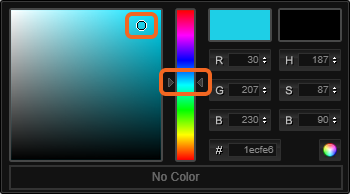
- Using the color picker, select a color by:
- Clicking and dragging the arrow up or down the vertical color bar to your preferred color (see below)
- Clicking and dragging the small circle in the color square to your preferred shade (see below).
- Click into the next square and repeat the steps above.
- Click off the color picker to close it.
- Click Save.