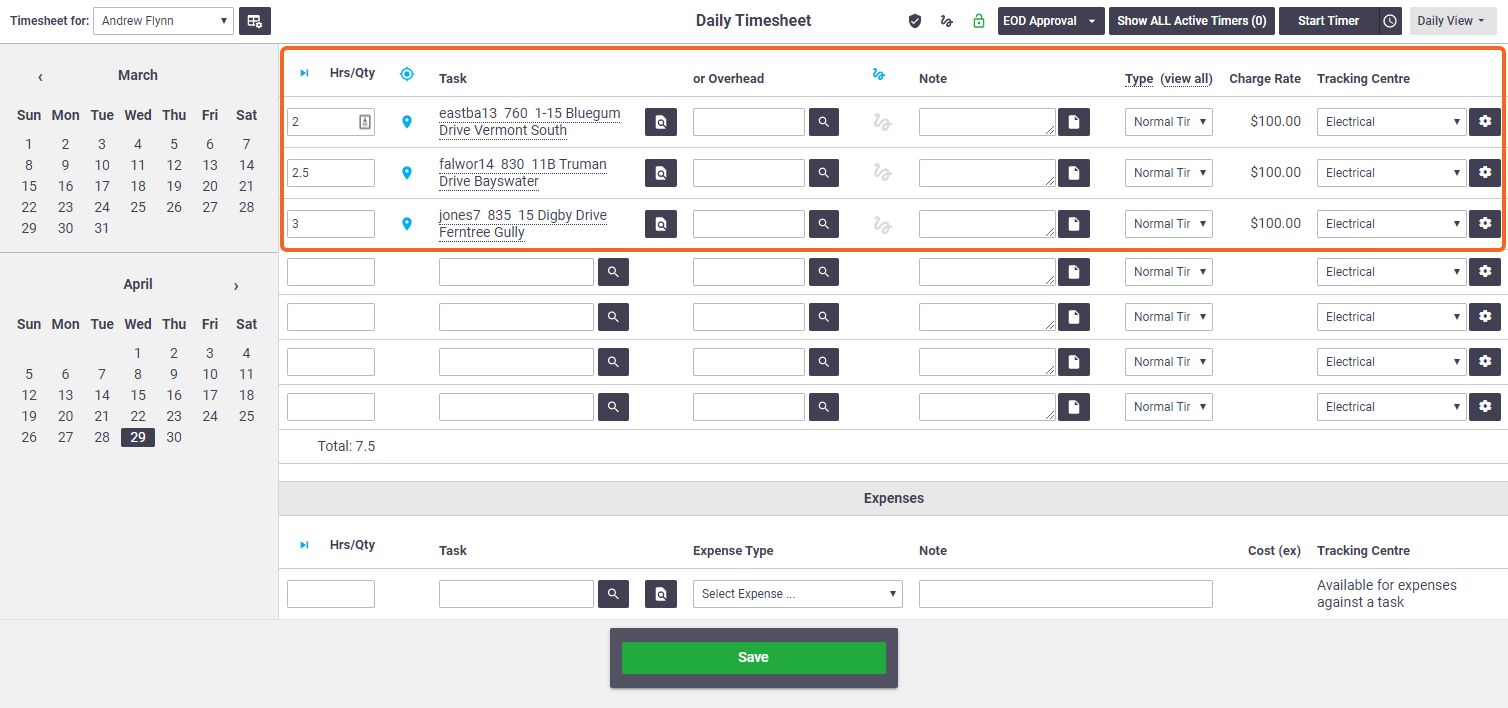
The Timesheets area is primarily used for recording non-productive time or reimbursable expenses as overheads.
This may include things like personal leave, public holidays, annual leave or travel reimbursement.
Recording labour on a job
Users can record task labour against a task in the Manage > Timesheets area, but we recommend that users complete this information on a task job sheet during each task.
Permission Groups
Managers and Supervisors can also view and add timesheets for other users. Site Administrators can enable this access for those in custom permission groups.
Custom Permission Groups
- Permission Groups > [Select permission group] > Users > Filters > Current User (set to unticked)
- Permission Groups > [Select permission group] > Timesheets > Fields > Users > View (set to ticked)
- Permission Groups > [Select permission group] > Task > Filters > Labour Created by or Assigned to User (set to unticked)
Record an entry using timesheet fields
|
 |
 |
Record an entry using the timer

Non-productive time vs productive time
The timer in the Manage > Timesheet view is used for recording an overhead (non-productive time).
To start a task timer (productive time), go to Workflow > Open. Start the timer from the Task Preview of the relevant task, or alternatively, open the Task and start the timer from the Worksheet or Labour Worksheet.
Start the timer
When you arrive at the event:
- Go to Manage > Timesheet. The Daily View opens.
- Select the user / resource from the Timesheet for dropdown list on the left.
- Click Start Timer on the top right of the screen. The timer will start. Elapsed time will be displayed on the button.

Stop the timer
Once you have finished at the event:
- Go to Manage > Timesheet. The Daily View opens.
- Select the user / resource from the Timesheet for dropdown list on the left.
- Click the elapsed time on the top right of the screen.
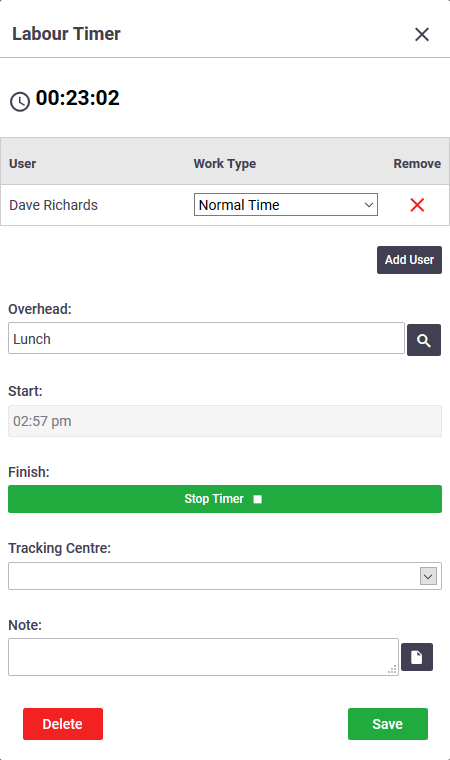
- The Labour Timer window will open. Click Stop Timer.

Create an entry from the timer
|
You can preset any details below (like the overhead and note) while the timer is still running. From the Labour Timer Window
|
 |
 |
View all active timers
|
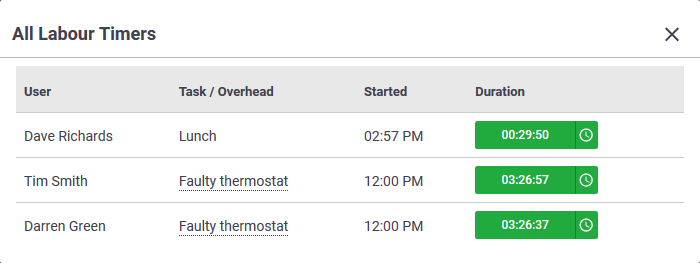
Managers, Supervisors (and those with permission) can also view active timers for other users.
|
 |
 |
|
From here you can stop a timer, create timesheet entries, or add other users to an active timer. Refer to the section above (Create an entry from the timer) for more information on the Labour Timer window. |
 |
 |
 to enter specific start and finish times.
 (magnifying glass icon) to select a Task or an Overhead.
 (pencil icon), then click
  , confirm the fields required for a timesheet entry: