AroFlo lets you create a range of email templates to achieve a consistent, professional look and feel to your emails and save you time. Set them up once and they're there for you to use whenever you need them.
Create an email template
Email templates can be created from various locations within AroFlo:
- Any screen that features Print Options.
- When setting up Event Messages
- Workflow list views that feature
 (envelope icon).
 - Client cards that feature an Email button (top right).
Where are you creating your email template from?
- Click Email
- Click Select Template… (or the name of the template, if a default has been set) and continue with the below instructions
- Click the magnifying glass
 to select a template and continue with the below instructions
- Click the envelope icon

- Click Select Template… (or the name of the template, if a default has been set) and continue with the below instructions
- Click Email (top right)
- Click Select Template… (or the name of the template, if a default has been set) and continue with the below instructions
- Click Add Template.
- Enter a Subject line for your template. This will become the subject line of the email when you apply this template.
- Click into the email body field and start typing your message.
Using data elements
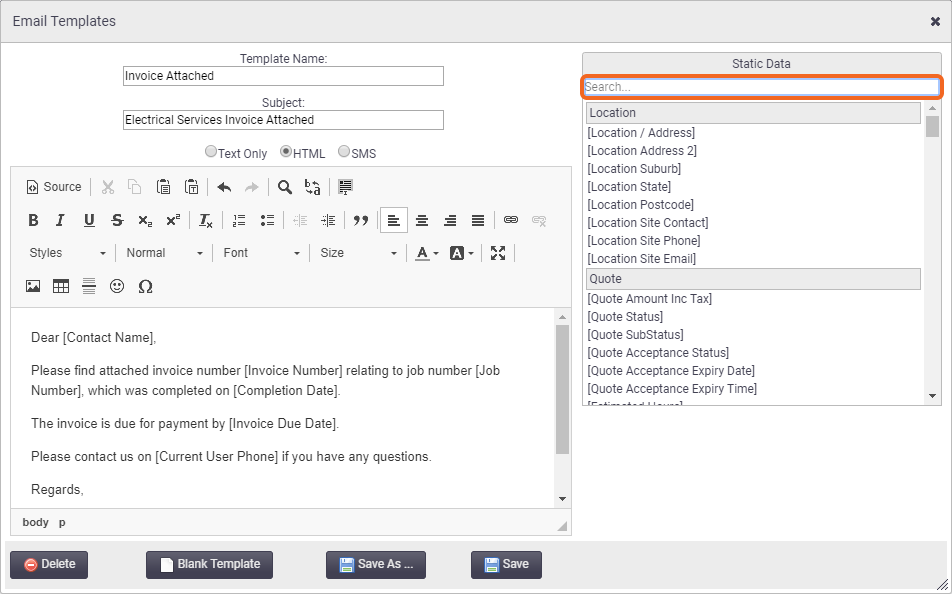
AroFlo lets you insert any of the information stored in your AroFlo site into your email templates by using data element fields. To insert a data element, place your cursor where you want the field to appear. Use the Static Data window and either scroll by category or start typing the field name in the search box. Click to select the field you want to insert. Data elements appear inside square brackets: [data field] within the template.

By default, the email body field is set to Text Only (i.e. plain text), but you can select HTML to open a text editor that allows you to format the text, insert images and apply your branding to the template. We recommend using HTML for certain data elements, e.g. Task and Invoice URL links, Online Quote/Invoice links, and Pay Now Links.
- When you've completed your message, click Save As.
- Enter a name for the template and click Save.
- To locate your new template: start typing the template name into the Name search field at the top, and double-click to select the template. If necessary, you can type over any of the details in the email body.
Edit an email template
- Go to the relevant area to view your list of email templates (see above)
- Select the template you want to edit and click Edit Template.
- Make the required changes and click Save.
- Alternatively, to make a copy of the template, click Save As…, enter a name for the template and Save.
Add Images to an email template
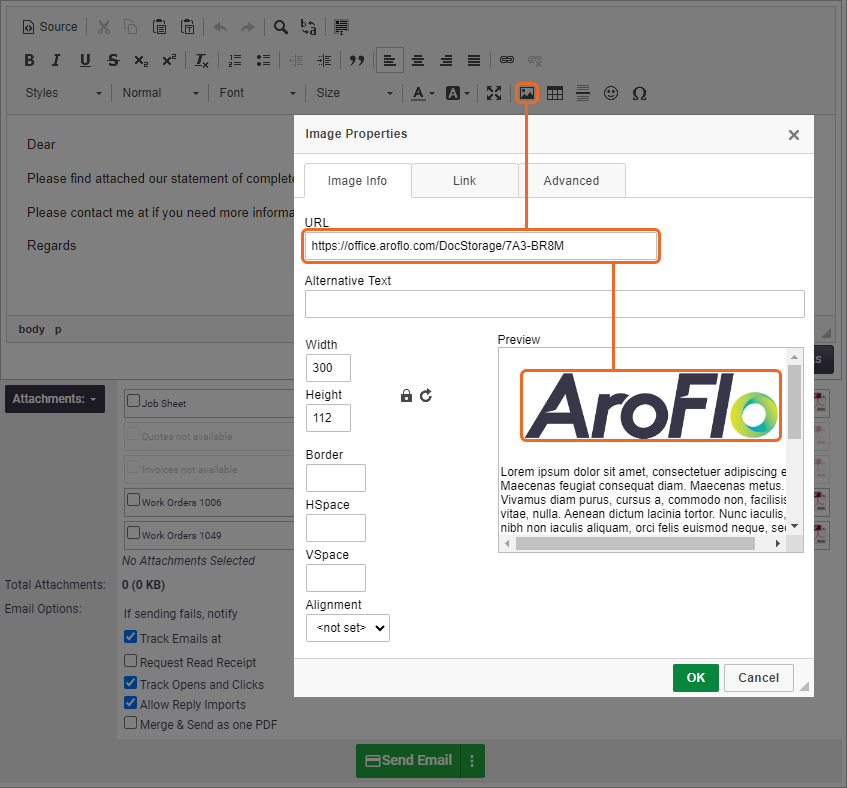
Add an external image
|
Before you begin You must have the image uploaded on a publicly accessible webpage to copy the address (URL). Then Right click on the image and select Copy Image Address You can also upload images to your AroFlo Document Directory and use a sharable link. See our video.
|
 |
 |
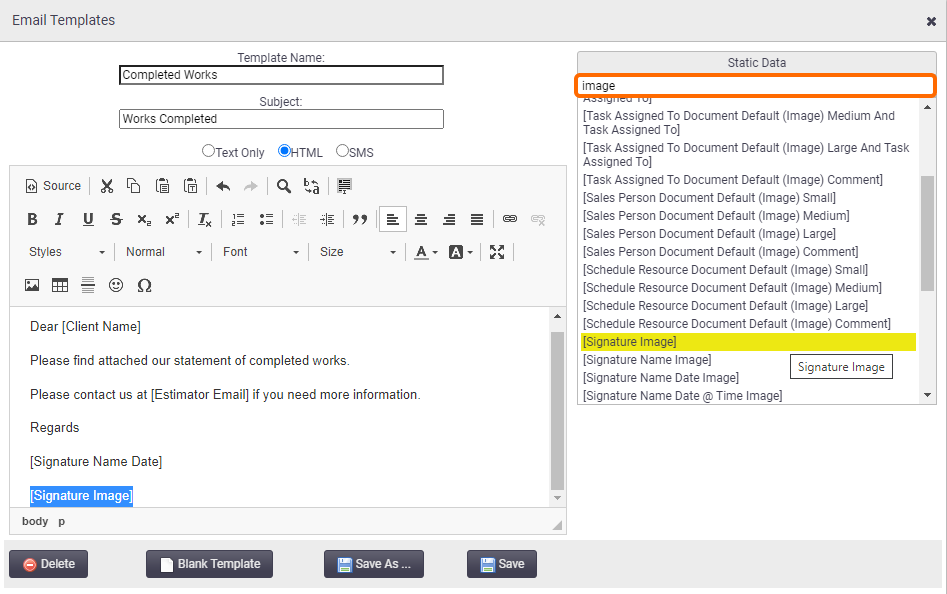
Add an image using static data
|
Email templates include Static Data Elements, allowing you to pull information out of AroFlo and display them in emails to save you from having to enter details manually.
|
 |
 |
Delete an email template
- Go to the relevant area to view your list of email templates (see above)
- Select the template you want to delete and click Edit Template.
- Click Delete and confirm deletion.
Set default email templates
Print and Email Default settings allow you to preset email templates across various areas in AroFlo. Set default templates on invoices, quotes, tasks, purchase orders, compliance forms, supplier quotes and credit notes.
To set default templates:
- Across a company/business unit, see Print and Email Layout Defaults.
- For a client, see Client Print and Email Defaults.
- For a supplier, see Supplier Print and Email Defaults.
- For a contractor, see Contractor Print and Email Defaults.