The document directory functionality is only available if you have Document Storage enabled for your AroFlo subscription.
To find out more or to activate this feature, please call AroFlo Customer Support or log a support request.
AroFlo's Document Directory is a repository for those documents and photos that you need to use regularly, e.g. terms and conditions, pricing schedules, info sheets, and product photos.
You can build a folder structure for easy access to your files, and you can easily add to your directory.
See Manage Documents and Photos for information on all other options for documents and photos including renaming, downloading, sharing and setting document visibility.
The Document Directory is available from within any area that has the Documents & Photos tab:
|
|

The Document Directory is for documents and photos that are not specific to a particular record (e.g. task, client).
To upload items specific to a particular record, see Manage Documents and Photos. Items uploaded to a specific record will remain only within that record; they will not appear in the Document Directory.
Upload files to the Document Directory
To upload files to the Document Directory, go to Manage > Documents.
- Click the folder you need or create a new folder.
- Click Add Documents & Photos then either:
- click Upload, to search and attach from your file system
- drag and drop files into the Drop Files Here box
- paste an image
- click Take Photo, to take a photo of the document and upload it automatically.
- Click Done.

Folder structure
See Document Folders for information on creating folders and sub-folders, and moving files to folders.
All Folders
The Document Directory is read only when using the All Folders option, which means certain actions will be unavailable. Ensure to select a folder if wanting to:
- Add files
- Rename files
- Add comments
- Change document visibility
- Drag items to other folders
- Delete files
- Use the Bulk Actions or Download All features.
see Manage Documents and Photos for information on the above.
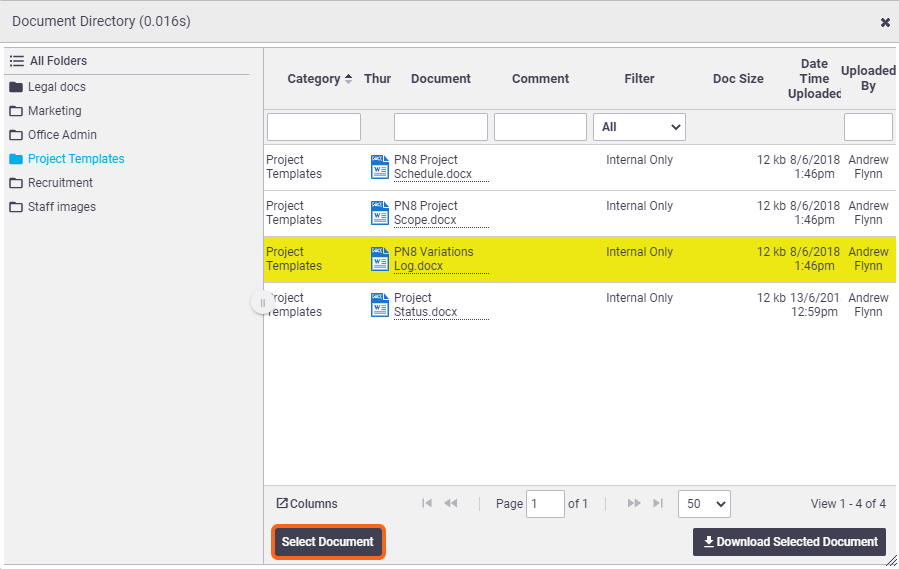
Attach a file from the Document Directory
|
To attach a Document Directory file to a record, such as a task:
Clicking on the document name opens a preview or copy of the file. To highlight the file, click on any field other than the document name.
|
 |
 |
Deleting DocumentsIf you no longer require a document in the directory, click the |
 |
 |
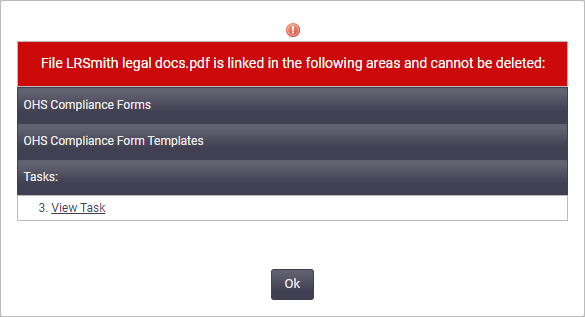
Archiving DocumentsIf a document from the directory has been attached somewhere, e.g. uploaded to a task, compliance form, or linked to a compliance form template, you won't be able to delete the document and you'll see the error message on the right: If this happens, archive the document:
View archived documents To display archived documents, select Archived from the dropdown box at the top right. Alternatively, if the document has been uploaded to a task, click the View Task link, delete the document from the task and Save, return to this screen and you'll be able to delete the document from the directory. |
 |
 |
 (red rubbish bin) > OK.
 (columns displayed) and tick Archive > Ok