|
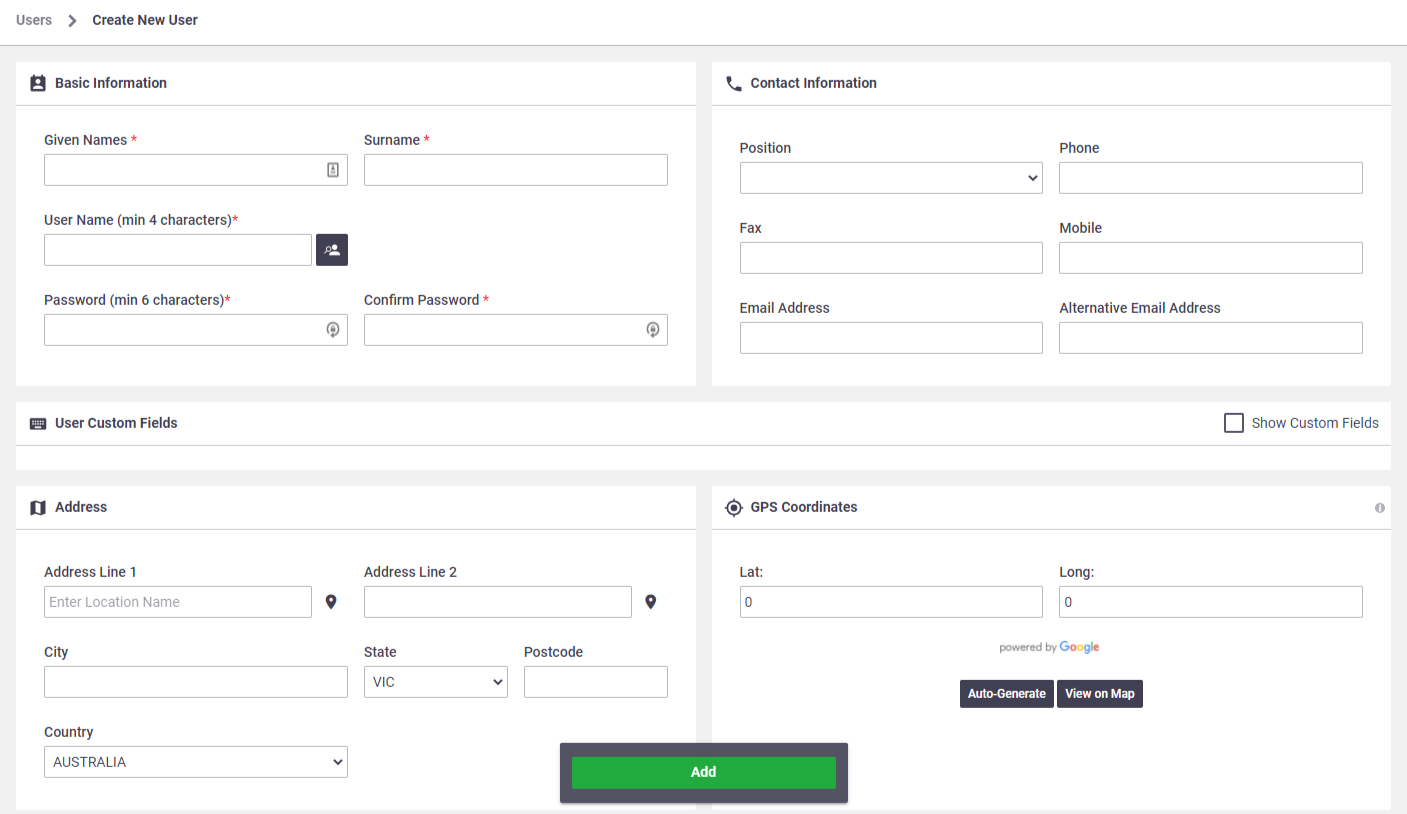
Site Administrators can choose to add users manually or email invitations to multiple prospective employees at once using our convenient User Invites feature. To add a user manually:
|
 |
|
Interested in learning through an interactive course in the AroFlo Academy?
Description of fields
| Field | Description |
|---|---|
| Given Names, Surname | Enter the user's full name. |
| User Name | Enter a username (min. 4 - max. 36 characters) and click the Check Availability button to ensure it is a unique username. Special characters such as @ # $ % [ ] " ' - are accepted, which allows for email addresses to be used as a username. |
| Password, Confirm Password |
Enter a password and repeat to confirm the password. Password complexity AroFlo passwords must be at least 8 characters with 1 number, 1 letter, and 1 special character. |
| Position | Select an appropriate position from the list. |
|
Phone, Fax, Mobile, Email Address, Alternative Email Address |
Enter contact details. Mobile and email address are used for system-generated notifications, including Event Messages. |
|
Address Line 1, Address Line 2, City, State, Postcode |
Enter user's address details. |
| GPS Coordinates | Click Auto-Generate to capture GPS coordinates of the address. This information assists with making decisions on job-runs, scheduling commitments and resource management. |
If you have Custom Fields set up for users, you can tick Show Custom Fields to fill out these fields. Alternatively, this can be done later.
Enter the user settings
Fill out the user settings using the tabs. You may skip this for later, but you must set up the user's permissions.

Settings
This information is used for profit and loss reporting. Complete the fields as described in the table below.
| Field | Description |
|---|---|
| Hourly Cost Rate | Record the user's hourly cost rate for calculating profit and loss. |
| Valid From | Updates all labour entry costs for the user from this date. Note: When entering a new hourly rate or overhead rate, this is the date it is valid from. When saved, the system will update all labour entries from that date to the current date. |
| Overhead Rate | Record additional costs which are only used during normal time. This is commonly used to include operational costs with the user's hourly rate (e.g. mobile phone or car leasing costs) for calculating profit and loss. |
| Labour Tracking Centre | Used for categorising or grouping labour recorded for this user for reporting purposes. For more information, please refer to Tracking Centres. |
Overhead rates
Your business may use one of two approaches for recording an overhead rate:
-
Consistent team size (Divide total business overheads equally per user)
Your business model may be to remain at a consistent team size. For this you could calculate all of the business overheads (insurance, vehicle maintenance, office staff, etc) and divide that to an hourly amount. Using this method, reports will be more meaningful for the business overall. This only works if the user count does not change. Once you add or reduce staff then the overhead amount needs to be recalculated and re-applied to all users in the business.
-
Variable team size (Direct overhead expenses per user) *Preferred.
If the business is planning for growth then it is best to look at the business expenses directly related to each individual. These could include (but are not limited to) sick leave, annual leave loading, vehicle maintenance and insurance, etc. Reports will then be closer to true actual costs for that individual. This is a perfect way to review performance as these are the costs incurred for that person.
How AroFlo calculates labour costs
Normal time: Hourly rate + overheads
Time and a half: Hourly rate x 1.5 (no overheads)
Double time: Hourly rate x 2 (no overheads)
Your overheads do not change if the employee works more than their standard week (therefore they do not apply for overtime).
For information about setting the hourly rates that will display on your quotes and invoices, see Work Types.
User Permissions
The level of access a user has is controlled via Permission Groups.
- Click Add User to Group.
- Select the permission group that matches the user's duties.
Pre-Built Permission Groups
There are three pre-built permission groups that you can either use as they are, or use as templates to create your own permission groups. They are Management, Supervisor and Worker.
- Click Add to User.
See also Add User to a Permission Group.
Feature Access
The Feature Access tab gives you further options for controlling staff access to certain information (e.g. pricing details), and for configuring what a user will see in AroFlo. You can also set up AroFlo Field tracking in this tab, and give a user Site Administrator Access.
Refer to Feature Access Settings for more information.
Landing Business Unit
This Feature Access setting is only available when editing a user.
Click Add to finish creating the user.
Once the user has been created, you will have more options available to edit the user such as setting up Multi-factor Authentication (MFA), uploading documents, setting up the user's hours of work, selecting resource zones, and resetting a user's password. See Edit a User for more information.