AroFlo provides a couple of different GPS tracking options that provide Field users with instant access to their daily tracking information. Locations captured are used to determine the duration of time spent on a job, and travel time between job locations.
A detailed timeline of the user's movements throughout the day can be viewed in a GPS timesheet on a Task or Quote, or via Menu > Timesheet. Users can choose to accept or edit start/finish times of GPS locations before adding to labour on a task or quote, or overheads such as travel time or personal leave.
The benefits of using this feature include:
- Automated timesheet entries and job costings using GPS data.
- Office staff have access to user GPS information within staff timesheets.
- GPS tracking can be restricted to individual users.
Connecting GPS tracking
Connecting user GPS tracking is an administration function that requires access to Site Admin. Please contact your Site Administrator for assistance. For more information, see Setting up GPS tracking and AroPoint GPS.
Assigning asset to user
Before using this feature, you need to assign the asset doing the tracking to the user.
Field tracking
If using Field tracking, this should already be done for you. See Set up AroFlo Field tracking.
Device tracking
If tracking a GPS or mobile device, assign the asset to the user by:
- linking the asset to the user via the user card, or
- linking the user to the asset via the asset card.
Should I use GPS Timesheets via the Timesheets area or via a Task/Quote?
Which of the following best describes your workflow?
If you're doing timesheet entries as you go about your day, doing this via tasks or quotes would be the easiest way to do this.
This will also prefill the task information with the task or quote you're working on, when matching GPS entries.
- On a Task, tap Labour > GPS tab.
- On a Quote, tap Time Spent > GPS tab.
If you're doing timesheet entries at a later stage and matching up entries with past jobs, then doing this via the Timesheets area instead is ideal.
Working with Quotes?
If matching up timesheet entries for quotes, you will need to do this from the Quote worksheet.
Go to Menu > Timesheet > GPS tab.
View GPS locations
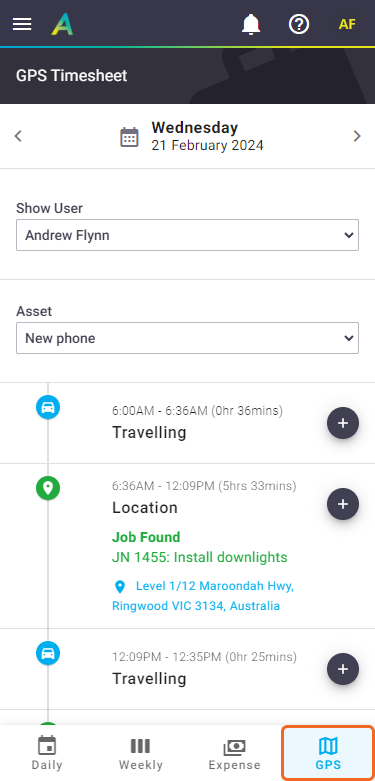
Match a single GPS entry to a timesheetIf AroFlo finds a task/quote or client location that matches the user's GPS location, the job number and task name will be displayed in green. Tap the location info (in blue) to open the location using your default Maps application. To match a GPS entry to a task/quote labour timesheet:
|
 |
 |
Unmatched locations
|
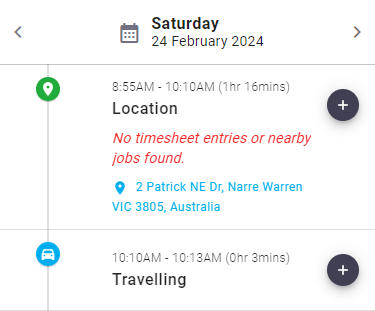
If AroFlo can't find a task that matches the GPS location, or if there are no timesheet entries found, the GPS entry will be displayed as 'No timesheet entries or nearby jobs found'. To match an unmatched GPS entry to a timesheet for task labour or overheads:
The timesheet information including the start/finish times will display in green on each applicable GPS entry. Click on the entry to edit/delete it. |
 |
 |
Merge multiple GPS entries into timesheet
|
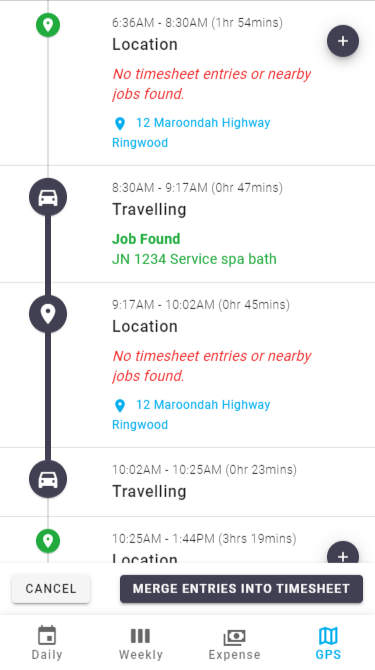
If there are multiple GPS entries relating to the same task, or an overhead, they can be merged to create a single timesheet entry. This is ideal if you want to combine travel time and on-site times into a single labour record for invoicing total hours inclusive of travel time.
|
 |
 |
 (plus icon).
 to select the relevant Task this entry belongs to
 (plus icon) on the GPS entry.