Scheduling a Quote
The below instructions have been written from the perspective of scheduling a Task. Scheduling a Quote is done in exactly the same manner as described below but from the Quote Worksheet, or Quote List.
There are two exceptions to the below instructions:
- The Schedules tab says Schedule
- Schedules are still displayed on the bottom of the quote worksheet, but there is no ‘Upcoming Schedules’ wording.
|
There are four ways to schedule a task in AroFlo Office:
|
 |
 |
Task worksheet - Upcoming Schedules
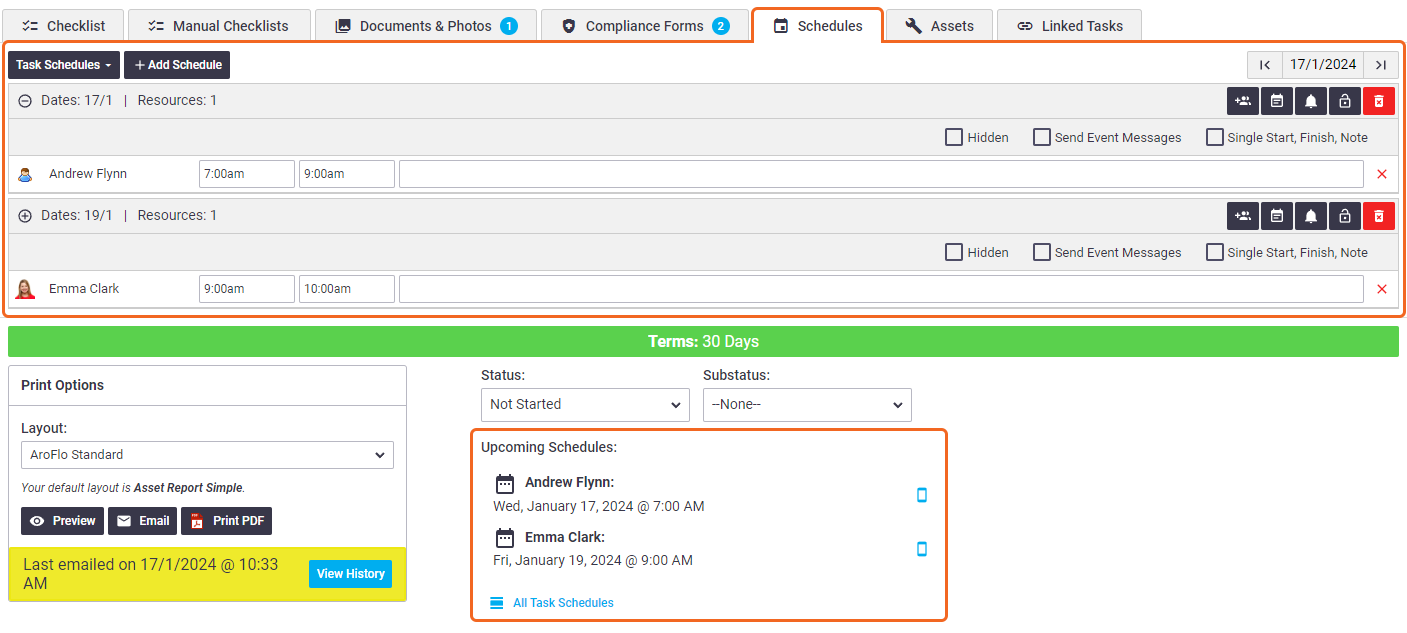
The easiest way to schedule a task is from the Upcoming Schedules section on the bottom of the task worksheet.
Click Create Task Schedule to open the task schedule in the Calendar.

From here, you can add resources to the schedule, change the date, add additional schedules, etc.
Task already scheduled?
If the task has already been scheduled, you'll see a list of upcoming schedules and the Create Task Schedule button will say All Task Schedules (see top image, above). You can still use this to schedule to more resources, create further schedules, etc.
Current Task List
|
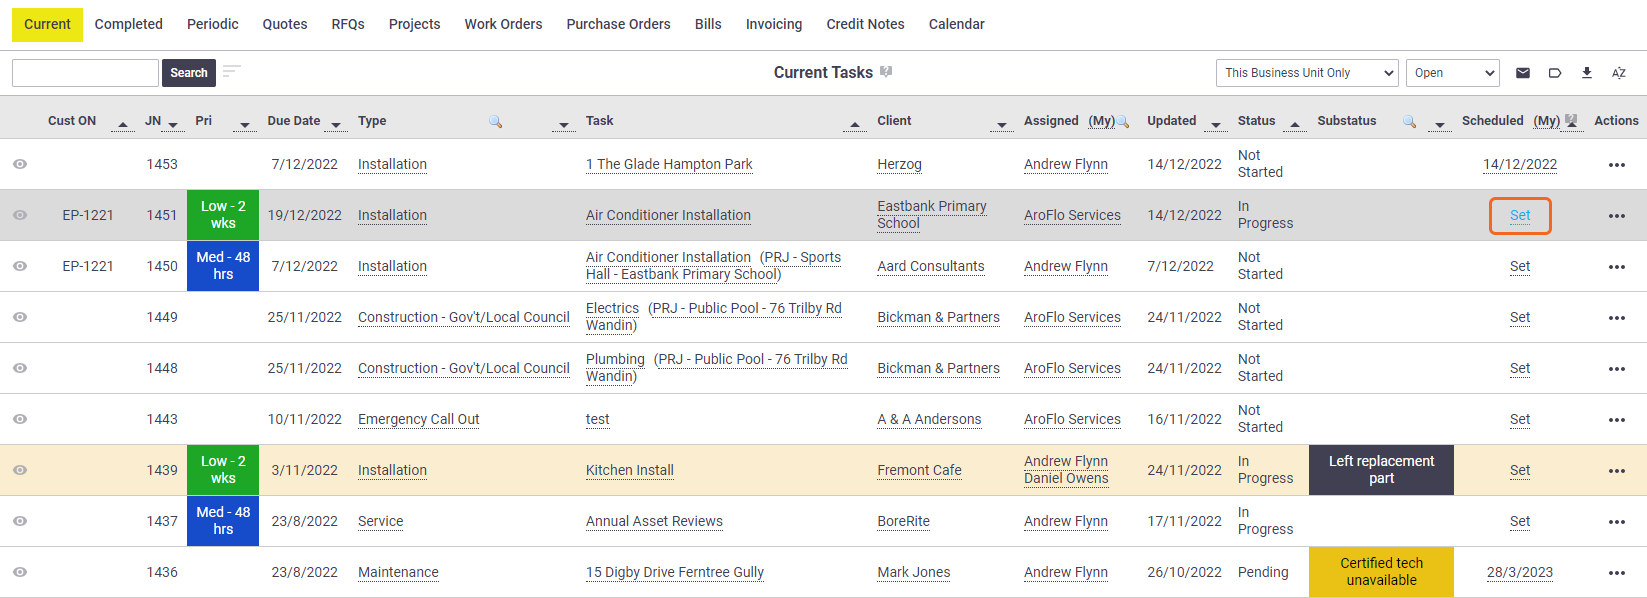
You can also schedule a task via the Current Task list (Workflow > Tasks > Open). From the Scheduled column, click Set. This will also open the task schedule in the Calendar. Task already scheduled? Similar to above, if the task has already been scheduled, the next scheduled date will appear in the Scheduled column (see image). Click this to access the schedule window where you can edit the schedule if necessary. |
 |
 |
Task worksheet - Schedules tab
The Schedules tab on a task worksheet is mainly designed to view task schedules and timesheets, but you can also create and edit schedules from here.
- Click Add Schedule
- Click
 (people icon) to add resources to the schedule
 - Adjust the start and finish times for each resource and add a note (optional).
- Click
 (calendar) if you need to change the date(s) for the schedule
Multiple dates
Use Ctrl+click to select multiple dates.

- If you need to add multiple schedules for this task (e.g. two resources on one day and another resource on another day), click Add Schedule again and repeat the above steps.
- Easily edit a resource by clicking the
 (pencil icon) beside their name (see image).
Save Task once you've finished adding and/or editing schedules.
You can also view Task Timesheets from here. Click Task Schedules to the left of Add Schedule to switch between Task Timesheets and Task Schedules.
Via the Calendar
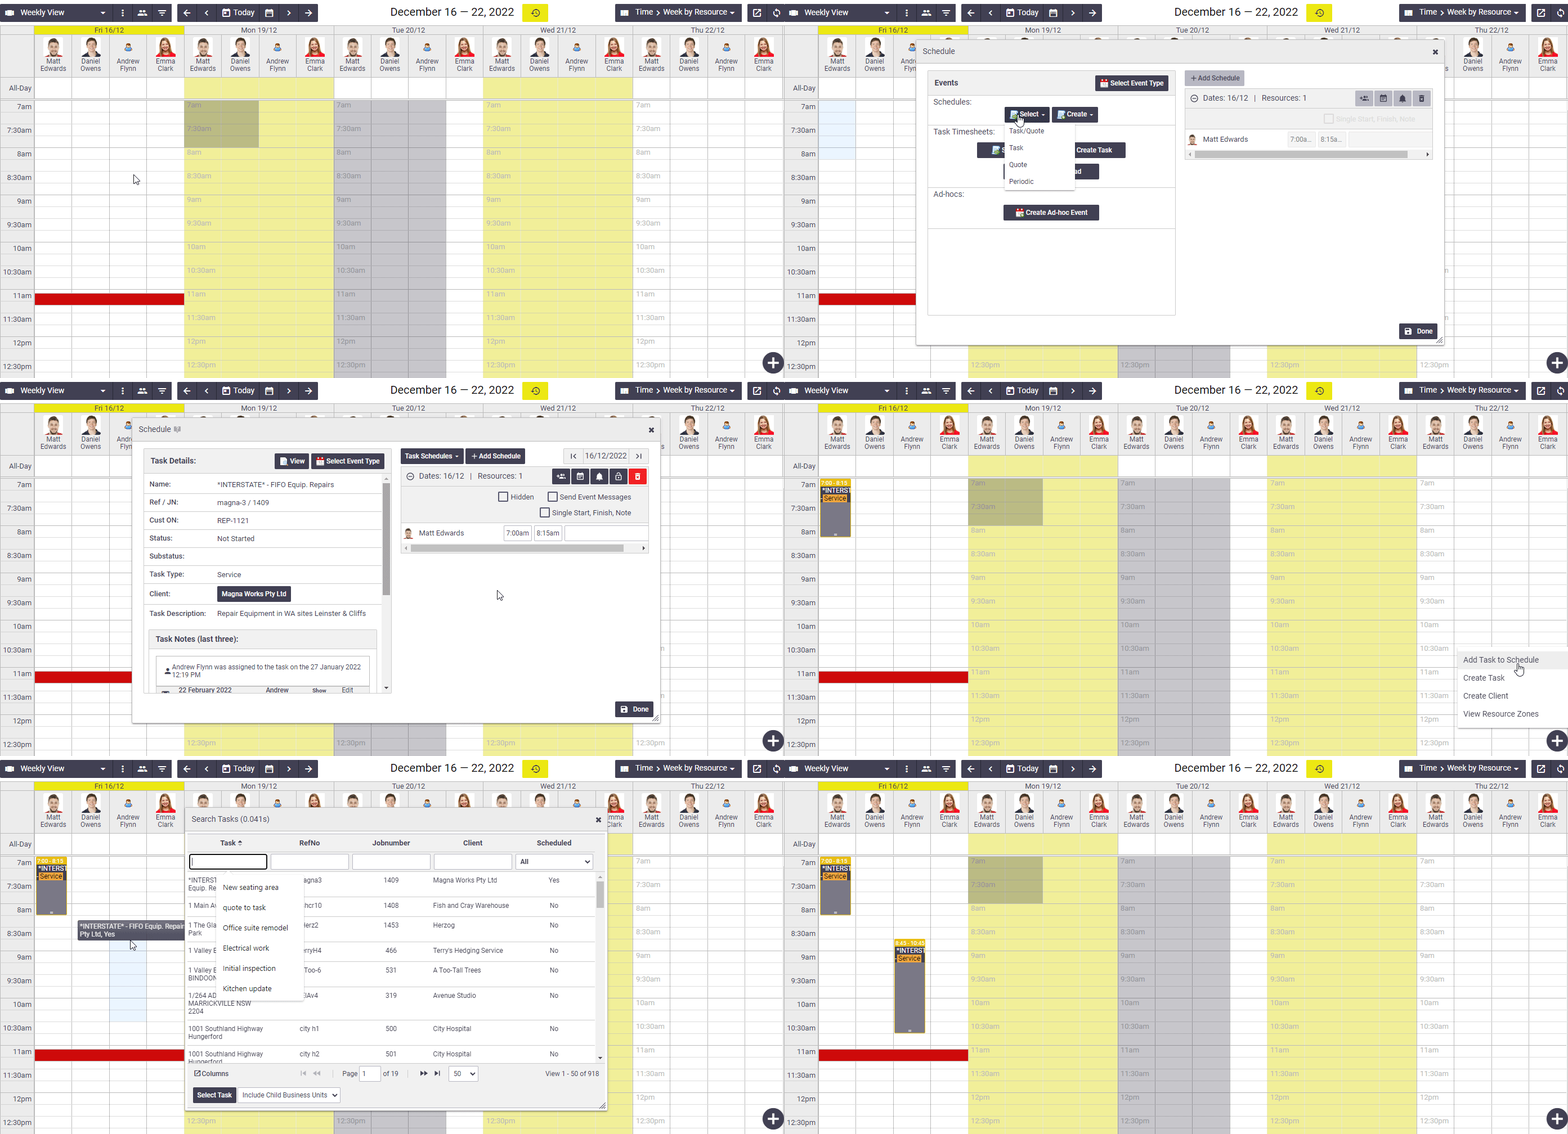
You can also schedule tasks via the calendar, either by blocking out time on the calendar and selecting a task, or by using the drag-and-drop method.

See Schedule an event - Schedule via the calendar for complete instructions.