Request for Quotes allows you to send a list of items to multiple wholesalers or contractors in order to get the best price.
The main steps in creating RFQs are:
- Select the RFQ Type (Supplier or Contractor)
- Select the suppliers or contractors that can respond
- Add Items to be quoted (or to be accepted with your rates)
- Set a supplier per item (if required)
- Send the RFQ to the selected suppliers / contractors.
Create an RFQ
An RFQ can be created from a Quote, Task, or using the Create menu.
Typically RFQs are sent from a quote, so you can get the best price from wholesalers or contractors before quoting your client.
- Open the related Quote or Task Worksheet
- For quotes, go to Workflow > Quotes > In Progress > [select required quote]
- For tasks, go to Workflow > Tasks > Open > [select required task]
- Click RFQs (0) in the Job Cost area.
- Click Create Request for Quotes.
You can create a Supplier RFQ via Create > RFQ. This is best for general stock.

Select RFQ Type
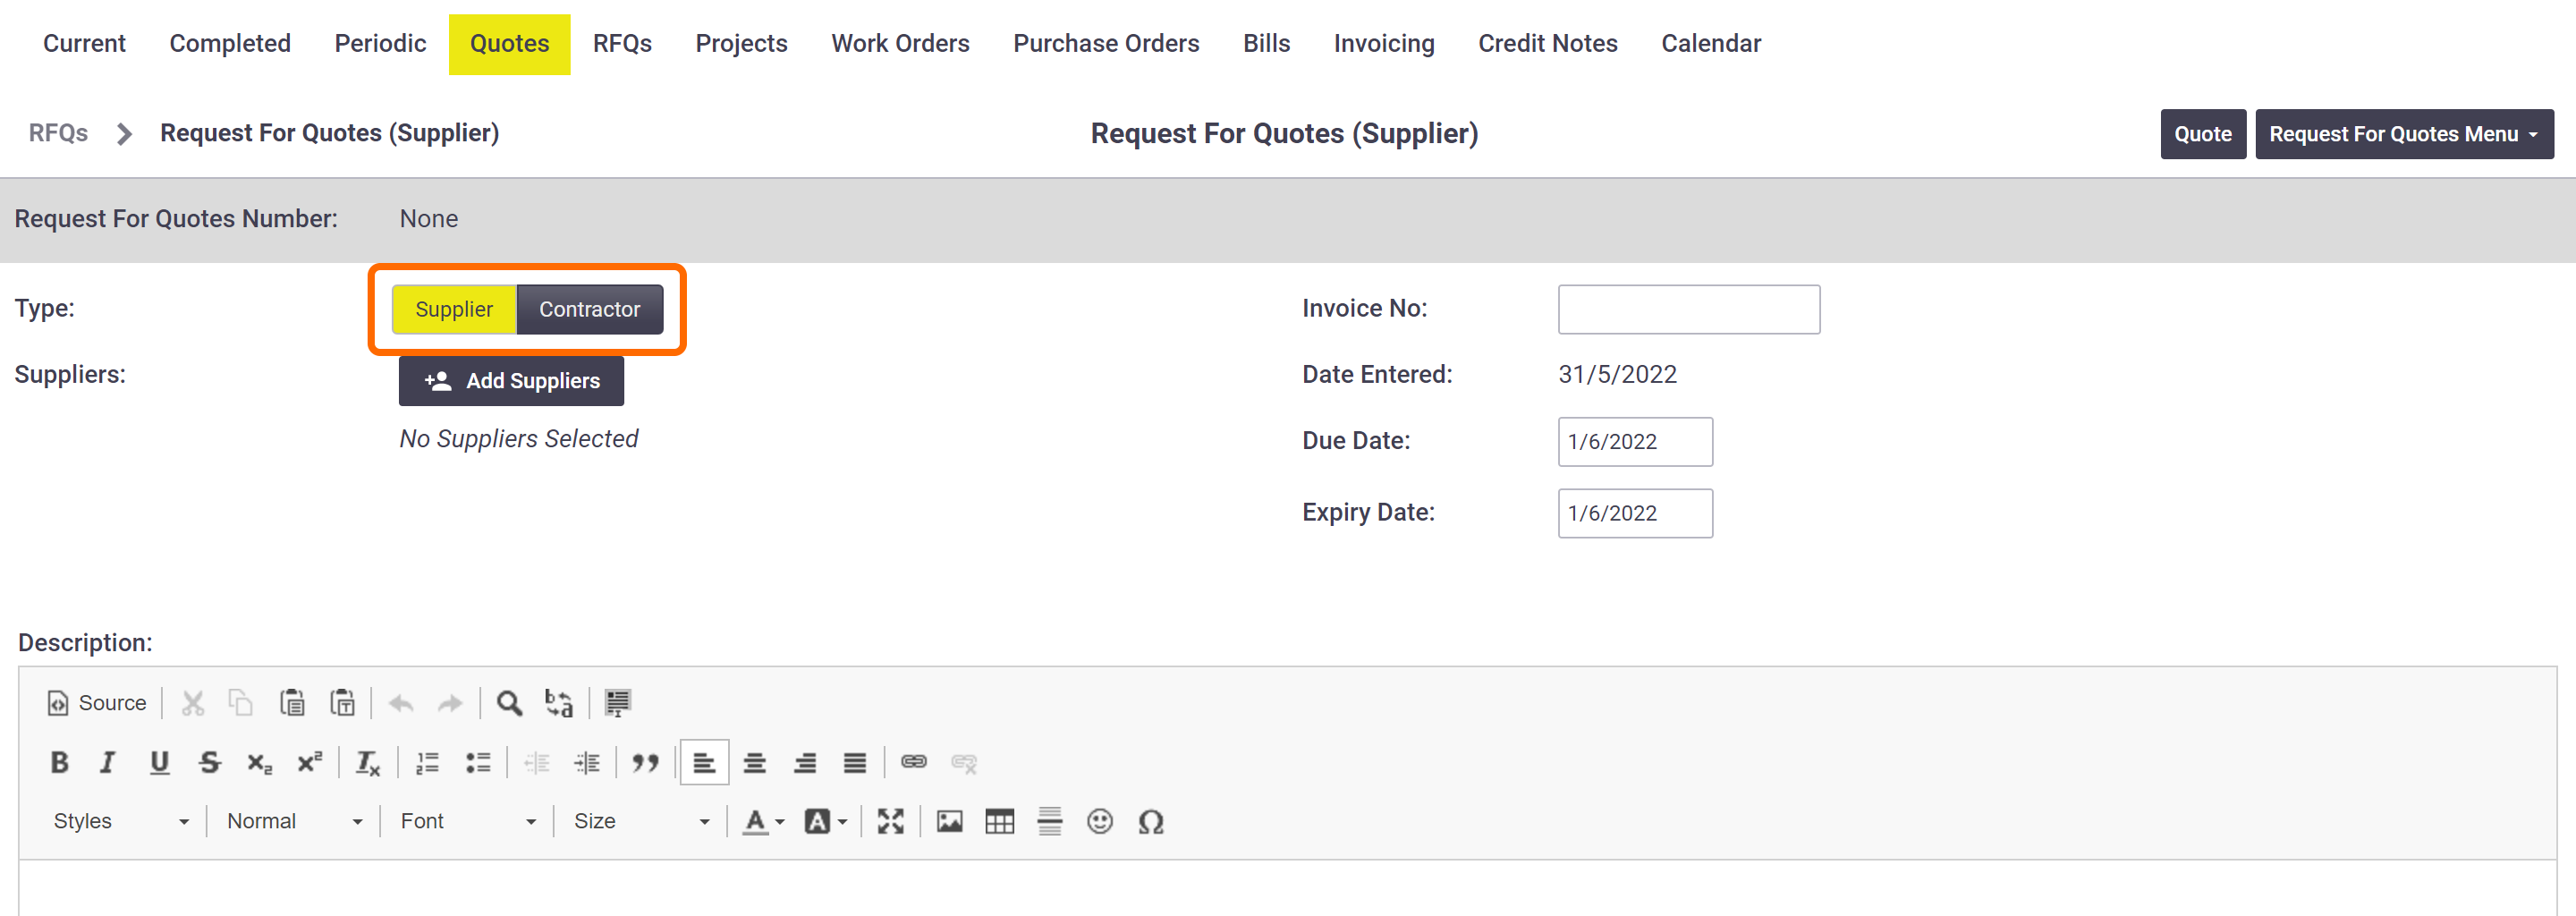
Once you have created a Request for Quote, you need to select the RFQ Type.
Do you need labour?
Create a Supplier RFQ
Create a Contractor RFQ
| RFQ Type | What are your requirements? | Further actions |
|---|---|---|
| Supplier RFQ | I'm looking to get the best price for material items. | You can then generate a Purchase Order if the price is right. |
| Contractor RFQ | I need labour or contractors to supply and install. | You can then generate a Work Order upon agreement. |
Creating an RFQ from Create > RFQ only allows for Supplier RFQs as they are not related to a Task or Quote.
Select Suppliers and Due Dates
- Depending on the RFQ Type, click Add Suppliers or Add Contractors.

-
Tick the recipients that will receive a request to quote. Click the x once done.
Supplier RFQs display both Suppliers and Contractors.
Contractor RFQs only display Contractors.
- Enter the Due Date (when you need the materials or service delivered) and Expiry Date (when you need the responses).
- Enter any Description if required. These can be used on your RFQ Layout if desired.
Description Templates
You can also use Description Templates here, including ones from other areas, e.g. Work Order descriptions.
Add Items
If you created the RFQ from a quote, you can add Quoted Items. Alternatively, you can add new Ad-hoc Line Items or existing items from Inventory, Task Specific Lists or from Supplier Catalogues.
Ad-hoc items
|
Adding ad-hoc items is generally used for materials not in your inventory.
|
 |
 |
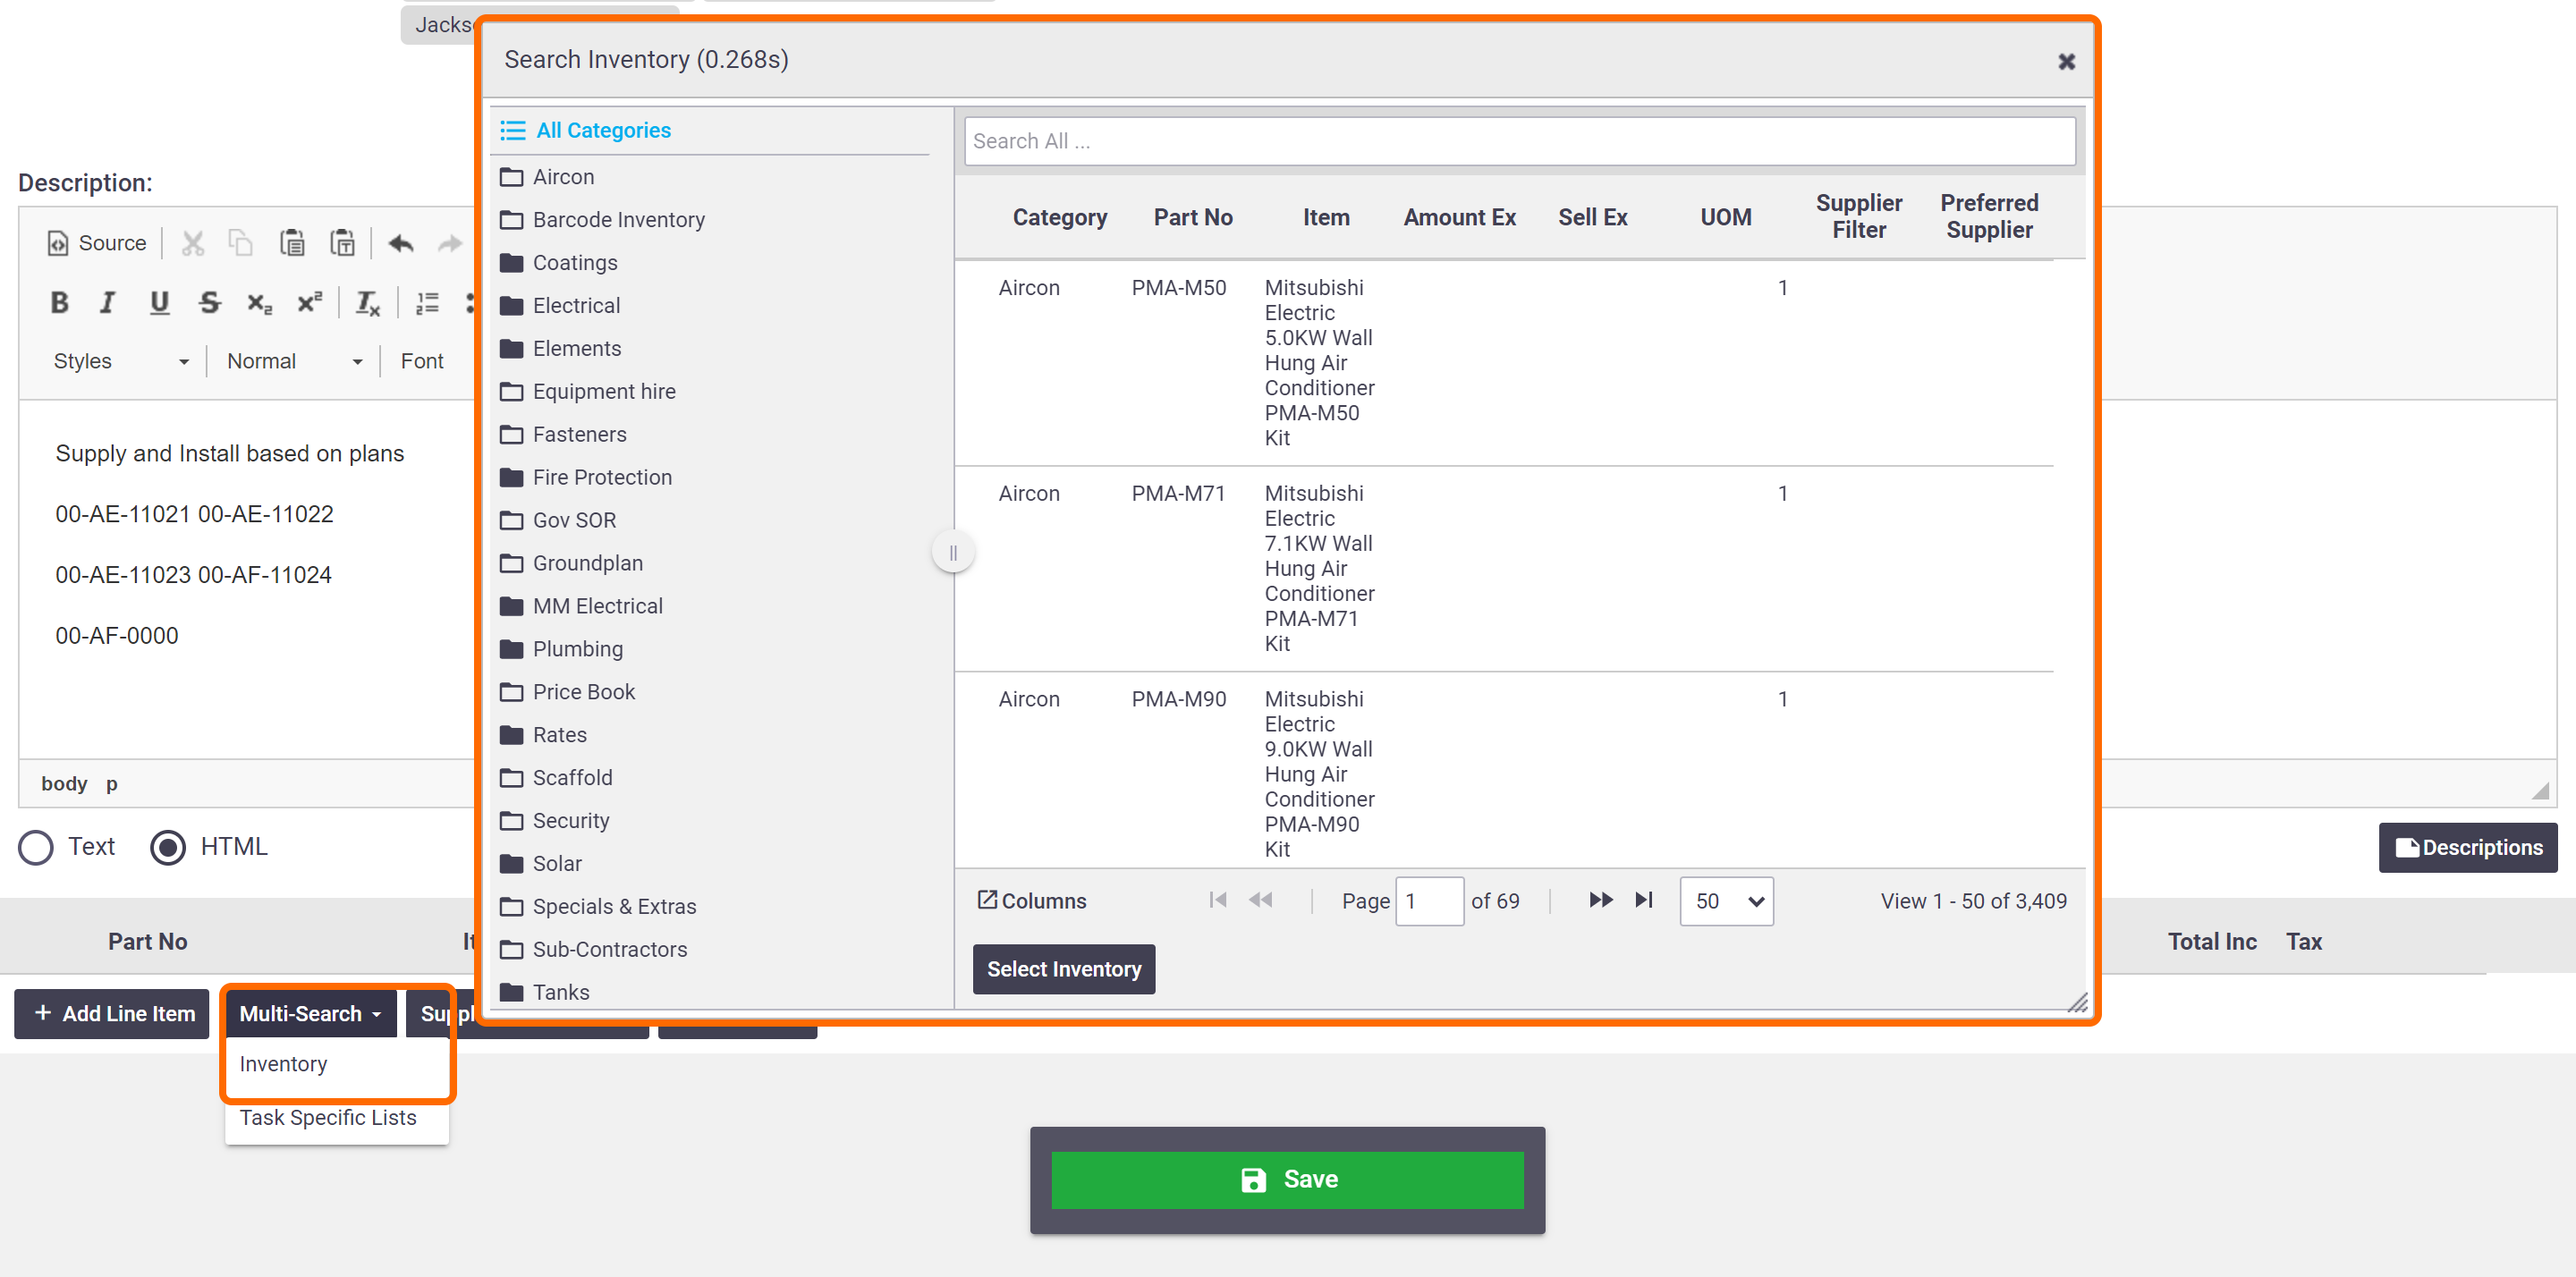
Inventory items
|
To add items from your inventory:
|
 |
 |
Supplier Filters
| You can also filter the list to display only items with suppliers added to them/preferred suppliers using the supplier filter. Alternatively, you can search by preferred supplier. Read more about preferred suppliers. | 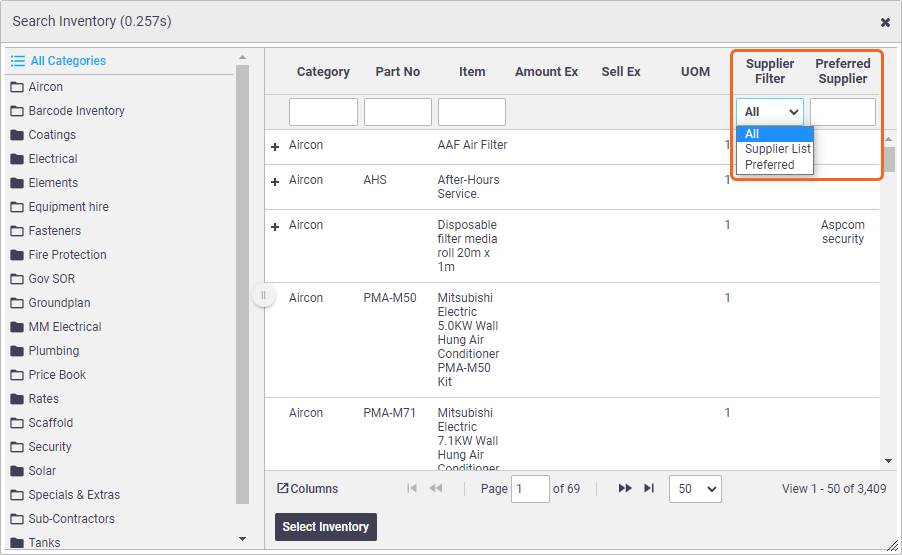 |
 |
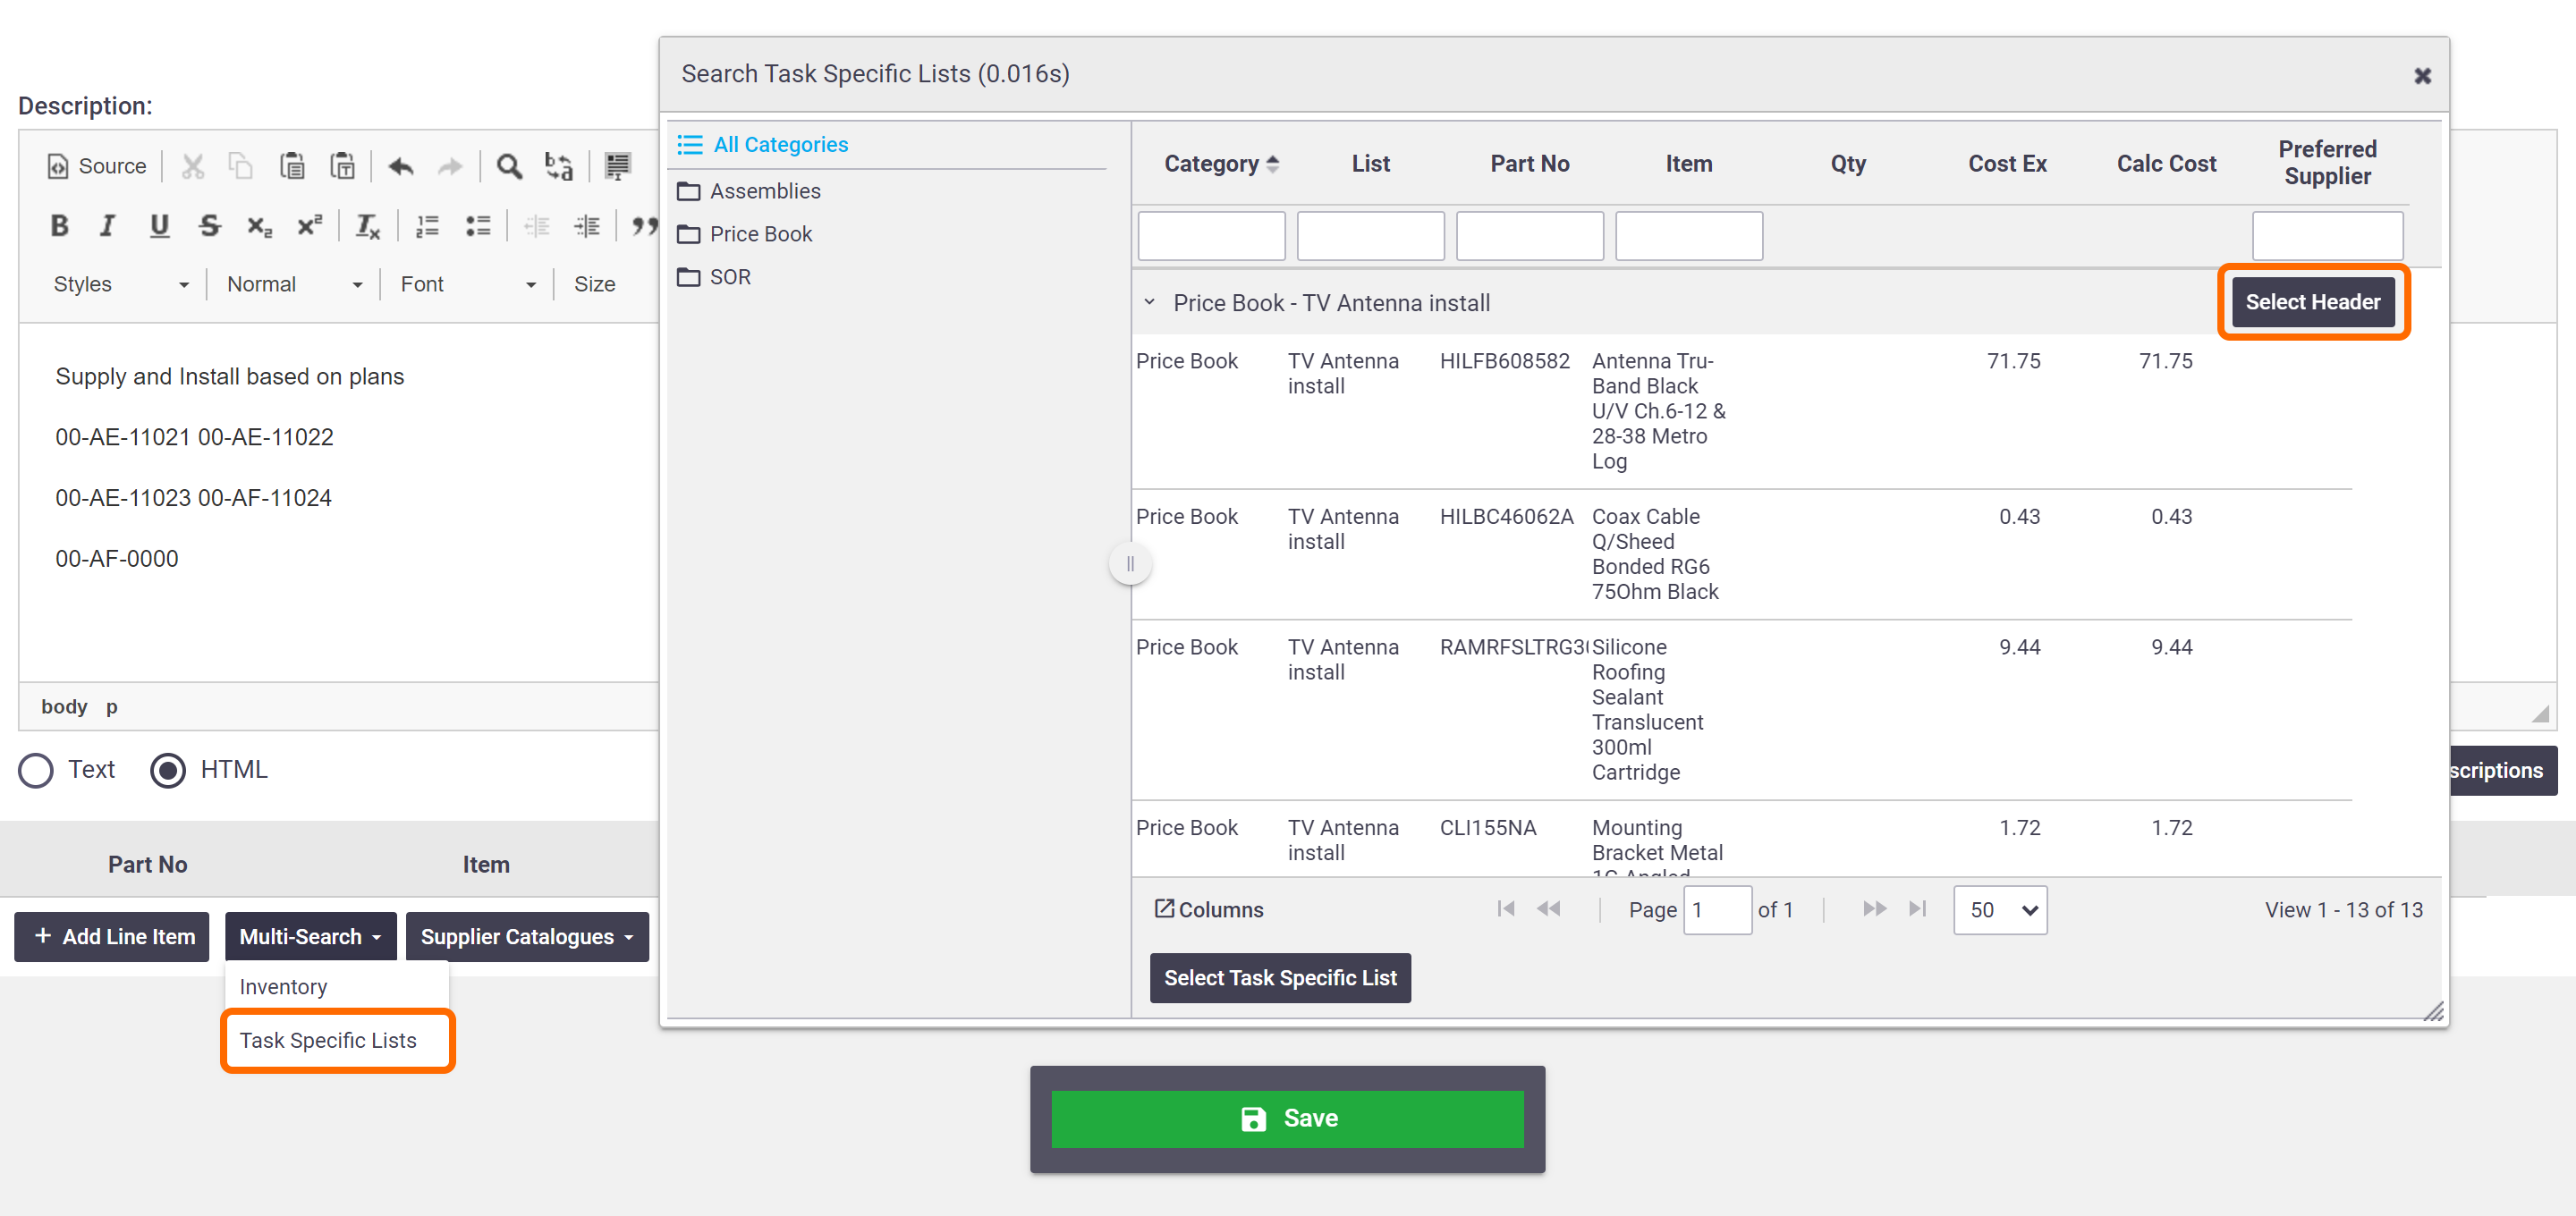
Task Specific Lists
 are ideal if you have a Schedule of Rates for your project. To quickly add multiple items from a task specific list:
|
 |
 |
Supplier Catalogues
The Supplier Catalogues menu allows you to access supplier online catalogues from within AroFlo and import items you've added to the 'cart' directly to your invoice. For more information, please refer to our help guide for using supplier catalogues.

Quoted items
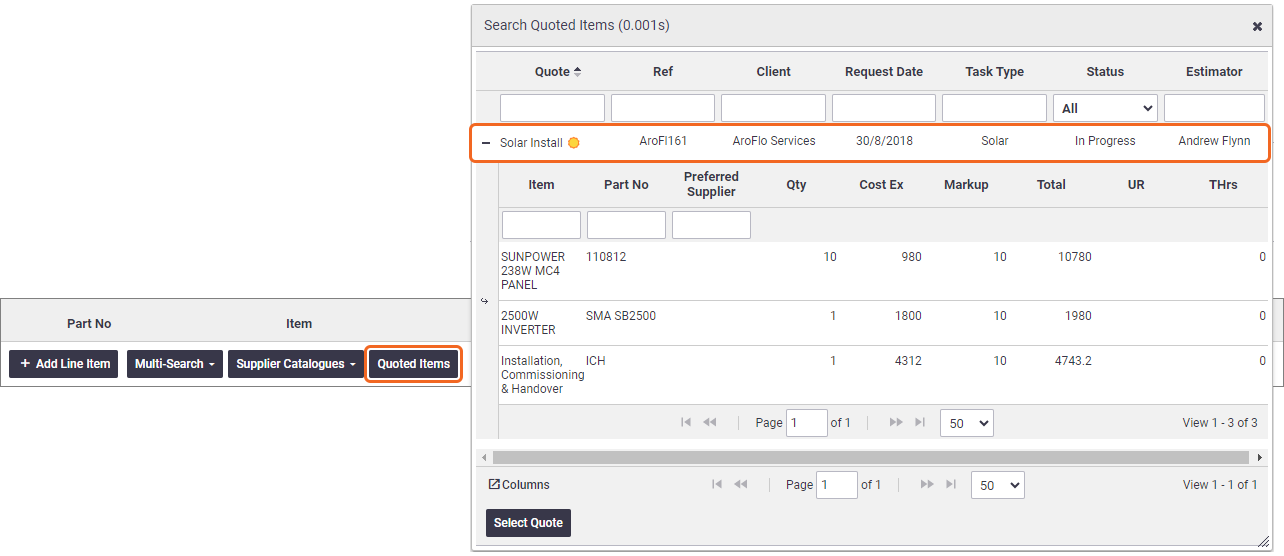
If creating a RFQ from a Quote, you'll have the option to add the items from your quote:
- Click Quoted Items
- From here you have two options:
- To add all items from your quote, double-click the Quote header line
- Alternatively, to pick and choose items from the quote, expand the quote items by clicking the plus button on the quote header and double-clicking each item you want to add.
Detailed Quotes
If working from a detailed quote, your items will be categorised by takeoff sheets. Double-click a takeoff sheet header to only add the items from that takeoff.
- Click the x once done to close the window
- Your quantity for each item will come across from the quote but you can edit these if needed
- Save your RFQ.
Set Suppliers per line item (if required)
If you want a specific supplier to only quote on a particular item in the quote, click the  (magnifier) to the left of the item and select the supplier from the Search Suppliers window by double-clicking.
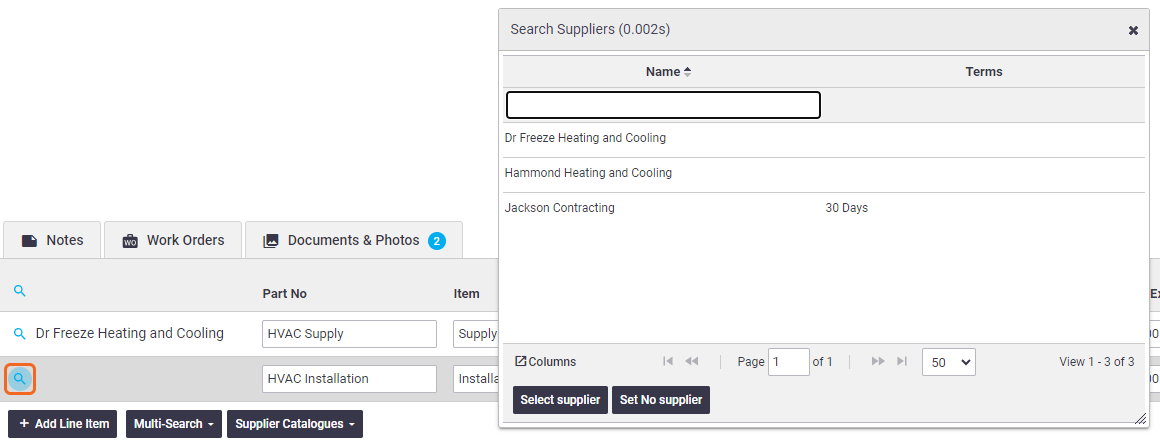
Selecting a supplier for a particular line item blocks any other suppliers who are listed on the request from seeing that line item. In the example above:
- Dr Freeze Heating and Cooling will receive a request to quote for both line items
- The other supplier(s) listed will receive a request to quote the second line item only.
Preferred Suppliers
If your inventory items have existing preferred suppliers set, the preferred supplier will be automatically listed with the item and added to the list of RFQ suppliers.
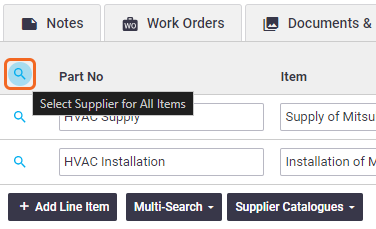
Selecting one supplier for most items
|
To select the same supplier for all items, click the top magnifying glass icon. If you want one supplier for most of your items and just a couple of suppliers for the remaining items, use this single-supplier method and simply edit the suppliers on the remaining items. This is faster than dealing with each line item individually. |
 |
 |
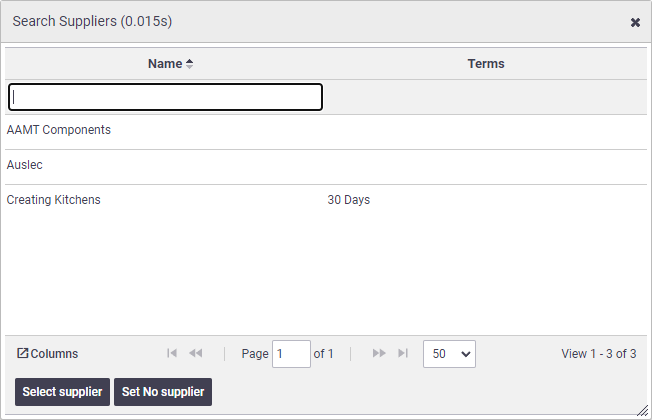
Change or delete supplier from a line item
|
If you've set a supplier against a line item and you wish to change or delete it, click the
|
 |
 |
Send Email to Suppliers
1. Click Email
Once all of the items have been added to the quote, click Email to send the quote to the selected suppliers.
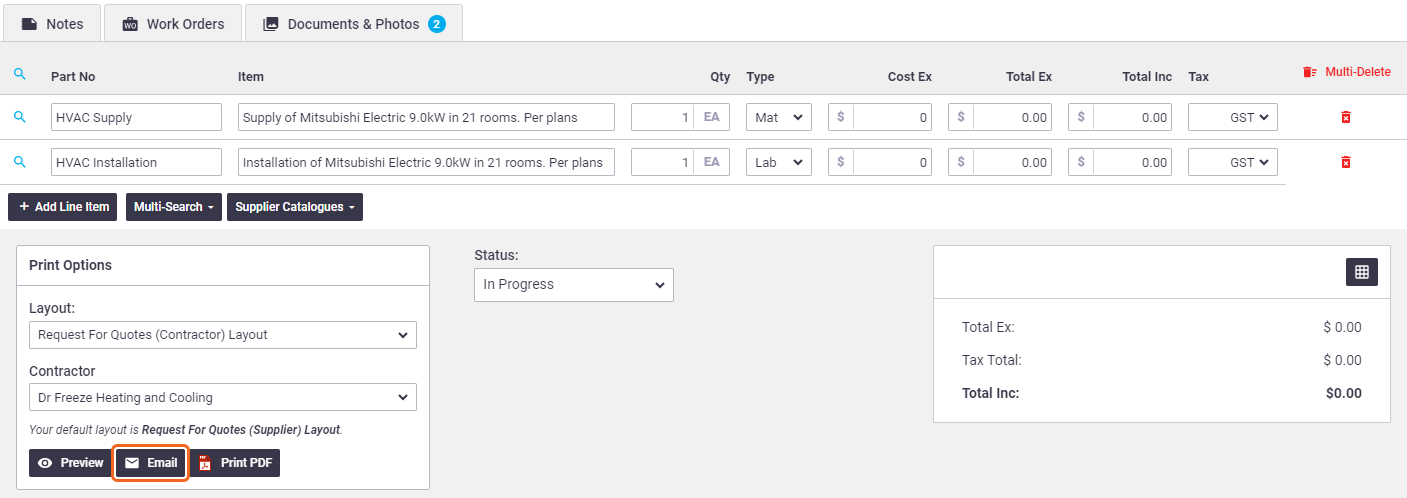
Layout field
The Layout field displays the Default Print Layout, but if you change the layout and save the RFQ, AroFlo will remember the selection if you need it again in the future. The default will also display, just in case you need it.
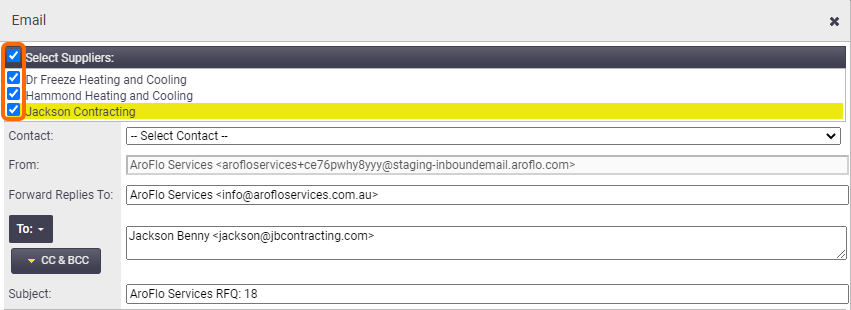
2. Choose suppliers
Tick individual suppliers or click the Select Suppliers checkbox to select all listed suppliers. This will automatically generate and attach a PDF for each separate supplier.
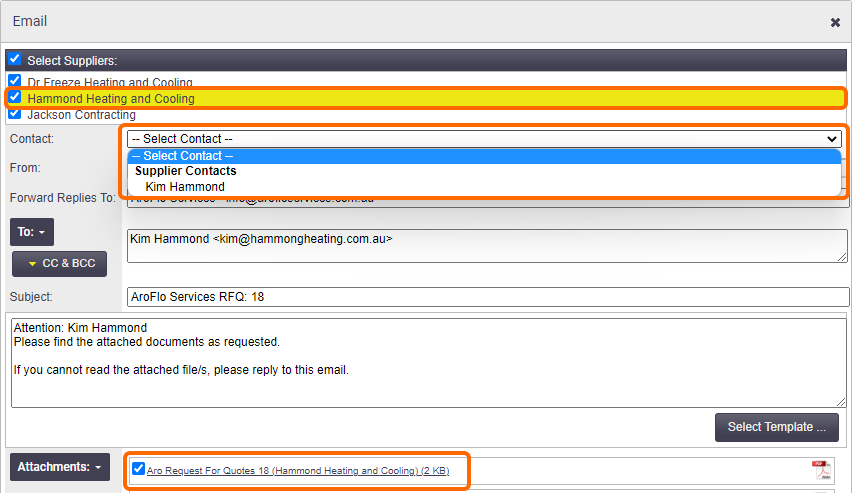
3. Select contacts and Send Emails
Click on a supplier name and select a contact for the request. You'll also notice the name on the attachment will be different for each supplier. Do this for all applicable suppliers.
When you're ready to send the email to all suppliers, click Send Emails.
You can preview any PDF by clicking the supplier name and the PDF attachment within the Email window.
Alternatively, close the email window and select the supplier in the Print Options area and click Preview.
Which layout does the email use?
The layout used for all suppliers will be the one displayed in the Print Options window (see step 1).
I want to send a different layout to each supplier/contractor
If you want to send a different layout to each supplier/contractor, you'll need to send separate emails:
- On your RFQ, choose your preferred layout
- Save the RFQ to retain the layout
- Email your RFQ to the relevant supplier/contractor
- Repeat these steps as necessary for the remaining recipients.
Update the Status
Set the status to Pending Approval and Save to indicate that the RFQ has been created and sent off to the listed suppliers. It is now waiting to be processed once the quotes come back from the suppliers.
You can also send the email and mark as Pending Approval at the same time by clicking the  (three dots) next to Send Email.

Once you receive a quote from your suppliers, you can Approve Request for Quotes.
 (magnifier) and either: