Checklists are a series of items that require a response (Yes, No, N/A), and which can be added to tasks or quotes.
A checklist could be a series of steps you want your field staff to follow in order to complete a specific task. For example:
- Arrived on Site
- Compliance Forms Completed
- Labour and Materials booked out
- Site left clean and tidy
You can link a checklist to a task type, so that every time a task with that task type is created, the checklist is automatically added to the task, ready for use. Checklists can also be added manually to any task or quote after it has been created.
By default, AroFlo comes with a sample checklist template with the major milestones of a simple task. Alternatively, a site administrator can create additional checklist templates using the steps below.
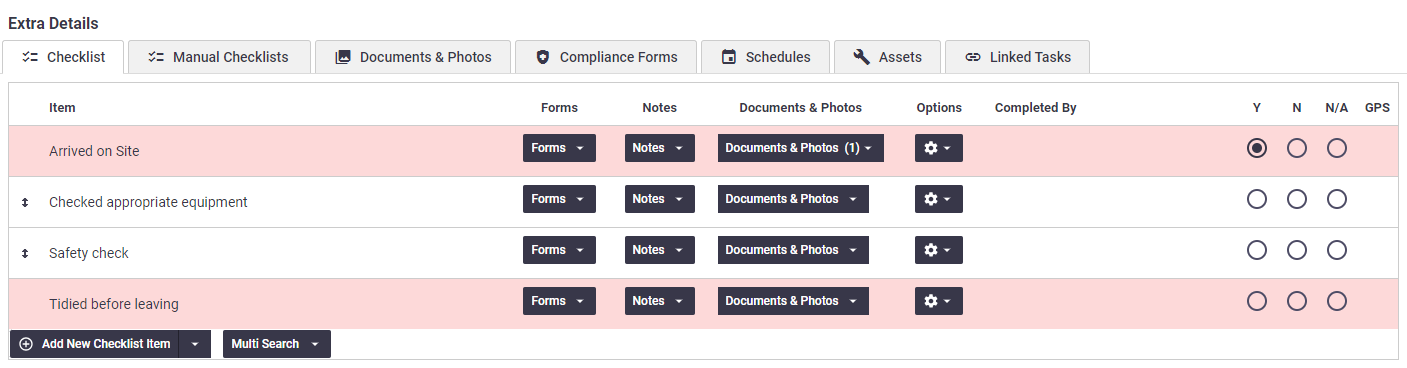
Office view
Field view

Interested in learning through an interactive course in the AroFlo Academy?
Create a checklist template
- In Site Admin, go to Settings.
- Use the search box to find Checklists.
- Click the link in the relevant section, i.e. Quotes or Tasks.
- Click Create Checklist.
- Enter a name for the Checklist.
- Click Add Item.
You might want to use the Cut & Paste button if you already have checklist items listed somewhere else (such as a Word document). Simply copy text into the text box after clicking the button.
- Enter the details of the checklist item.
- Continue to add items to the checklist until all items are listed.
- Once your checklist items are all entered, you can configure the settings for each checklist item (as explained below).
- Save.
Checklist item settings
The table below describes the settings on the Checklist Templates screen.

| Setting | Description |
|---|---|
| Checklist Type |
The checklist item will be shown on either the Quote, Task or both (Task & Quote) by setting the checklist type. This can be set against either individual checklist items or against the entire checklist using the field in the header. |
|
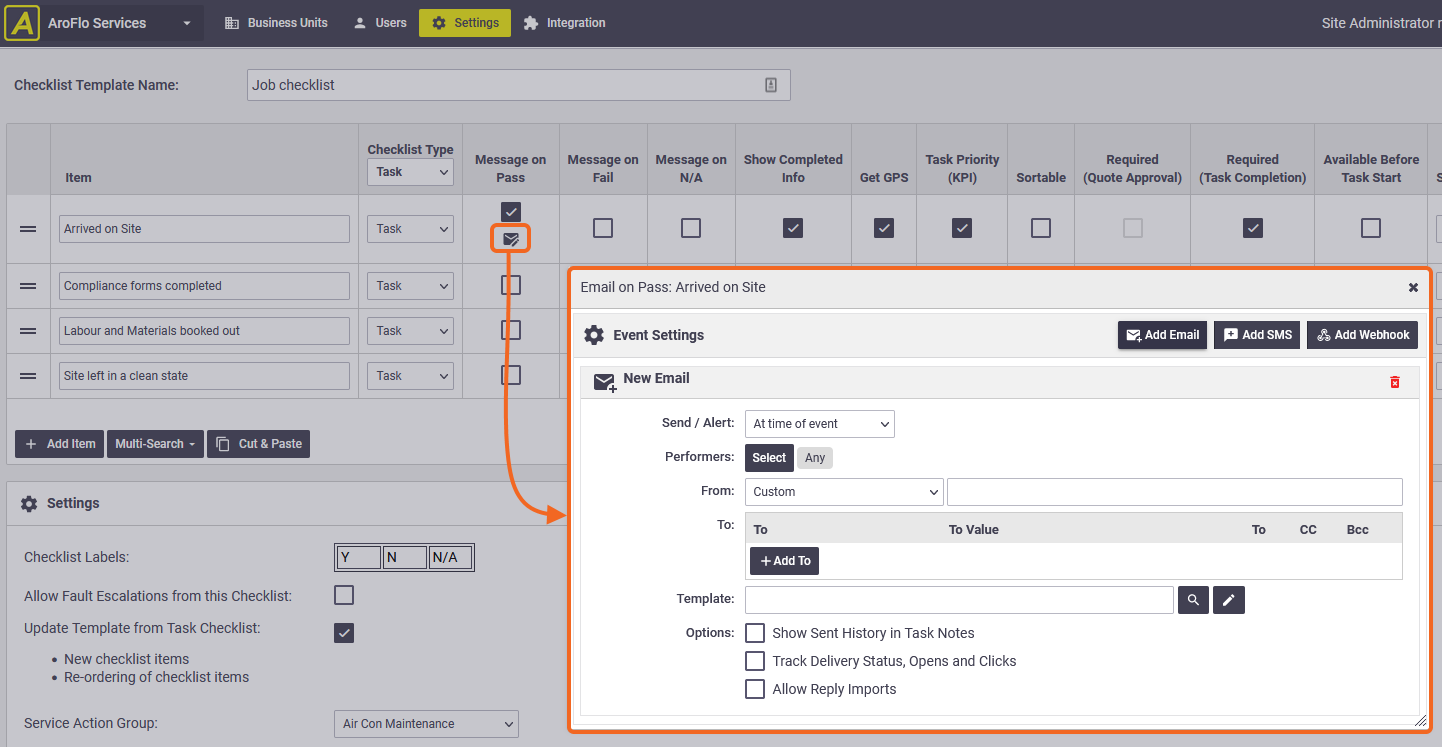
Message on Pass Message on Fail Message on N/A |
Tick this if you want an Email, SMS or Webhook sent when the checklist item is marked as either Pass (Y), Fail (N) or N/A (Not applicable). See Checklist event messages, below, for more information. |
| Show Completed Info | By default, AroFlo captures details of interaction with a checklist item but does not show it in Field. Enable this option if you want AroFlo Field to display the date and time of when the checklist item was completed and by who. Show this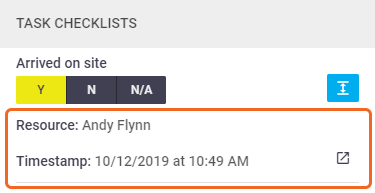 Field users can use the completed info on the checklist item as a quick link to the Labour timesheet page and the start time will be pre-populated using the completion time on the checklist item. This can be very useful for checklist items such as 'Arrived on Site' or 'Start Travel' where you want to capture and use completion info for populating a start time on a labour timesheet. It is not designed for populating the finish time on a labour timesheet. |
| Get GPS | Enable this option if you want to record the GPS location when the checklist Item is marked as Pass / Fail or N/A, captured from AroFlo Field. Show this This can be useful if there is a dispute in the future, questioning where a user actually was at the time the checklist item was marked. This is most useful for checklist items that represent work started or completed. To ensure this function works, make sure the:
Enable location sharingUsers will be asked the first time they log into AroFlo Field whether they want to enable location sharing. If they choose 'Don't share', and later want to enable location sharing, they can do so in their browser settings. Show this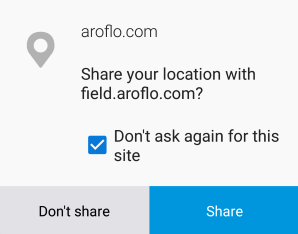 |
| Task Priority (KPI) | Enable this option if the checklist item would fulfil a Task Priority Response when marked as Pass / Fail or N/A. See Track Tasks with Priority Response Times for more information. Watch video |
| Sortable | Enable this option if the checklist item should be sortable in Office and Field. Users click and drag the sort icon as required. Show this |
|
Required (Quote Approval) |
Enable this option if the checklist item needs to have a Pass / Fail or N/A marked before a Quote can have a status of Approved. |
|
Required (Task Completion) |
Enable this option if the checklist item needs to have a Pass / Fail or N/A marked before a Task can have a status of Completed. |
| Available Before Task Start |
Used in conjunction with linked compliance forms, enable this option to make the checklist item available to users regardless of any pre-start compliance forms set for the job. For example, you may want your field techs to mark off when they 'Arrive on Site' before they complete the required compliance forms linked to the job. |
| Start / Stop Timer | To have a checklist item automatically start or stop the labour timer on either a quote, task or periodic task, select Start Timer or Stop Timer, as required. Leave the default 'Not Set' option in place if you don't want to use this feature. When a user sets a checklist item with the Start Timer option on it to Y and saves, the timer starts. When they set a checklist item with the Stop Timer option on it to Y, they will be asked to stop the timer and create a timesheet entry. |
| Del (Delete) | Click |
Checklist event messages
When you click any of the checkboxes in the Message on Pass / Fail / N/A columns and then save, the  (envelope with pencil) icon appears below the checkbox. Click this to create an Email, SMS or Webhook template to be used for notifications.
Refer to Set up an Event Message for detailed instructions.
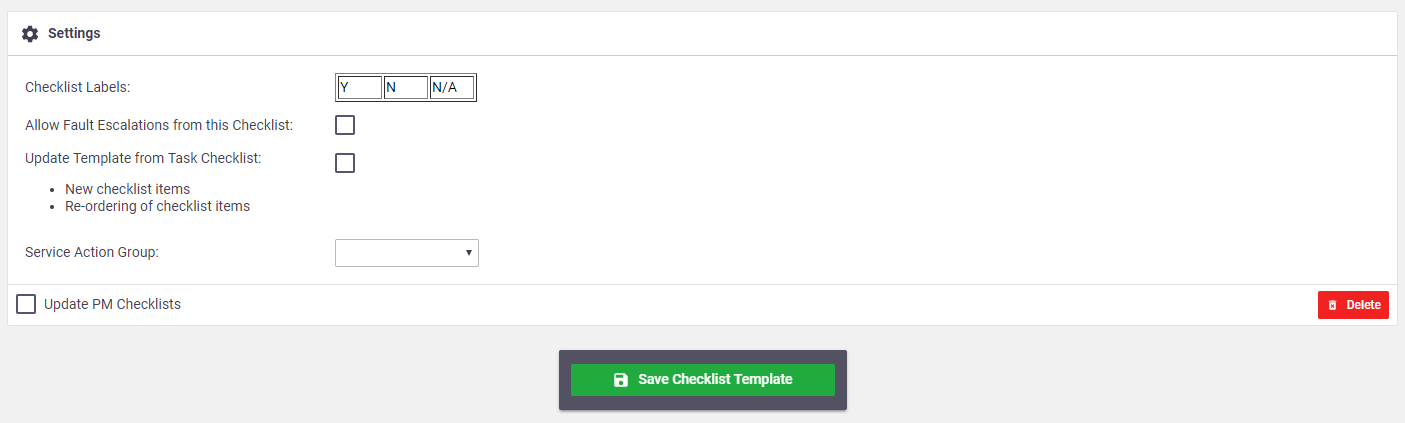
Checklist settings
The following checklist settings apply to the entire checklist (optional settings for advanced checklist requirements).
| Setting | Description | ||||||||
|---|---|---|---|---|---|---|---|---|---|
| Checklist Labels | You can relabel the Checklist items representing Pass, Fail and N/A by clicking into the field and changing the values from their default: Y / N / N/A. | ||||||||
| Fault Escalations |
The option Allow Fault Escalations from a Checklist presents the field technician with two options when a Checklist item has failed ('N'):
The two options will be displayed in Office and Field. See Checklists - Escalate a Fault Failed items are shown in the Failed Inspection Summary Report available when logged in as an office user from Reports > Tasks > Failed Inspection Summary. |
||||||||
| Update Template from Task Checklist |
This allows new ad-hoc checklist Items to be added through a Task which will also update this checklist template. This is more likely used on periodic maintenance jobs and rarely used on "standard" day-to-day jobs. |
||||||||
| Service Action Group |
You can link a single Service Action Group to the checklist. This allows the office or field staff to select a Service Action that can automatically link Documents, Forms and/or Inventory to a task. This option will only be visible if Service Action Groups have been created. |
||||||||
| Update PM Checklists |
Tick this option to choose what you want to happen with existing Periodic Maintenance checklists:
Show me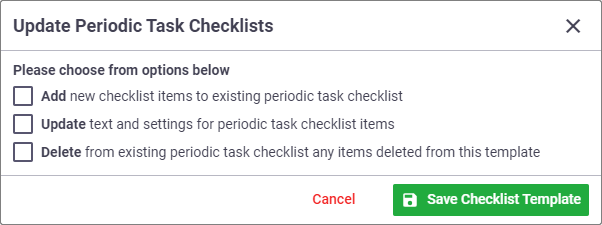 |
Link a checklist to a task type
We recommend you link checklists to your task types. You can set up task types so that whenever you create a task or quote with your chosen task type, the checklists you've linked to that task type will appear by default on the Checklist tab of your task or quote. To do this:
- In Site Admin, click Settings > Tasks > Task Types.
- Click the task type you want to link the checklist to.
- On the Checklist tab, under Auto Add Checklist, click the dropdown menu and select the checklist you want to add.
- Click Add. You can repeat the above steps as many times as you need to, if you need to add multiple checklists to a task type.
- When you've added all the checklists you need to, Save Task Type.

What happens if I don't have any checklists added?
If you don't have any checklists added in the Auto Add Checklist section, you won't have any checklists appear on tasks or quotes by default, but you will still have a Checklist tab for Tasks and you can add checklist items or entire checklist templates using the Multi-Search button. See Using Task Checklists for more information.
Quotes
Quotes will only contain a Checklist tab if checklists applicable to quotes have been added to the task type in the Auto Add Checklist section.
Manual Checklists
|
Use the Manual Add Checklist section in the same way. Adding checklist templates here means they will be available to select to add to the task or quote on the Manual Checklists tab. Once you've added a checklist, you can still add individual checklist items or entire checklist templates to it using the Multi-Search button. |
 |
|
What happens if I don't have any manual checklists added?
If you don't have any checklists added in the Manual Add Checklist section, the Manual Checklists tab will not appear on tasks or quotes when using this task type.
For more information on using checklists, refer to Using Task Checklists