Set a Schedule
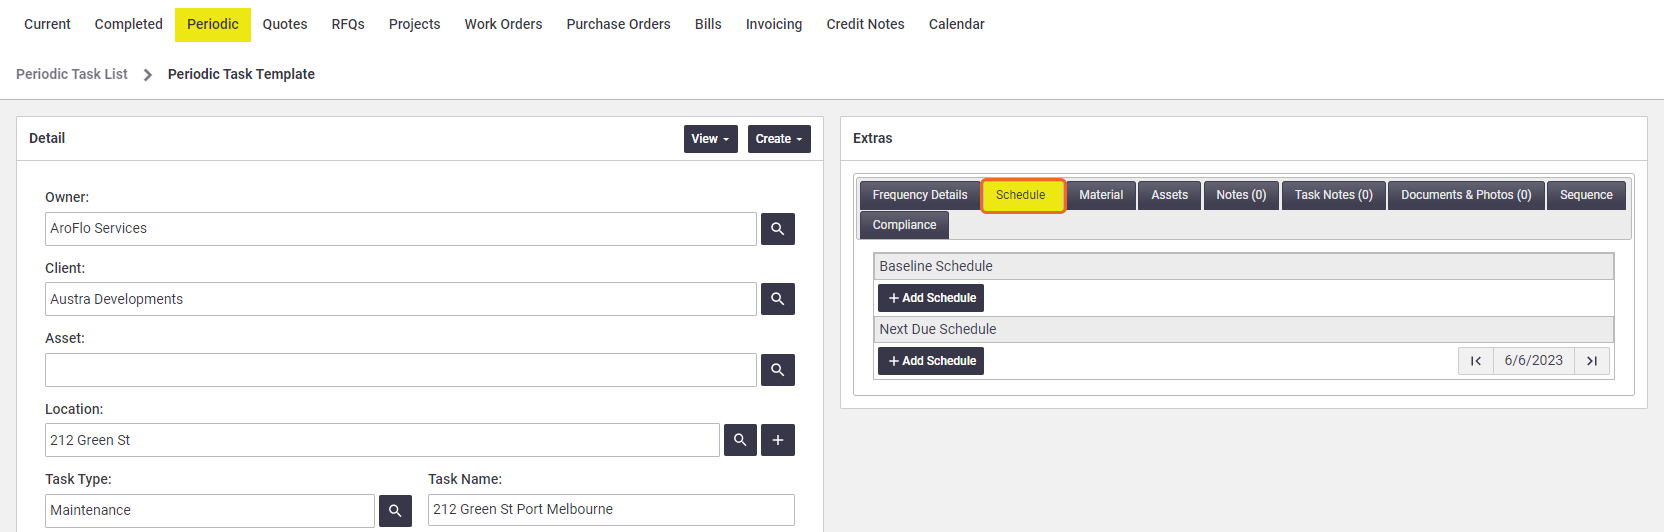
Go to Workflow > Periodic and select the periodic template you want to set a schedule for.
In the Extras section (right-hand side), click the Schedule tab.
Schedule a resource
There are two options for scheduling:
Baseline Schedule
This is the standard schedule that will be created when your periodic task is next generated according to the Due Date. Just like a normal task schedule, a periodic task schedule contains:
- the name of the resource you want to schedule (or a placeholder resource), and
- the time at which the task should be completed.
Placeholder resource
You can create a resource called Placeholder and schedule your periodic tasks to it. This can be handy if the periodic task will be completed by a different person each time.
Simply add the Placeholder resource to your calendar and when the periodic task generates, drag its schedule to the resource who should complete the work.
Unlike a normal task schedule, there is no date shown on the Baseline Schedule, as the date will be different each time and will be determined by the Baseline Date and Set Day (see Frequency Details tab) that were entered when the template was created.
Next Due Schedule
This is a temporary schedule that can be set to overwrite any of your Baseline Schedule options. This can be very handy if you need to make a change to one of your periodic schedules but want to keep your original scheduling set for the next periodic task generation.
To use either scheduling option:
- Click Add Schedule.
- In the Schedule window:
- Click the
 (two people) icon.
 - Click the option you need from the dropdown menu and make a selection from the Search window that appears.
Options
Option Description  Add Users
Add one or more users (resources) to the template.  Add Assets
Add one or more assets to the template.  Add Crews
Add a crew to the template. You can add as many users, assets or crews as you need to.
- Click the
- Enter the start and finish times.
- Optional: Enter a schedule note.
- Save Periodic.
Related tabs and areas
The following sections relate either to:
- tabs in the periodic template's Extras area other than the Schedule tab, or
- other areas of AroFlo (e.g. the calendar),
but all the content relates in some way to scheduling periodic tasks.
Frequency Details tab: Baseline Date & Set Day
The Baseline Date is the date that the periodic task was initially due and is used to work out (in conjunction with Set Day) which day the task should be generated on, i.e. the new Due Date.
Once you have set your initial Baseline Date, this field should not be modified. Any changes to the next task generation date can be made via the Due Date field in the Detail section of your periodic template.
Set Day can be either the First, Second or Third Monday, Tuesday, Wednesday, Thursday or Friday. If you look at your calendar you'll see that not every month has exactly four weeks, but they do have at least three full weeks.
Sequence tab: Sequence No & Target
If you have a contract that defines, for example, 10 periodic services, how do you track that? The Sequence No & Target allow you to keep track of this defined number of services by adding their number to the end of the task name.
Example:
- Set Sequence No to 1 and Target to 10.
- Set the Task Identification to 51 New St.
The first time the task is generated it will have a Task ID of: 51 New St 1
The fifth time the task is generated it will have a Task ID of: 51 New St 5
The tenth time the task is generated it will have a Task ID of: 51 New St 10
Having a sequence number and target in place will NOT stop periodic tasks from generating after the Sequence Target has been reached. Like Start, Expiry and Review Dates, this is for information and tracking purposes only.
Modifying the Next Due Schedule in the Calendar
|
To modify the next due schedule via the calendar:
|
 |
|
View Periodic Tasks
The Periodic Tasks list shows you the periodic task templates you've created. These templates generate the tasks when they're due.
To see a history of generated tasks:
- Open the periodic task template
- Click View > Periodic Task History
A list of tasks generated from this template will show. Click a task name to access it.
To generate a task before its due date:
- Open the periodic task template
- Click Create > Generate Task > OK.
- Click Save and OK to accept the changes.
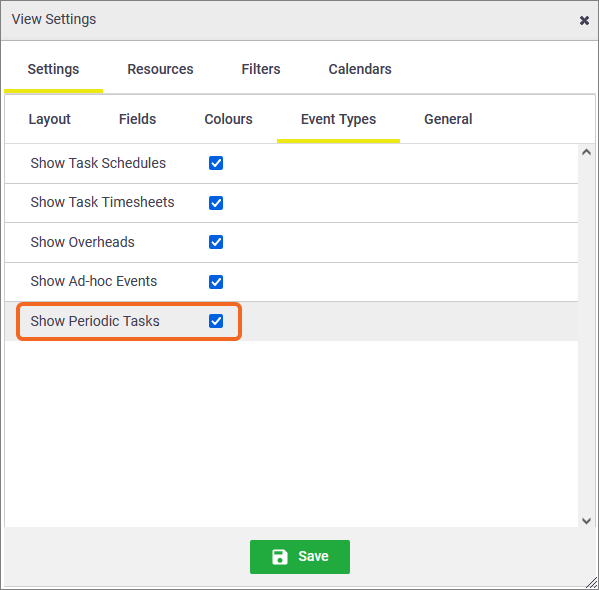
View periodic tasks on the calendar
To view periodic tasks on the calendar, make sure the Show Periodic Tasks option in the calendar settings  is checked > Event Types > Show Periodic Tasks > Save). In the calendar, Periodic tasks will be marked with the word 'Periodic' in grey text. To view the details of the task, click the calendar entry and click View.