Schedule label settings let you customise the information displayed on task schedules within your calendar.
External calendar labels
The Header Labels and Schedule Labels you choose in your AroFlo calendar settings will be sent to any external calendars you have subscribed to.
|
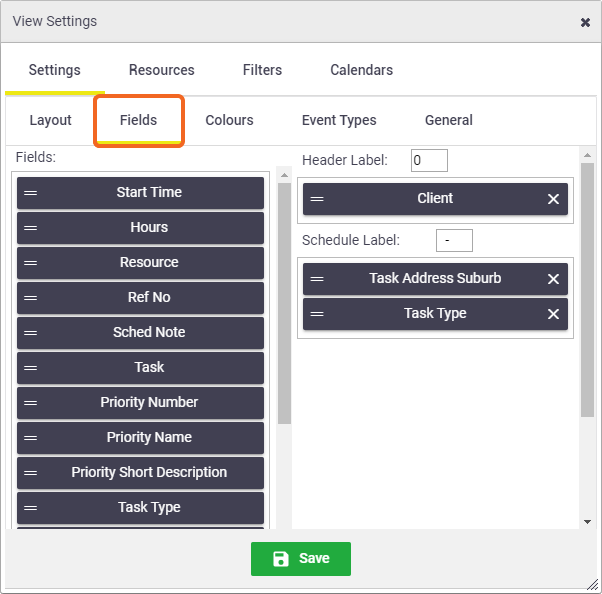
To access the schedule label settings for your calendar:
|
 |
 |
Available field types and descriptions
| Field | Description |
|---|---|
| Active Timer | Displays a green icon in the schedule when a labour timer is running. See Task Timer, below. |
| Client | Task client's name. |
| Cust ON | Task Customer Order Number. |
| Hours | The total hours of the schedule. |
| Job No | Task job number. |
| Priority Name | Task priority name. |
| Priority Number | Task priority order number. |
| Priority Short Description | Task priority short description. |
| Quote Status | The status of the related quote. |
| Quote Substatus | The substatus of the related quote. |
| Ref No | Task reference number. |
| Resource | Scheduled resource names. |
| Sched Note | Displays either the schedule note for a task schedule or labour/expense notes for a timesheet. |
| Site Contact | Task location contact's name. |
| Site Phone | Task location contact's phone. |
| Start Time | Schedule start time. |
| Task | Task identifier. |
| Task Address | Task address. |
| Task Address Suburb | Task address and suburb. |
| Task Client Primary Contact | Task client primary contact's name. |
| Task Client Primary Contact Mobile | Task client primary contact's mobile phone number. |
| Task Client Primary Contact Phone | Task client primary contact's phone. |
| Task Due Date | Task due date. |
| Task Frequency | Task generation frequency. |
| Task Postcode | Task postcode. |
| Task Project | Name of the project the task belongs to. |
| Task Reported by | Task reported by name. |
| Task Reported by Mobile | Task reported by cell phone number. |
| Task Reported by Phone | Task reported by phone number. |
| Task State | Task state. |
| Task Status | Task status. |
| Task Substatus | Task substatus. |
| Task Suburb | Task city/suburb. |
| Task Type | Task type. |
Header label
|
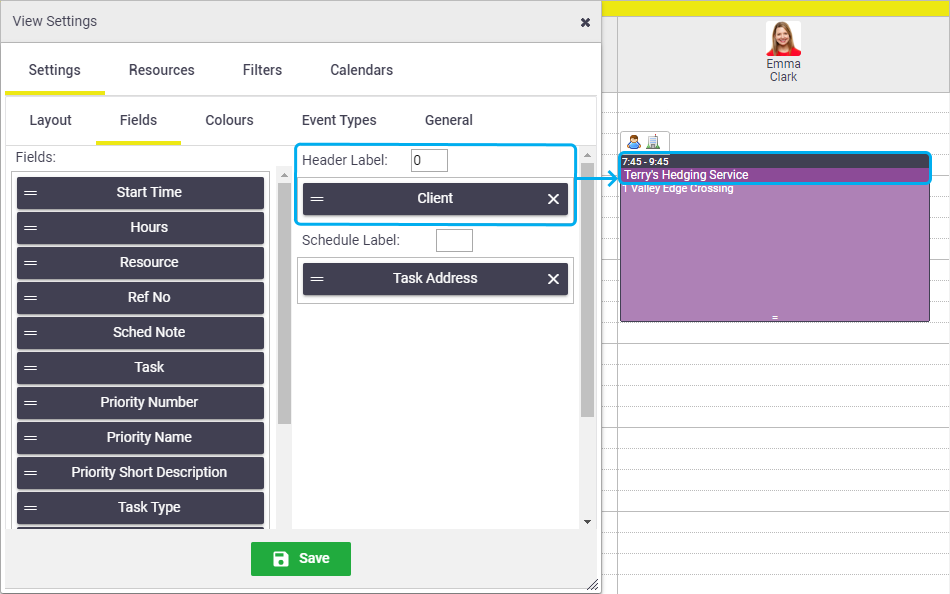
The Header Label is the heading of the schedule label, and therefore usually contains key information. Depending on your view type, the header will display the task start and end times by default, and you can select additional fields to display in the header label of task schedules. To add fields to the header label:
|
 |
 |
Schedule label
|
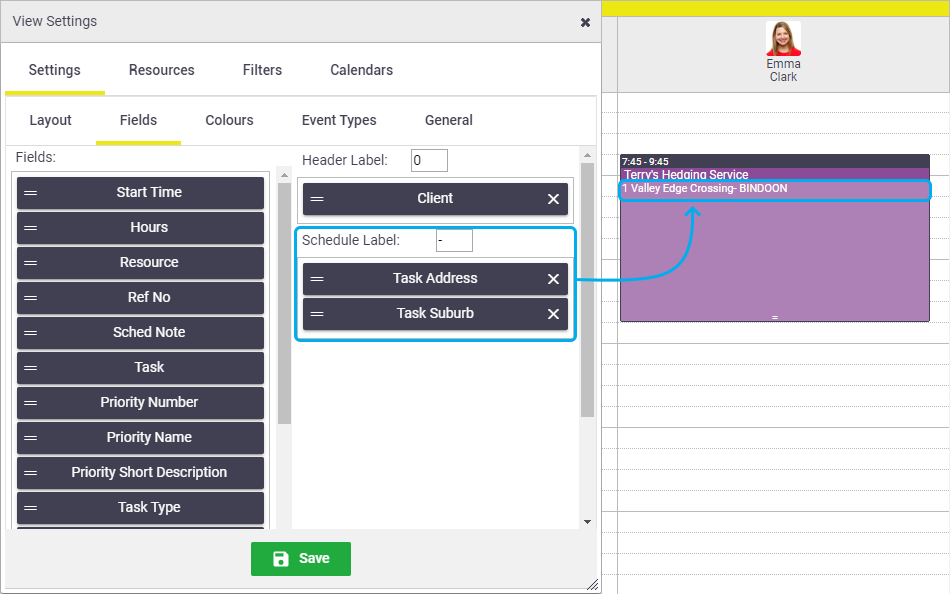
The Schedule Label is where additional information is displayed for quick reference. Generally, more fields are added to the schedule label than the header label. You have the option to select the fields you would like displayed within the schedule label of task schedules. To add fields to the schedule label:
|
 |
 |
Task Timer
|
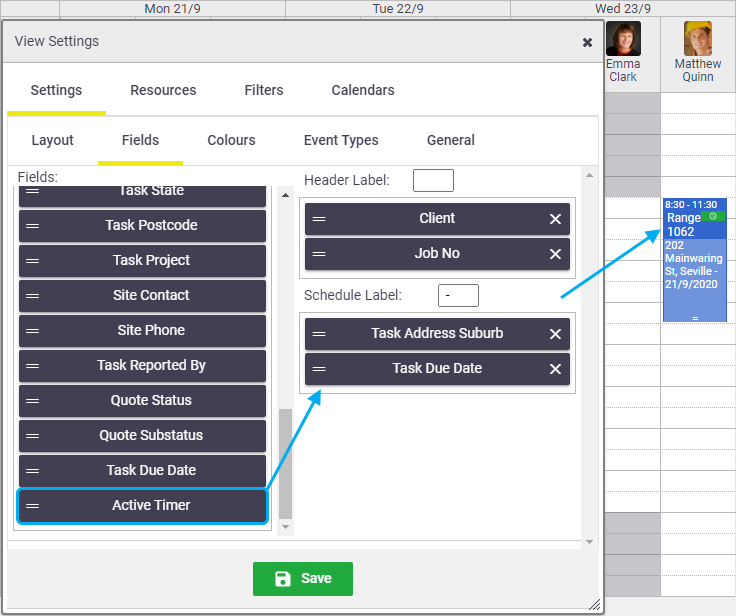
If you want the task timer to display on task tiles, add the Active Timer field in either the Header or Schedule label. The green task timer icon will appear at the top right of the task tile (as pictured), except for short schedules where it will appear at the top left.  |
 |
 |
Remove fields
- Click x next to the field you want to remove from either the header label or the schedule label.
- Click Save.
Reorder fields
You can change the order in which the fields are displayed in both the header and schedule labels.
- Click and drag the field to a new spot on the list. Repeat for each field as required.
- Click Save.
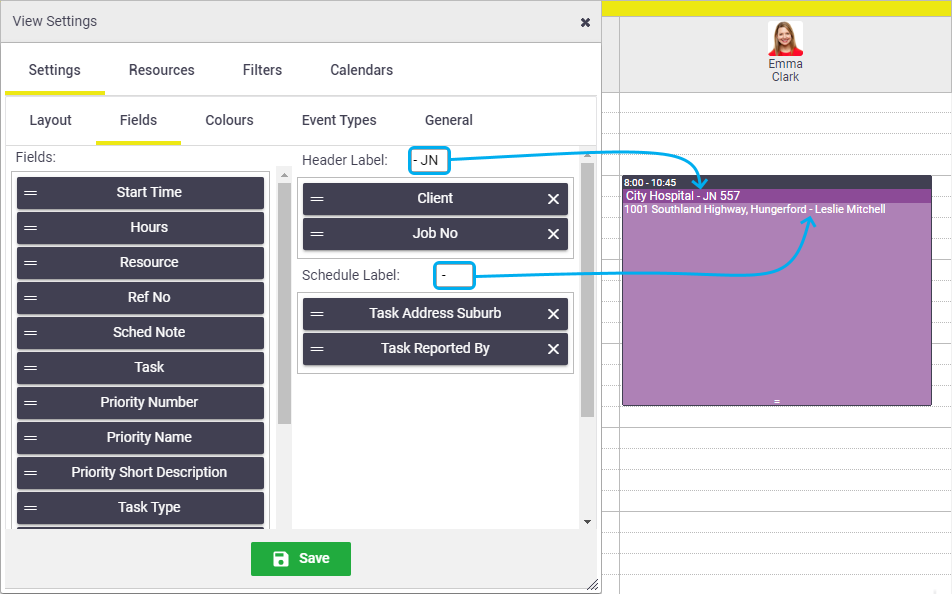
Field separators
|
You can separate the various fields within the header label and/or schedule label by using any keyboard character. This makes your labels easier to read.
|
 |
 |
 (three dots icon).