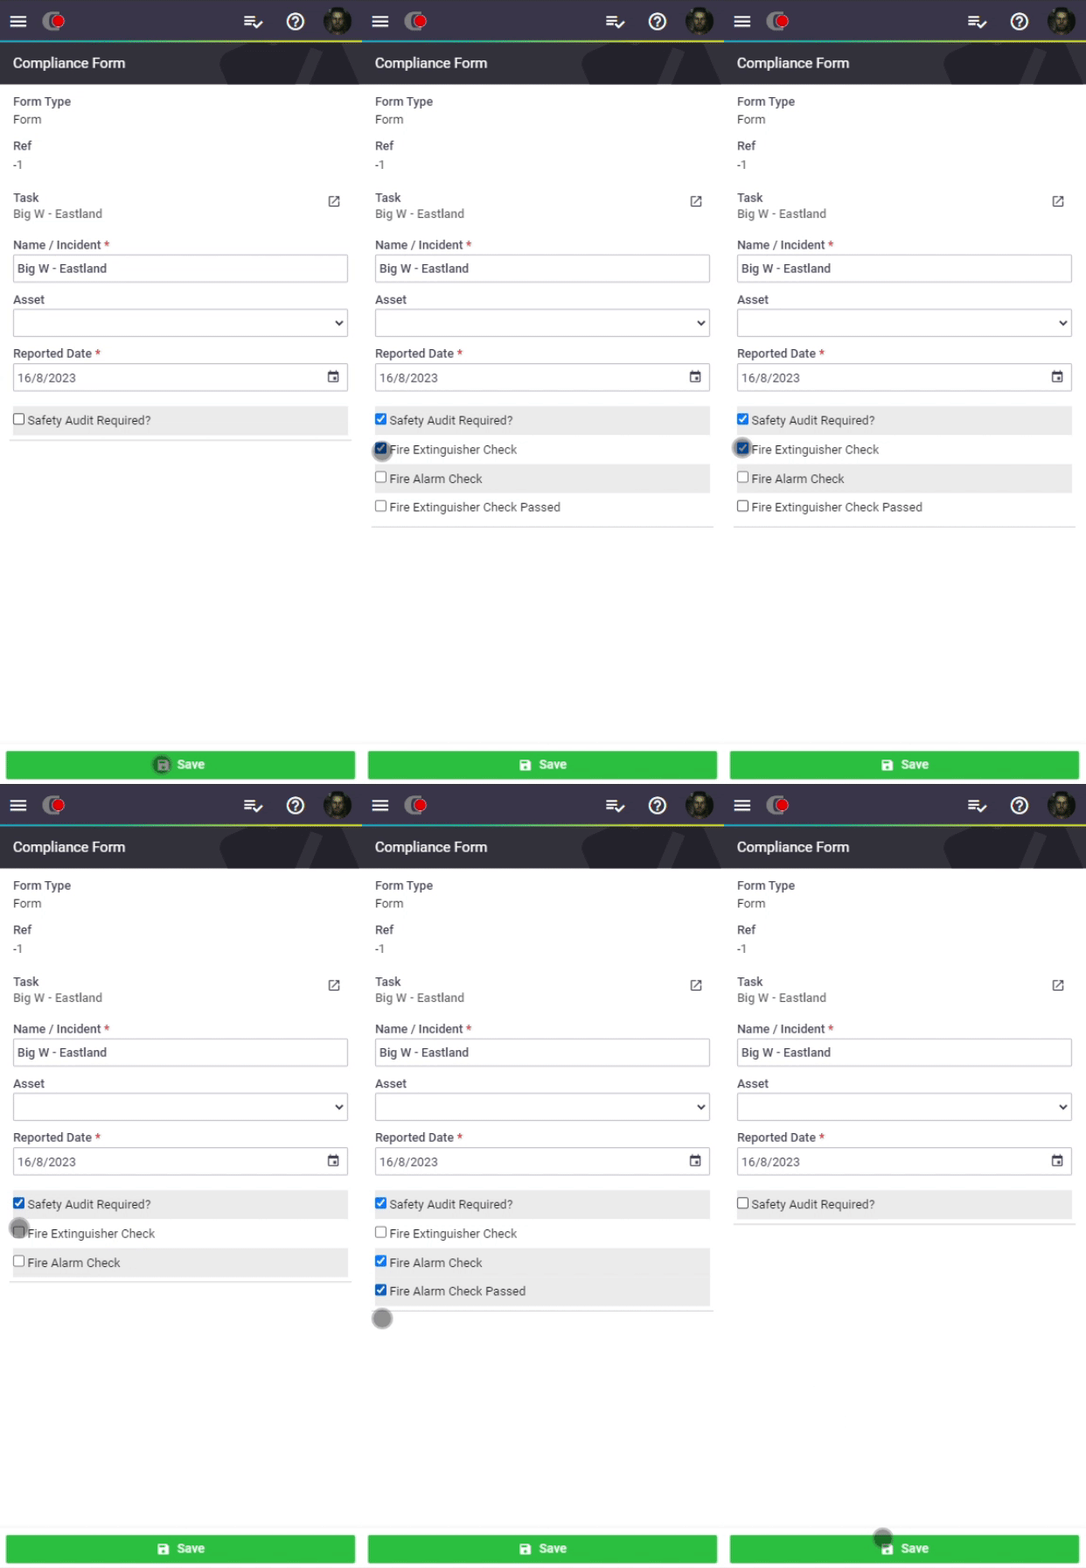
Conditional Fields on Custom Forms are designed to allow you to create simple, uncomplicated compliance or safety forms that guide a user through a series of choices. Your form will show or hide elements depending on how you initially built it to make them much more user-friendly.
Create a Form with Conditional Fields
|
Before you begin, make sure you understand how to create a custom form, because you'll need one to begin. Next, map out what you're hoping your final form is going to look like. What ‘path’ do you want your users to go through to get to their final destination. For instance, is your form a list of questions or is it designed to hide document uploads if a photo isn't necessary? Once you've worked out your ‘map’ of the form, use the following instructions to build your conditional elements:
|
 |
 |
Thinking ‘Logically’
When you're building your form, you're actually applying logic to it. When used in the sense of a piece of software, logic works like this:
"If this happens, then do this. If that happens instead, then do that."
So what does this look like in practice? We'll look at an example:
Using Logic with Conditional Elements
|
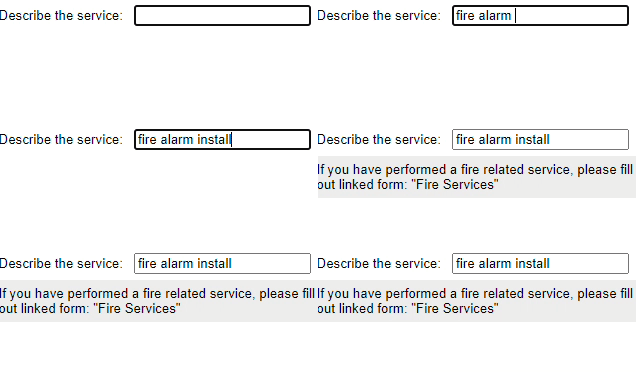
I want to build a form that when the technician describes that they performed a service containing the word ‘fire’, AroFlo knows to remind them to fill out a supplementary form:
Then, AroFlo would know that if my technician includes the word ‘fire’ in their description, they will now be reminded to fill out a supplementary form. |
 |
 |
Conditional Visibility FAQ
| “I can't see any of my fields in the Conditional Visibility dropdown!” |
| You might not have clicked Save Form. Your fields may not be visible until you do this. |
| “Why can I see all of my fields in the Form editor?” |
| You can see everything because you're currently editing the form. Click Preview in the top right to see an example of the user experience to that point. |
| “Why can I see all of my fields when I go to print my form? Shouldn't it only be showing me the visible ones?” |
| This feature is intended to make forms easier or more logical to fill out in the field. You still may need to have all of your fields visible on a printed form, so they come through to the preview like that once the form has been completed by the technician. |