|
Calendar views are made up of the View Type and the Calendar Settings you select.
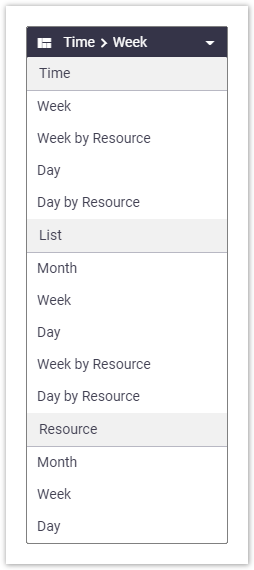
View TypeThe View Type determines the basic layout of your calendar. Choose from time-based, list-based, or resource-based views. See image to the right. Calendar SettingsThe Calendar Settings let you change things like:
These are just a few of the settings you can adjust in your calendar to tailor the view to your requirements. Interested in learning through an interactive course in the AroFlo Academy? |
 |
 |
Standard Calendar View
|
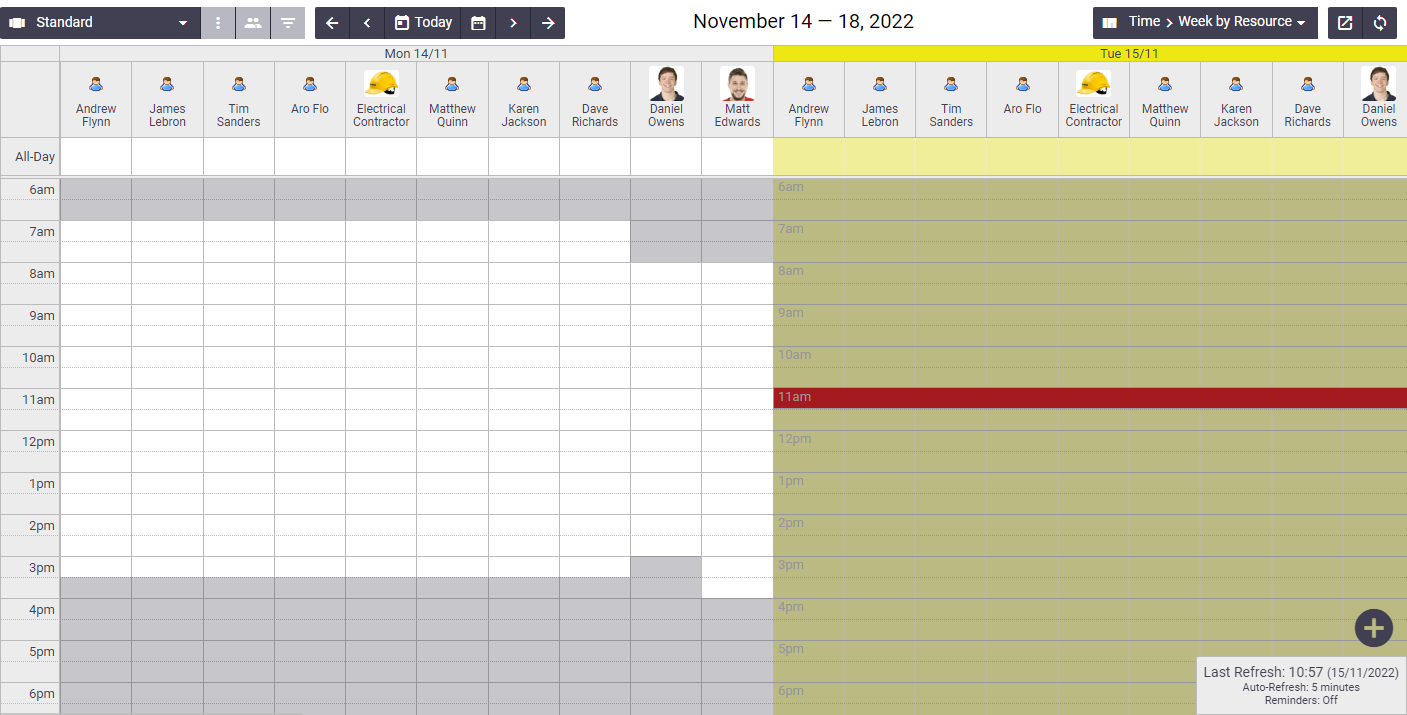
New AroFlo users can start scheduling straight away with the standard calendar view included with your site. This view is not customisable but will automatically include yourself and the next 9 users you add, as well as remove deleted users. The standard calendar view is designed to automatically refresh so you get the latest information about your scheduled tasks for that day (see Auto-Refresh Calendar Every setting). In addition, the view includes a slot called All-Day when you want your team to be aware of a company-wide event which you might want to separate from your job schedule. If you have more than 10 users, the calendar will prompt you to create your own customised view:  Once you're ready, use the instructions below to create your own view. |
 |
 |
Save a calendar view
|
We recommend saving your preferred calendar settings by creating a customised calendar view. When you create a new calendar view, the Standard layout described above is used as the base and you can then customise it as you see fit. Duplicate a calendar view If you're only making minor changes to a calendar view and don't want to run the risk of losing any calendar settings, we suggest duplicating a calendar view. If you prefer to start afresh, however, follow the below instructions. |
 |
 |
To create a calendar view:
- From the main menu, click Calendar.
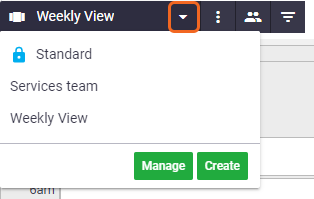
- In the top left, click the down arrow to the right of the view name > Create.
- Enter a name for the view, e.g. Weekly View.
- Optional: Enter a description of the view.
- Optional: If you want others in your company to be able to access the same calendar view, tick the 'Shared' box. (See Sharing a calendar view below).
- Click Create.
- Alter the Settings (
 ), Resources (
 ), and Filters (
 ) to create the view that best suits your needs. See Calendar Settings for details.
 - Save.
Edit a calendar view
|
To change the name or description of a calendar view:
|
 |
 |
View Types
|
Select a Calendar View Type to determine the basic layout of your calendar, e.g. a time-based, list-based, or resource-based view. See Calendar View Types for more information. |
 |
 |
See Managing Calendar Views for additional calendar view options, e.g. sharing and duplicating calendar views.
 (pencil icon).