The email interface within AroFlo Office is similar to your standard email program where you can select a contact, enter a subject line and email body and include attachments.
Emailing directly from AroFlo saves you from having to switch between programs to send an email and makes it easier for you to track communication between you and your clients or suppliers.
You can send emails from various screens throughout AroFlo Office such as the Client card, Quote, Supplier Quote, Job Sheet, Invoice (worksheet and menu), Purchase Order, Compliance Form and Project Invoice screens. Click through the following instructional tabs that show you how to email from within the Invoice screen, but the steps are the same for other areas of the system.
1. Click Email
Open the required Invoice worksheet, scroll down to the Print Options and click Email.
You can also access the Email function from the layout Preview.

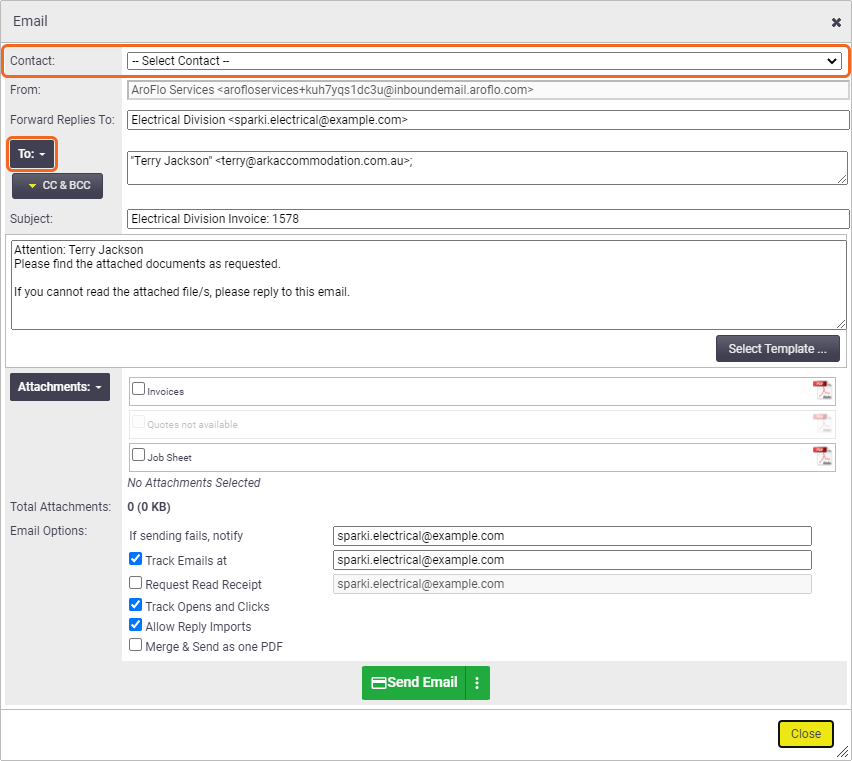
2. Select a Contact
Select the required contact from the Contact dropdown list. This will add the Contact's name to the Contact field and their email address to the To: field. Alternatively, click To: to select from a list of Users, Client Contacts or Contractor Contacts, or simply type the email address directly into the To: field.
- The names which appear in the Contact dropdown list are contacts for who you're emailing (e.g. client or supplier) with an email address. If invoicing a task using a location and the location contains a site email, this email address will also be in the dropdown.
- If the primary contact for who you're emailing (e.g. client or supplier) has an email address, this email will prepopulate in the To: field.
Click CC & BCC to open the CC: and BCC: fields. These allow you to select or enter a contact email address for sending a carbon copy or blind carbon copy to.
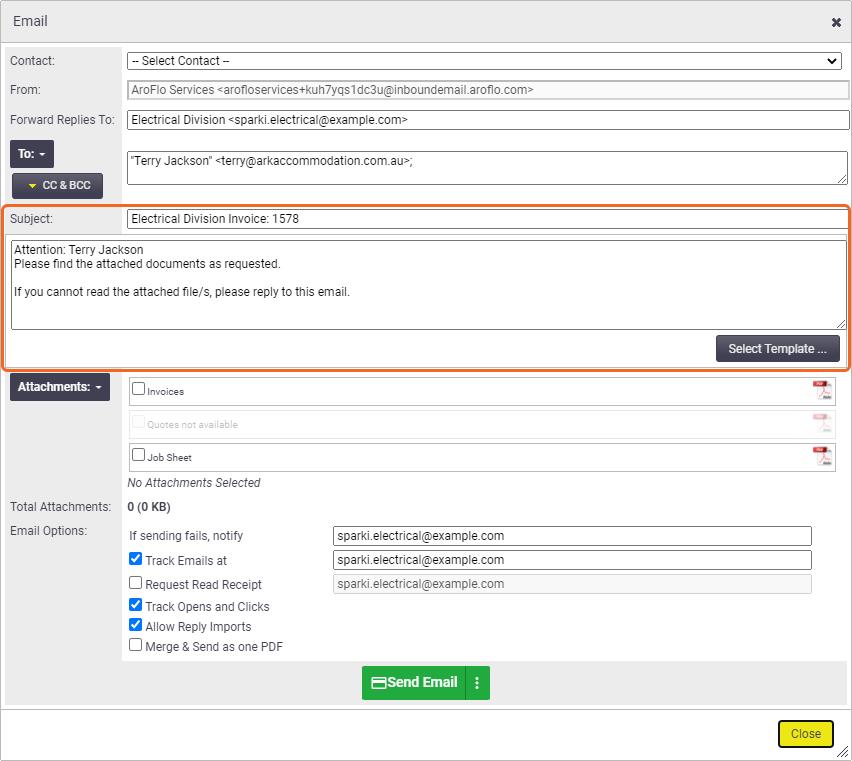
3. Enter a Subject and a Body
Modify the Subject line and email body text as required. Alternatively, you can click Select Template to select an existing email template or create a new template.
You can preset the email body template, as well as many other things, using Print & Email Defaults.
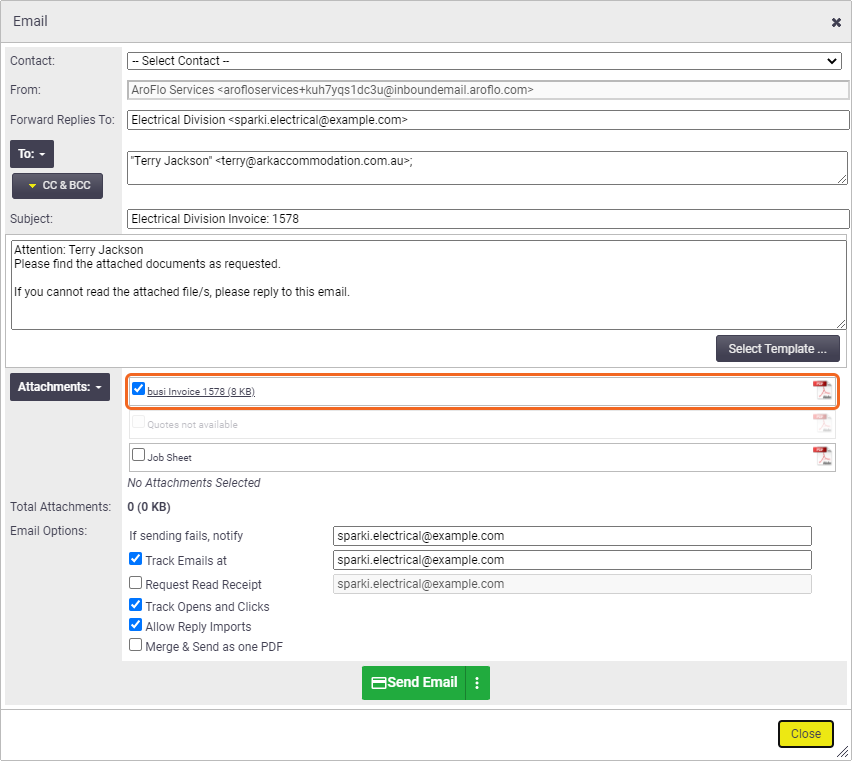
4. Add Attachments
In the Attachments area, click the Invoices checkbox to generate and attach a PDF version of the invoice. Click Send Email.
External Filename
You can customise the name of the attachments. See Layouts - Layout Setup.
5. Send Email
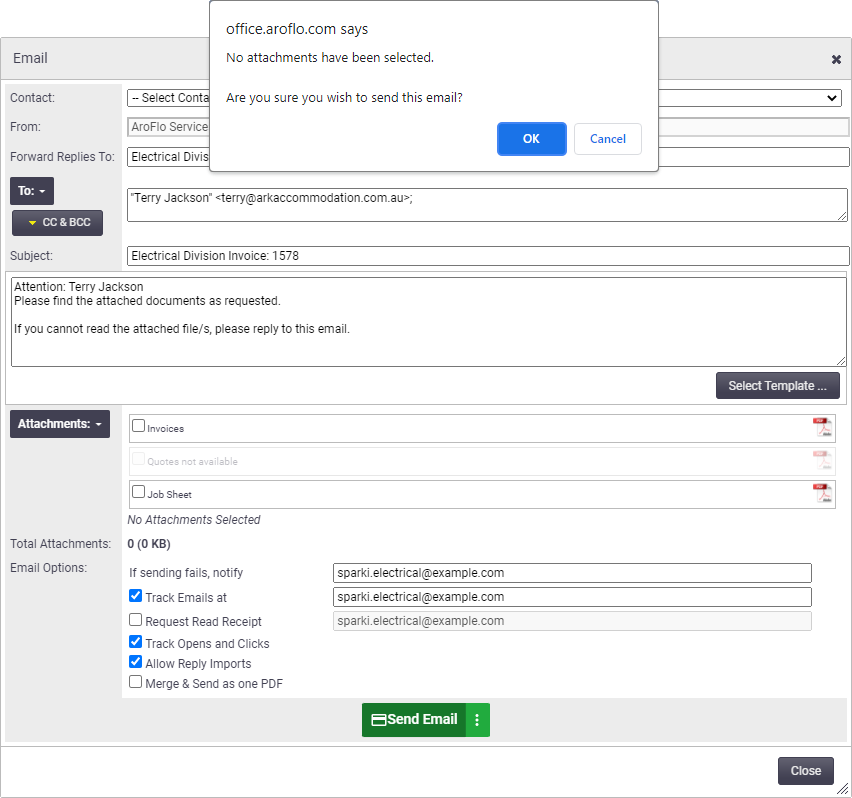
If you were sending an email that didn't require any attachments, you would click Send Email straight after writing your email body.
A dialogue box appears, asking if you wish to send the email without attachments. Click OK to send the email or Cancel to add attachments or edit the email.
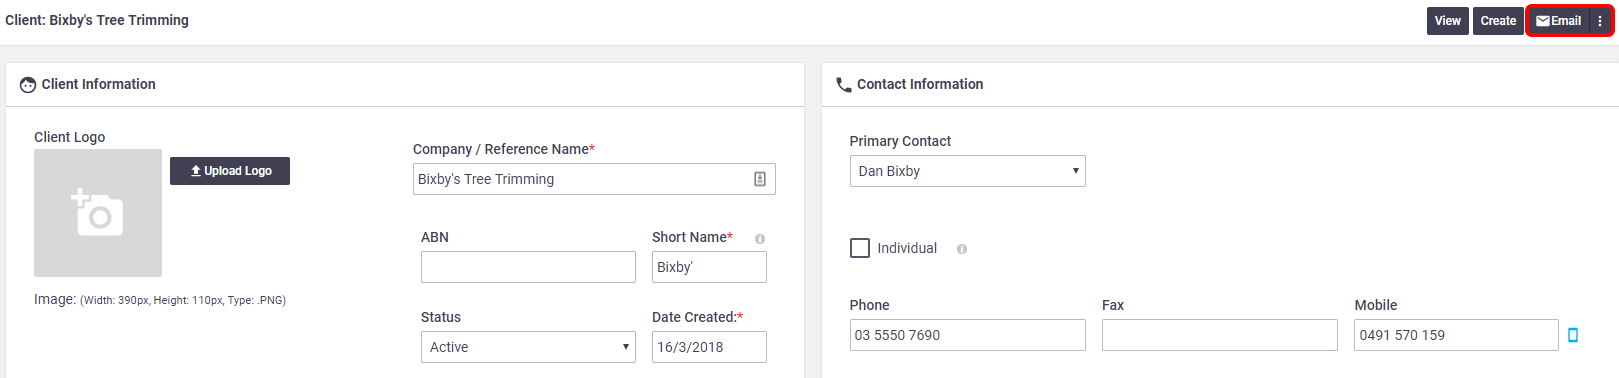
Client-specific email
If you would like to email a specific client a collection of their Job Sheets, Quotes or Invoices, go to:
- Manage > Clients
- Select the client.
- On the Client Card, click Email.
Add attachments
|
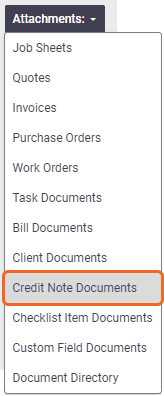
The Attachments feature allows you to search, select and attach multiple documents from different areas of the system to a single email. Dynamic options The attachment options available to you will change slightly, depending on the scenario. For example, the 'Credit Note Documents' option will only appear if you are sending an email from within a credit note, and the 'Location Documents' option only appears if a Location was selected on the task or quote. Areas
|
 |
||||||||||||||||||||||||||||
|
Allowable size limit
You can attach up to 10MB in attachments. If you exceed this, your email will be sent in batches.

You cannot email an individual file which exceeds 10MB.

Default layouts for Job Sheets, Quotes, Invoices and Purchase Orders are configured in Site Admin (global settings) or on the Client / Supplier Card (Client/Supplier specific settings). Please refer to Print and Email Layout Defaults for instructions.
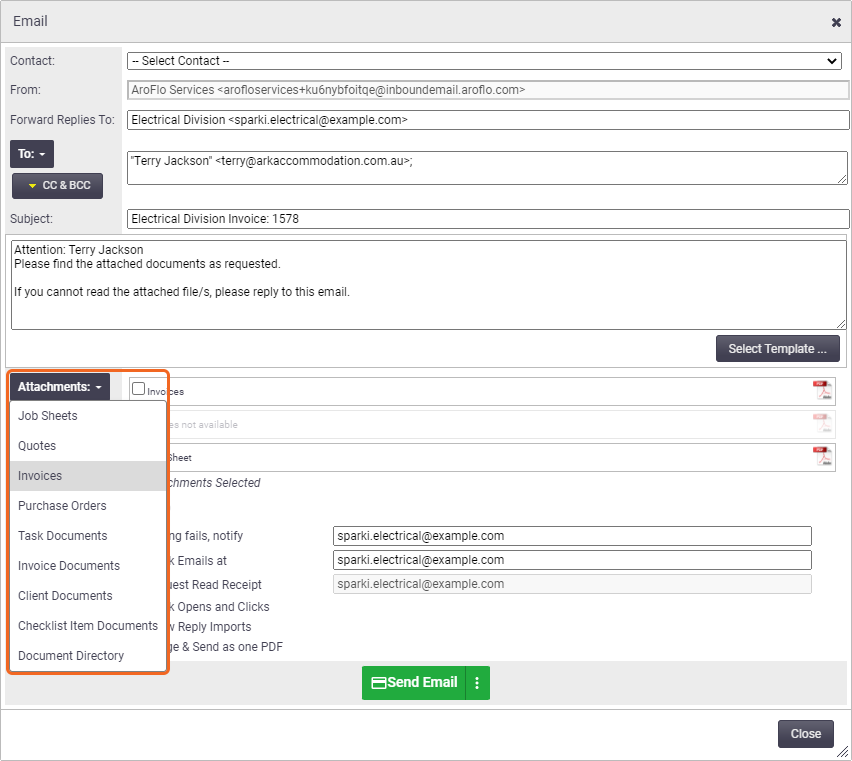
1. Click Attachments
|
Click Attachments and select the relevant type of attachment from the dropdown list. For this example, we are going to attach invoices to the email.
|
 |
|
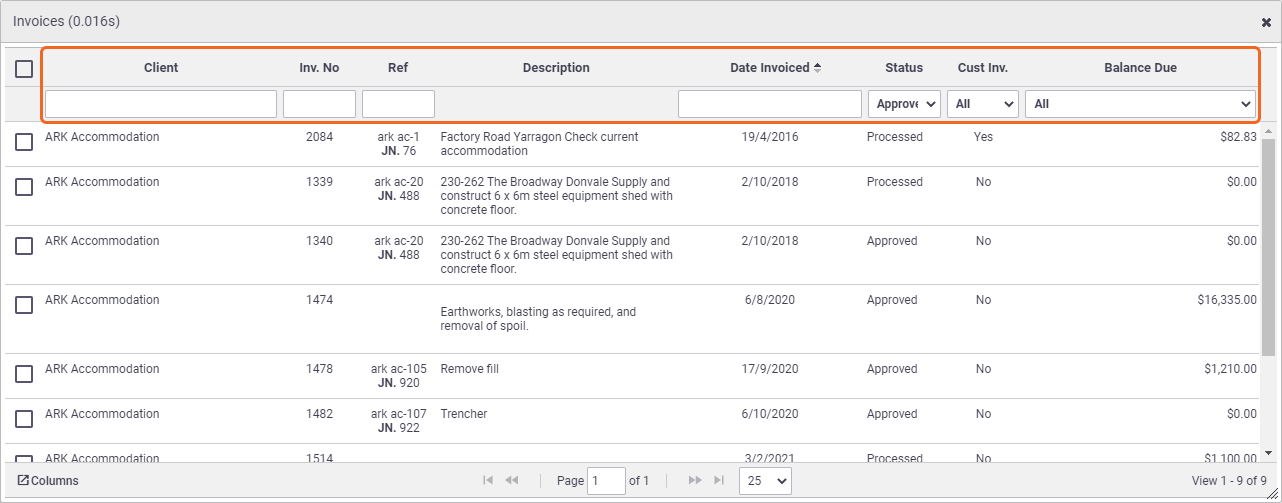
2. Search Attachments
|
The pop-out window displays a list of the client's invoices that exist within the system. Use the search boxes at the top of the list to search by Client, Invoice No. or Client/JN Reference, or filter the list by Date Invoiced, Status, Customer Invoiced (controlled by the Cust Inv. check box on each invoice) and/or Owing (all or unpaid invoices). |
 |
|
3. Select Attachments
|
Use the checkboxes on the left to select individual invoices, or check the box at the top to select all invoices in the list and close the search window when finished. The selected invoice/s are attached to the email as a PDF document. Generating multiple PDFs can take time. For equal priority, PDF Documents are generated one page at a time across all AroFlo clients. |
 |
|
4. Click Send Email
|
Click Send Email. Email & Update Status If you're emailing a quote, task sheet, invoice or purchase order, click the 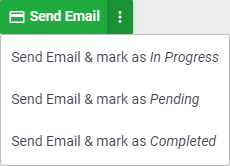 Last emailed details are displayed at the top of the Email window and also at the bottom of the Print Options box. To view full email history, click this link at the top at the top of the Email window, or the View History link located within Print Options for the relevant area of the system, e.g. quotes, tasks, invoices, purchase orders. History from an email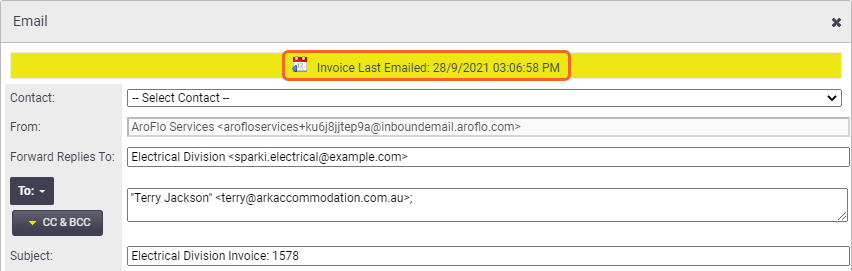 History for the worksheet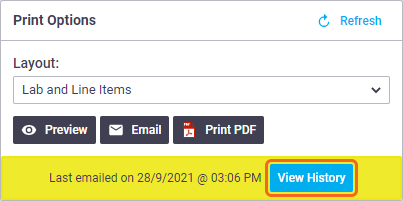 |
 |
|
 (three dots icon) to view additional options that allow you to send the email and update the status at the same time.
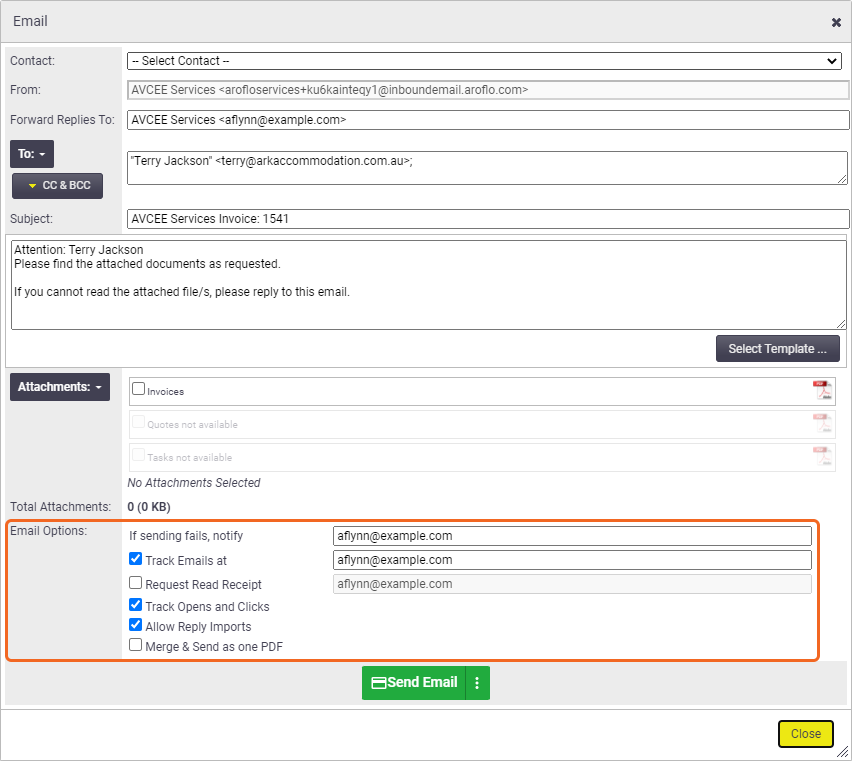
Email Options
There are a range of email settings available within the Options section that you can modify for each email, if required.
Email default settings are configured in Site Admin (global settings) or on the Client / Supplier card (client / supplier specific settings). Please refer to Print and Email Layout Defaults for instructions.
Option Settings |
Description |
|---|---|
| From | Allows you to modify the 'From' email address for this particular email. (Cannot be modified if Allow Reply Imports has been ticked.) |
| If sending fails, notify | Used for setting up automatic notifications when an email is not sent or bounces back. |
| Track Emails at | Used for setting up a specified address for copies of the email to be sent to. |
| Request Read Receipt | Used for setting up a specified address for Read Receipts which are sent by the system when an email has been read by the receiving person. |
| Track Opens and Clicks | Used to track email delivery status, i.e. see if the email has been opened, clicked or read. |
| Allow Reply Imports | Enables automatic importing of email replies to the Task Notes section. Refer to Tracking Email Replies for more information. |
| Merge & Send as one PDF | Enable to automatically merge all attachments (which were generated by AroFlo) into one PDF attachment when the email is sent. The system generated file name will be the client's short name, e.g. AVC.pdf. |