

When raising a work order to send to contractors, there are two possible scenarios:
- You want the entire request for work to be outsourced to one or more contractors
- You only want certain aspects of the job to be contracted, e.g. you're supplying the materials but you want a contractor to provide the labour.
Similar to purchase orders, you can either raise a work order from a particular task, or raise a work order and link a task to it.
Regardless of how you create a work order, a task needs to exist first for the job at hand.
Create a Work Order
Create a request for a specific task
To outsource an existing task in AroFlo, create a work order from the task.
The task could be an incoming work order that you've received.
1. Open task
Open the Task.
2. Click the Work Orders button
Click Work Orders.
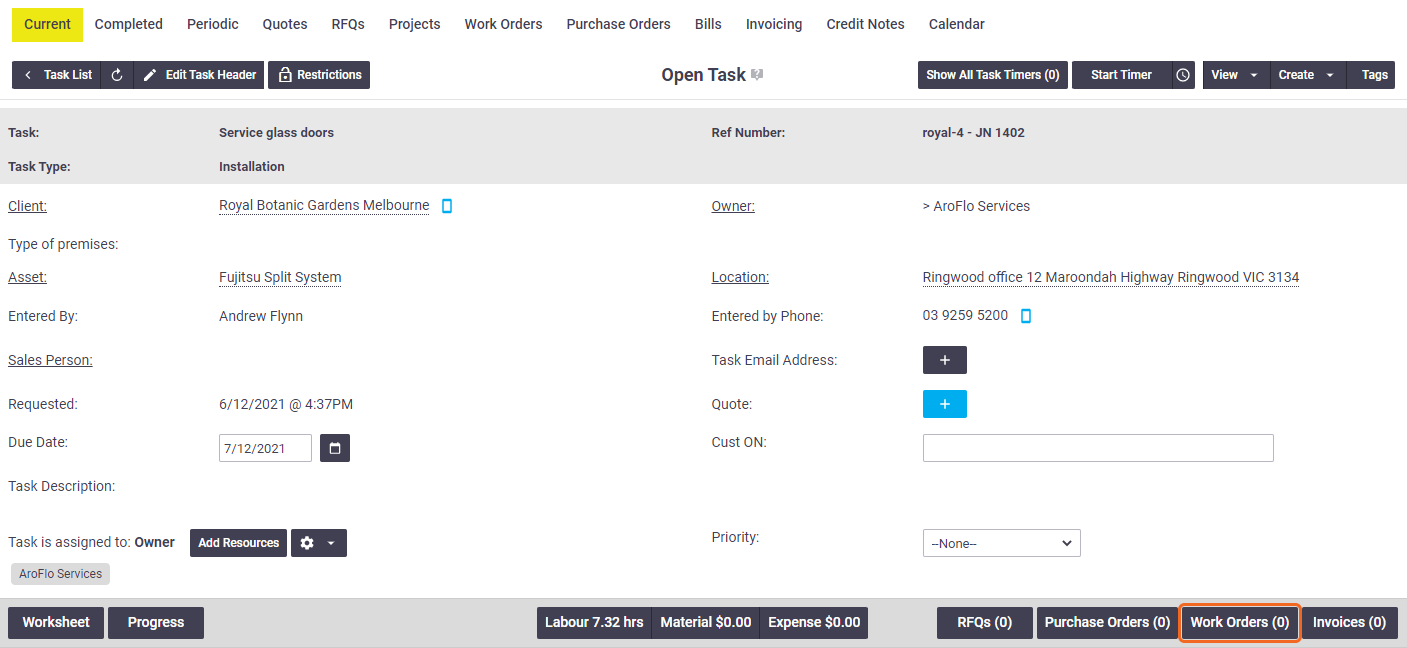
3. Create Order
Click Create Order (top right).

Create a work order and link a task
Alternatively, you can create a work order via the Create menu and then link the task to it.
The quickest way to do this is:
- From the main menu, click Create.
- Click Work Order.
Alternative methods
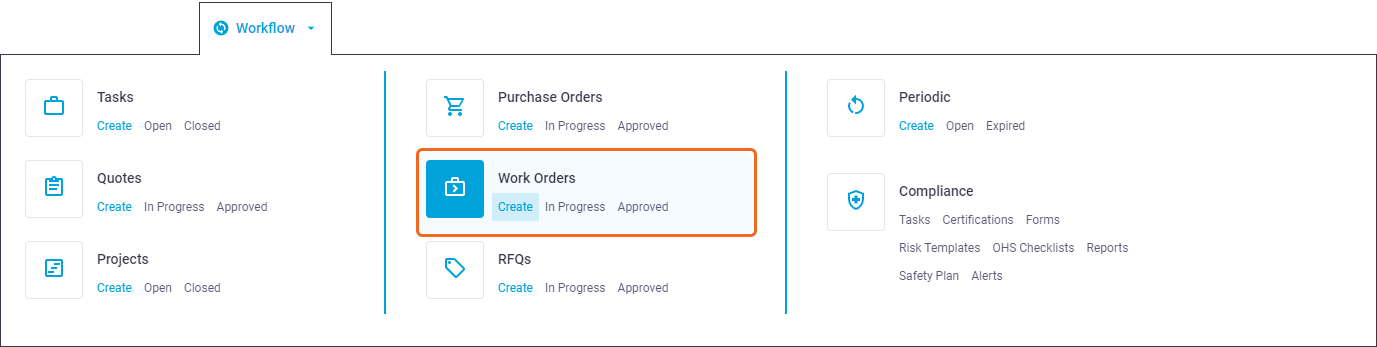
Workflow menu
Click Create from Workflow > Work Orders
Work Order menu
Workflow > Work Orders > Create Work Order
Work Order list
- From the main menu, click Workflow
- Click Work Orders
- Select a list of work orders from the Work Order Menu, for example: In Progress Work Orders.
- Click Create Order.
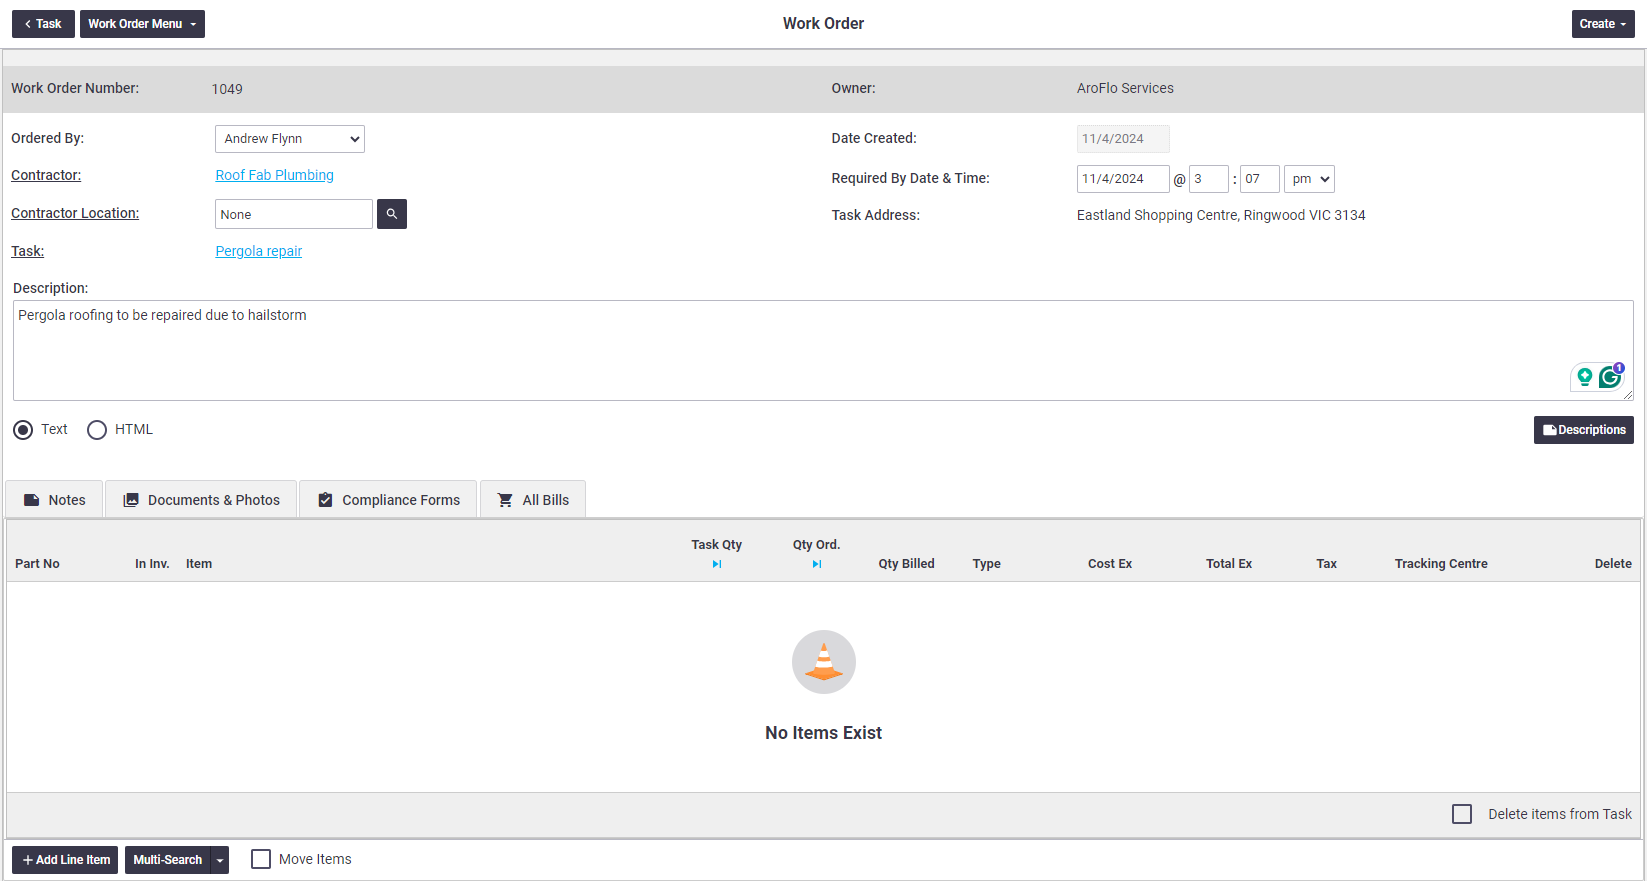
Enter order details
- Edit the resource in the Ordered By field if necessary. This is used to take note of who is responsible for the order.
- Start typing the Contractor name and select from the search results, or use the
 (magnifier) to search and select from your contractor list.
 - (Optional) If your contractor has multiple locations, enter the Contractor Location or use the (magnifier) to search and select from the location list.
- If you haven't created a work order from a task, select the Task this work order relates to by using the (magnifier) and selecting from the list.
- The Date Created and Required By Date & Time are auto-populated with the current date and time. Edit the Required By Date & Time if necessary.
- Enter or edit your Description of the work that needs to be performed.
- The task description will transfer over to your work order. Edit this if necessary.
- If you regularly use the same descriptions, why not use a Description Template? - Save.
Task Address
If creating a work order from a task, the Task Address will be displayed prior to saving your work order for the first time. If you created your work order from scratch and selected the applicable task, the Task Address will be displayed after you save the work order.
Change Task
If you need to choose a different task for the work order, click Task to unlock the field and either type in the field or click (magnifier) to search.
Add labour and materials
The next step is adding materials and labour to the work order.
Only record items you are outsourcing
When adding line items to your work order, only record goods or services to be provided. For example, if you want a contractor to supply all materials and labour for a job, enter the materials and the labour on the work order. If you're supplying the materials, only add labour to your work order.
Items added to a work order (labour and materials) will automatically be added to the task the work order is linked to once the work order has been saved. On the work order, this is visible in the Task Quantity column, and from the task worksheet, this is visible within the Labour and Materials sections.
My Task Quantities are zero
If your task quantities are zero once you've saved your items, this means the setting Automatically add new items to task has been turned off in Site Administration. If you want these job costs to be included on the task, you'll need to edit the Task Quantity value either from here or from the Task. See the above links.
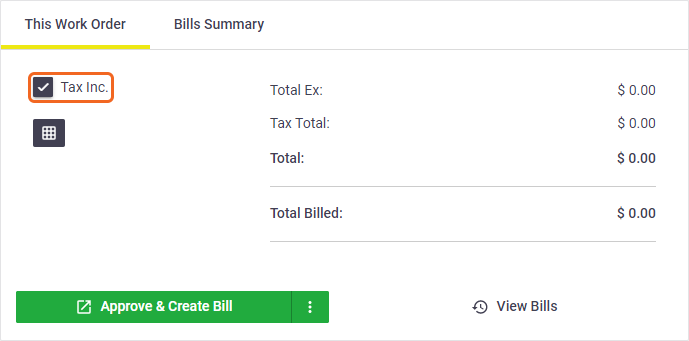
Tax exclusive or inclusive pricing
By default, unit prices are treated as tax exclusive. If you want to use tax-inclusive pricing, click the Tax Inc. checkbox in the work order summary area before adding items.
Show me
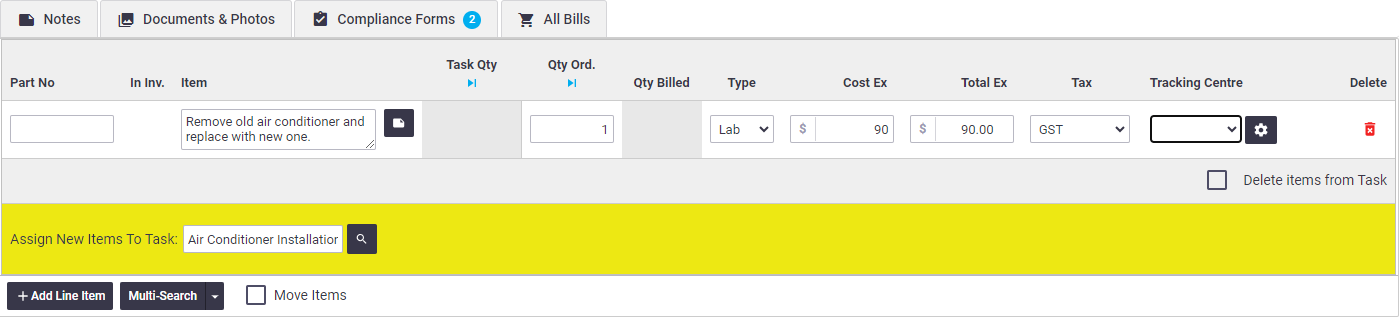
Adding labour
- Click Add Line Item
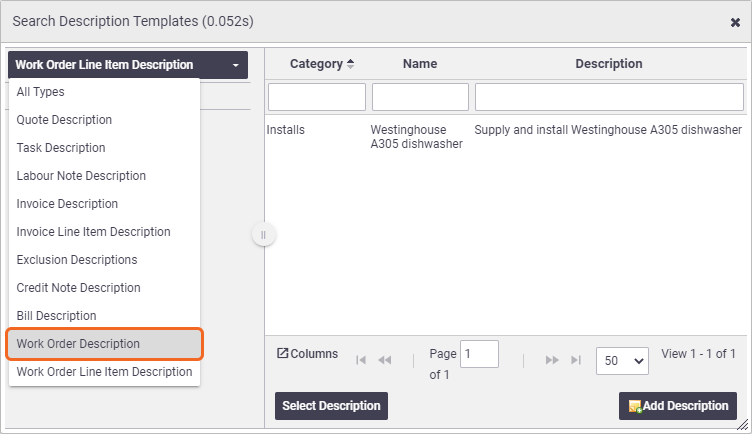
- Enter a description for the work to be performed, or use a line item Description Template (
 ).
).You can also select a Work Order Description by using the dropdown for description type.
Show me
- (Optional) Enter a part number.
- Enter the number of hours for the Quantity Ordered. Alternatively, use the
 (blue arrow) to insert your start and finish times (if known) to calculate the number of hours.
 - Adjust your costs if necessary.
Hierarchy of Labour rates
When adding a Labour line item to the Work Order, the rate of your labour is determined by the following hierarchy:
- Contractor labour rates, which are set on the Contractor card.
- The default labour rates for work orders, set in Site Administration for the owning business unit (i.e. the one used when creating the work order)
- The default labour rates for work orders, set in Site Administration for the top-level business unit.
If no default labour rates have been set, you'll need to manually enter your labour costs.
Labour entries
See 'Line Item Fields Explained' for a full explanation of every line item field.
Quoted labour
If your quote contained labour line items, you can add these to the work order using the Quoted Items function. See below.
Adding materials
There are a few ways materials can be added to a work order. Click the relevant tab below to find out more about each way.
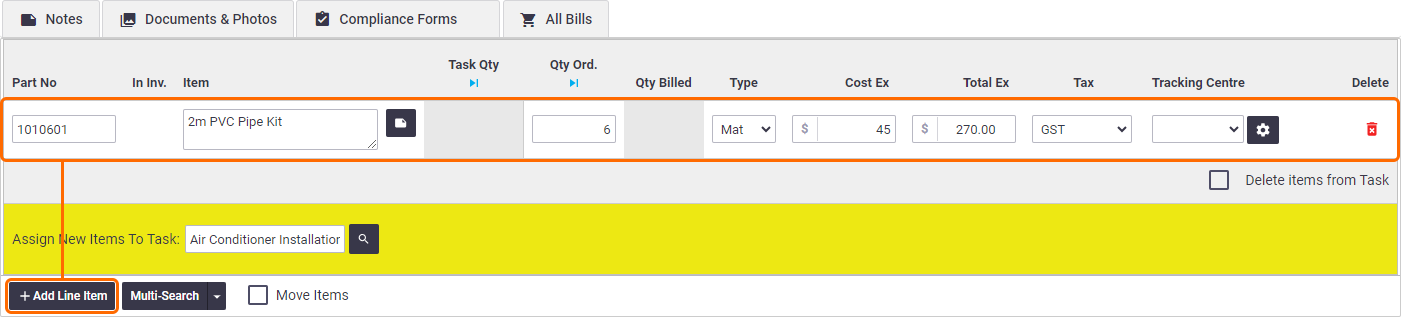
Ad hoc line items
To add a new line for ordering items that are not in your inventory list:
- Click Add Line Item
- Select Mat for Type
- Complete the fields, including a description, quantity, and part number if applicable, and update your costs.
See 'Line Item Fields Explained' for a full explanation of every line item field.
- Click Save to complete.
Inventory
To select existing inventory items:
- Click Multi-Search and select Inventory.
- Find your items by entering a keyword into the Item field at the top of the Search Inventory window, or by going through your Inventory categories.
Header columns
Click the columns button to add additional searchable columns to the header. - Click an item to select it, or click the checkbox on the left-hand side. You will notice the selected items appear on the work order (using the listed cost price).
More info
On a Work Order, the listed item cost will be based on Cost Ex, rather than any Calculated Cost that has been set.
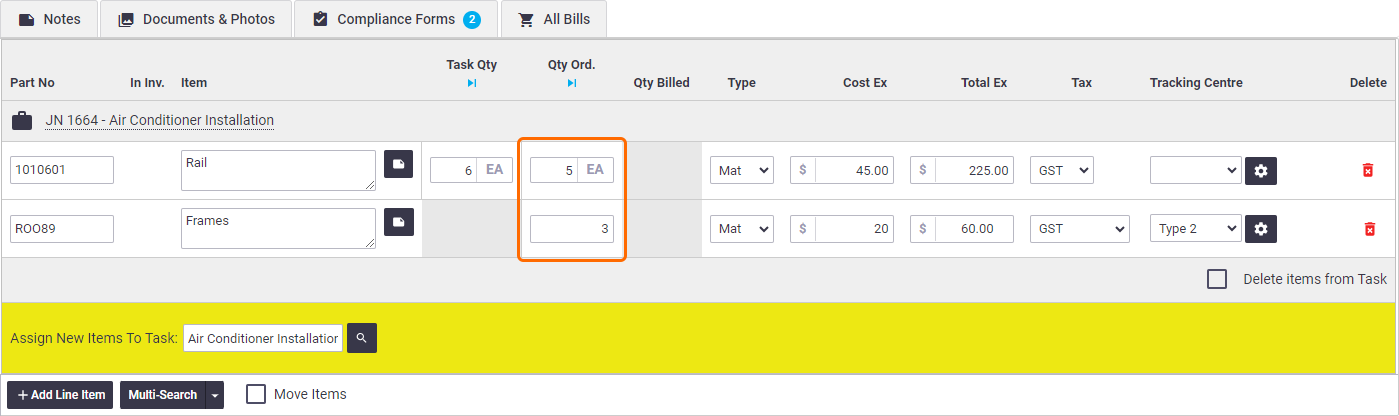
- Close the Search Inventory window once all items have been added.
- Enter the required quantity into the Quantity Ordered field for all line items (see image).
Assemblies
To order items within an assembly (a list or kit of items):
- Click Multi-Search and select Assemblies.
- Use the filters at the top of the Search Assembly Lists box to find the relevant assembly, or search through your Inventory List categories.
- To add an entire assembly to the order, click Select Header, or, add individual items within an assembly by double -clicking each item.
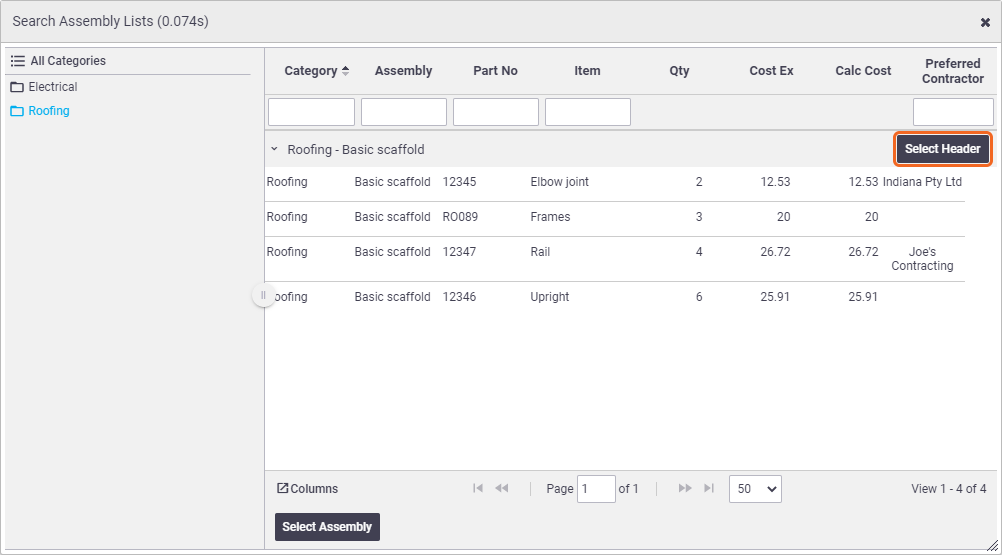
- Close the Search Assembly Lists window once all items have been added.
- Enter the required quantity into the Quantity Ordered field on the assembly header (see GIF).
- Click Save.
Delete assembly
To delete an assembly from your work order, click the  (red rubbish bin with three lines) in the assembly header.
Task Specific Lists
|
Click Multi-Search > Task Specific Lists to add these to your work order. You'll have the option to Select Header, like we saw in Assemblies.
Remember to Save. |
 |
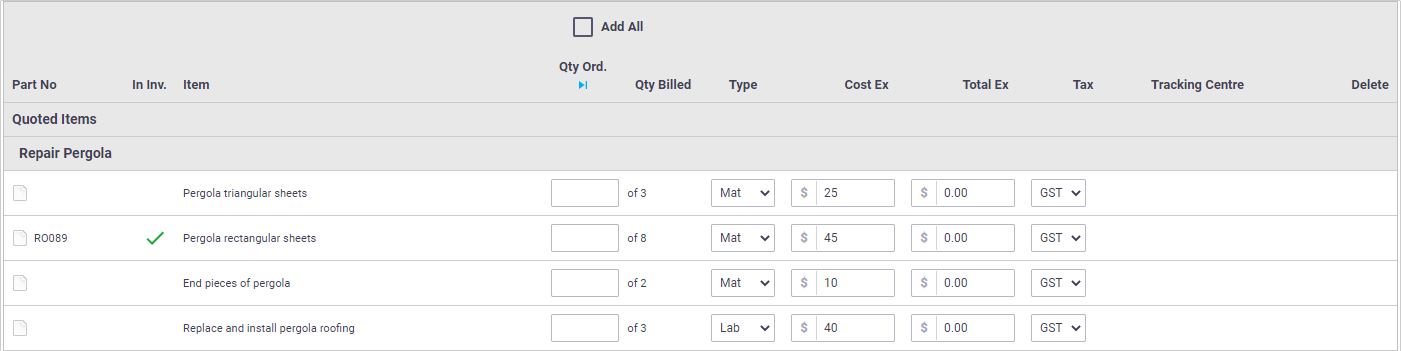
Quoted Items
| If the task linked to your work order was created from an approved quote, click Quoted Items to bring up the items from your quote. All you need to do then is enter the quantities you want to add to your order in the Quantity Ordered fields, or simply click the Add All checkbox, then Save. |  |
Quoted labour
If your quote contained labour line items, you can add these to the work order using this method. (See image)
Line Item Fields Explained
Field |
Description |
||||||||||
|---|---|---|---|---|---|---|---|---|---|---|---|
| Part No | The part number of the item. | ||||||||||
| In Inv. | In Inventory indicates the item is included in your Inventory. | ||||||||||
| Item | The Item name / description. | ||||||||||
| Task Qty | The quantity of items used on the job. Automatically add new items to task Work order items and associated costs are automatically added to Task Materials. For more information, see Work Order Settings. |
||||||||||
| Qty Ord. | View or record the quantity of items or labour hours used for this work order. Start and finish times For labour entries, you have the option to insert your start and finish times (if known). Click the |
||||||||||
| Qty Billed | Quantity of items that have been billed for. | ||||||||||
| Type |
Select the type of line item:
|
||||||||||
| Cost Ex | Used to record the unit cost of the item, excluding tax. |
||||||||||
| Total Ex | The Total value (excluding tax). If updated, the system will back calculate the unit Cost Ex. value based on Qty Ordered. | ||||||||||
| Tax | Select the appropriate Tax Code from the list. | ||||||||||
| Tracking Centre | Link an existing Tracking Centre to help categorise or group items for reporting purposes. |
||||||||||
| Delete | Click the |
What to do next
Once you've finished creating your work order and have added all your labour and materials, the next step is to approve it and then send your order to your contractor. See Send a Work Order.