Enable AroPoint GPS
Before using GPS Tracking, you will first need to enable AroPoint GPS in Site Administration.
In AroFlo, we create an asset for everything we want to track via GPS. An asset must always be created for the device or equipment performing the tracking. This could be vehicles or equipment (with a supported GPS unit installed), or a personal mobile phone (with in-built GPS). Any asset can then be linked to a user, so the movements of a user are based on the asset doing the tracking.
Assets can be tracked in one of two ways:
- Using a supported GPS tracking unit (suitable for vehicle or equipment tracking)
- Using a mobile device (e.g. smartphone) with browser location information (AroFlo Field Tracking) or a supported third-party tracking app.
We recommend reading our GPS Tracking Overview page for the differences between the types of tracking and to find out which device best suits your needs.
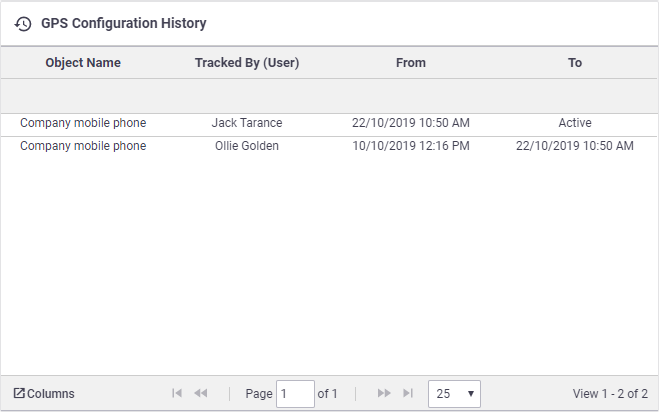
GPS Configuration History
|
If you've set up GPS Tracking on an asset before, you can check the GPS Configuration History. This will give you a history of which object was linked to this asset, who it was tracked by (if used for Field tracking), and the dates it was linked for. Find this from the AroPoint GPS tab within the asset card:
Columns displayed Click the |
 |
|
 (Columns) button to display more headings, e.g. Device IMEI (