Emailing and Printing

Learn how to email and print jobsheets, invoices, purchase orders and more from AroFlo Field

Updated on February 6th, 2024

AroFlo Field features an integrated email interface that lets you:

  • Email jobsheets, invoices, purchase orders and compliance forms from your mobile device
  • Use your own email templates for messages you send often
  • Track the delivery status of emails sent and auto-import replies to task notes.

Email settings

Email default settings are configured in Site Admin (global settings) or on the Client / Supplier card (client/supplier specific settings). These settings can be modified on individual emails if required. For more information, see Print and Email Layout Defaults.


You can also print documents from within AroFlo Field.
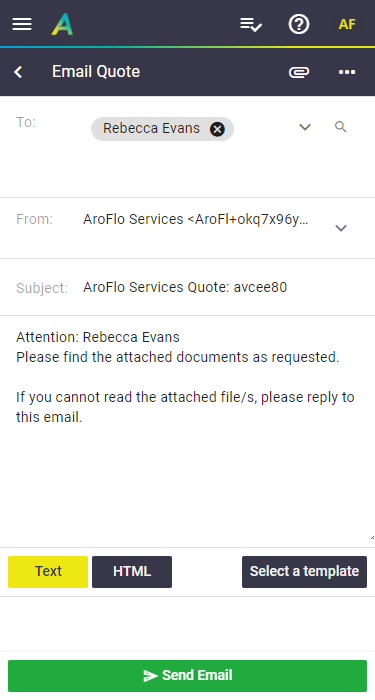
 

Email a document

To email a document from AroFlo Field:

  1. Open the record, e.g. a quote, task, purchase order.
  2. Tap the More tab > Email, or the email button in the header, if available.
  3. Ensure the details in the To: field are correct

    More info

    The recipient in the To: field will be the primary contact of your client/supplier/contractor, if they have an email address. To email a different contact, either:

    - tap to easily select a contact from the list. The list only includes contacts who have an email address listed, and a site contact if a location was selected.

    - manually type the email address in the field

    - tap to search all your contacts and select from Client, User, or Supplier/Contractor contacts.

    Remove recipient

    Tap x on a contact name or email address to remove them.


  4. (optional) Tap to add CC or BCC, and follow the instructions above to add recipients
  5. (optional) Tap for the From: field to edit the From email address or email address used to forward replies to. See Import Email Replies.
  6. Edit the Subject and Body as needed. Alternatively, tap Select a template to use one of your company's own email templates.

    If a default email body template has been set, this will appear and the Select a template button will display the name of the template.


    Search/Filter

    When using email templates, use the search field to search by name or subject. Tap the (three dots) to toggle between them if necessary. Alternatively, tap any of the column headers to sort ascending or descending.

     
  7. Tap 
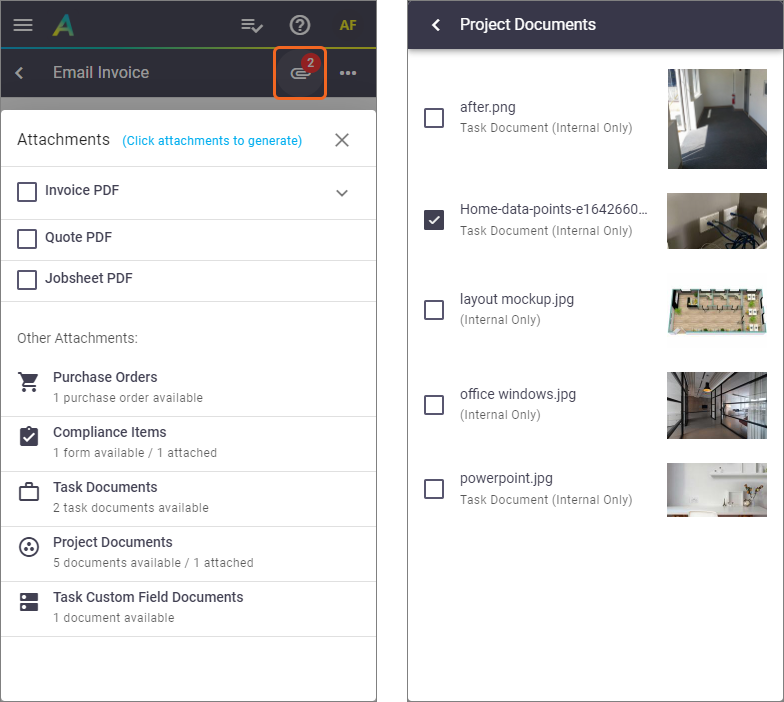
to open the attachments area. From here, attach the relevant documents and close the window. (More on attachments below)
    1. Tap the relevant attachment (e.g. Quote or Jobsheet PDF) to generate.
    2. Tap Change Layout if you wish to select a different document layout from your available layouts.
    3. If necessary, select any other attachments to attach to your email (e.g. documents and photos attached to the task).
  8. Tap Send Email.

More on Attachments and Layouts

  • Tap if you need to select a layout. The layouts available to you are dependent on the area you're emailing from (Tasks, Quotes, Invoices, Purchase Orders). See Standard Layouts for more information.
  • The available attachment PDFs are dependent on which part of AroFlo you are in, for example, Quotes and Invoices will have the option to attach the Jobsheet (and Invoices will have the option to attach a copy of the quote if there was a quote involved). The layout of these documents uses the layout set on the task or quote.
  • The available attachments in the Other Attachments area are dependent on the area you're emailing from and the scenario. In this example, we're emailing a task invoice and the task has documents attached to it, document custom fields attached to it, contains a purchase order, compliance forms, and is part of a project containing documents and photos.

To select attachments:

  1. Tap the relevant area in the Other Attachments area
  2. Tick the necessary attachments
  3. Tap to return to the Attachments area. A confirmation of your selected attachments will display (see image).
  4. Exit the window to return to your email.

Delete attachments

To remove attachments:
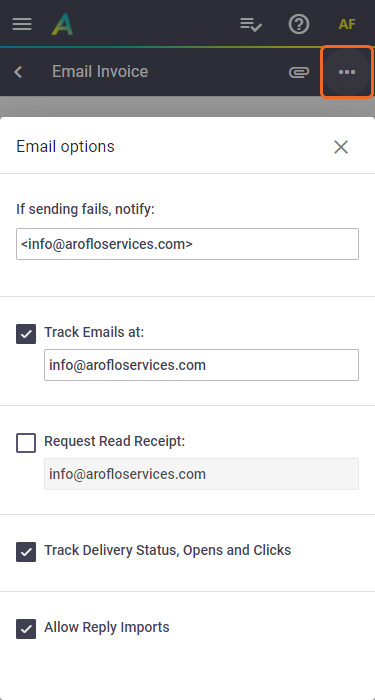
  • Tap the x next to the relevant attachment(s) on the main email page, or
  • Tap the (which will now have a counter on it) to open the attachments area and untick the attachments from the relevant section(s).


Email Options

Tap if you need to access the email options, prior to sending your email.
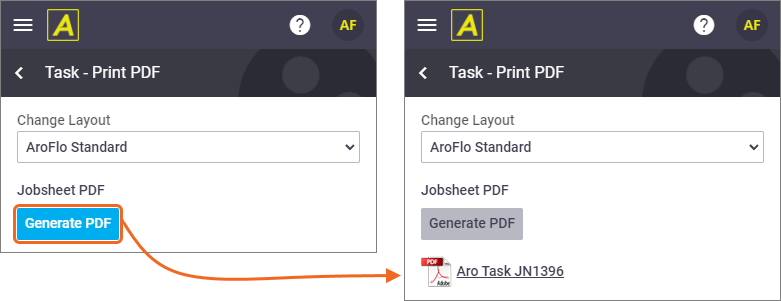
Modifying this information will only apply for the email you're sending.

Defaults

Information contained within these fields is determined by your Print and Email Layout Defaults.

 
Option Description

If sending fails, notify:

Used for setting up automatic notifications when an email is not sent or bounces back.

Track Emails at:

Used for setting up a specified address for copies of the email to be sent to.

Request Read Receipt:

Used for setting up a specified address for Read Receipts which are sent by the system when an email has been read by the receiving person.

Track Delivery Status, Opens and Clicks

Used to track email delivery status, i.e. see if the email has been opened, clicked or read.

Allow Reply Imports

Enables automatic importing of email replies to the Task Notes section. Refer to Tracking Email Replies for more information.


To print a document from AroFlo Field:
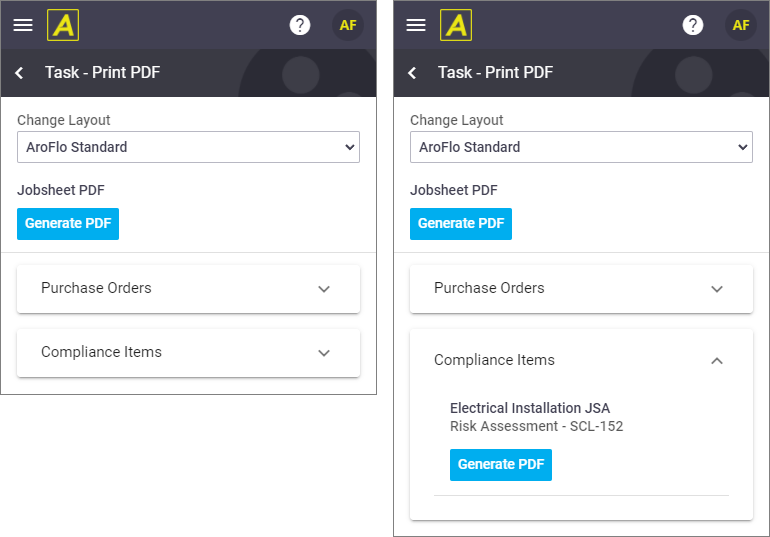
  1. Open the record, e.g. a quote, task, purchase order, or invoice.
  2. Tap the More tab > Print PDF
  3. Tap Generate PDF to generate a PDF of the file, e.g. Jobsheet PDF. Once generated, tap it again to preview. If you're not happy with the layout, use the dropdown in the Change Layout section to preview others. Regenerate the file if you need to.

    For Quotes, Invoices and Purchase Orders, you'll have the option to print the Jobsheet


    If the task contains compliance items and/or purchase orders, you'll have the option to attach these as well. See below.

     
  4. Tap the printer icon when previewing to select your printer and print the file.


To print a compliance form or purchase order that has been saved against a task:

  1. Open the relevant item (task, quote, etc)
  2. Tap the More tab > Print PDF
  3. Tap the relevant section (Compliance Items or Purchase Orders).
  4. Follow steps 3 - 4 from Print a document.

Alternatively, if you're in the Forms area of the task (More > Forms), go to the Task Forms tab > Print to access the Print PDF area.