Rather than assigning a user to a single pre-built or custom permission group at the time of user creation, you can assign them to multiple, depending on your workflow, and your users' roles and responsibilities.
- Add users to multiple permission groups to provide additional permissions in cases where user roles or responsibilities overlap.
- Create feature-based permission groups to save you from modifying multiple custom permission groups
- Use our pre-built feature-based Permission Groups to simply upload into your AroFlo site.
Adding additional permission groups to a user
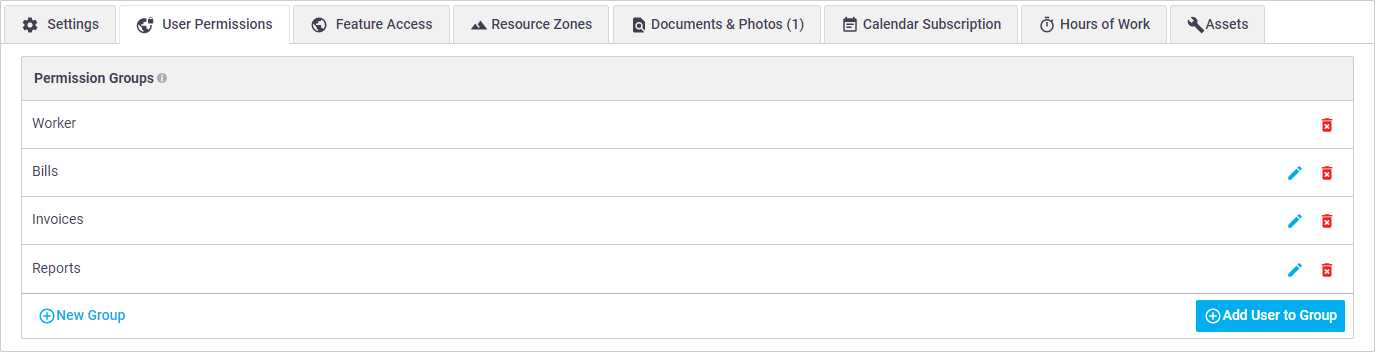
Adding a user to a permission group is done at the time of user creation but you can still add other groups to a user at a later stage.
Why would I want to do this?
Users may be added to multiple permission groups to provide additional permissions in cases where user roles or responsibilities overlap. For example, a Supervisor user could be given access to a custom permission group involving invoices and payments, if this is part of their role.
- Go to Site Admin > Users.
- Click the user's name.
- Scroll down to the User Permissions tab.
- Under Permission Groups, click Add User to Group.
- Select the relevant permission group checkboxes to add to the user.
- Click Add to User.
- Save.

Feature-based Permission Groups
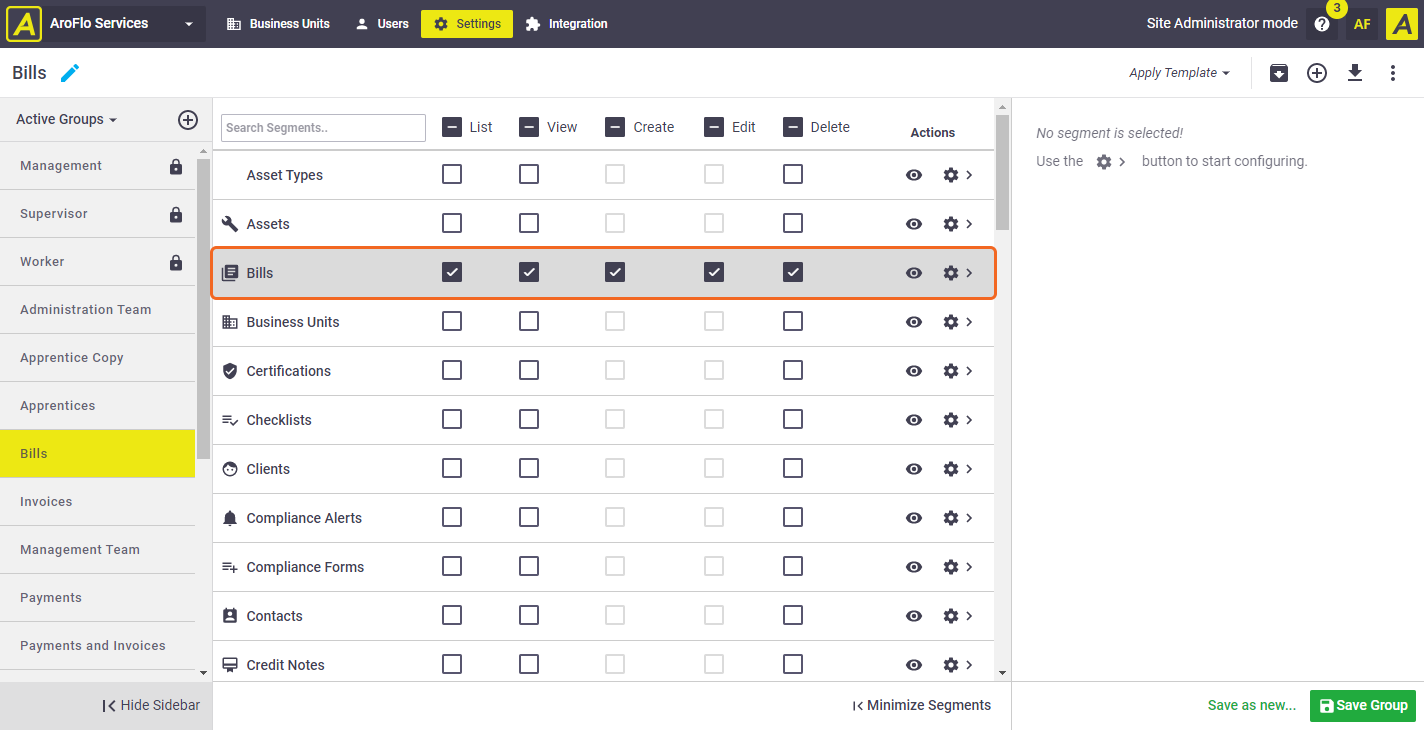
Another way you can utilise adding multiple permission groups is to create feature-based custom permission groups and add these to users if and when you need to.
This will save you from modifying multiple custom permission groups each time a new feature comes around.
Example
For example, a staff member who usually manages Bills is going away for a couple of weeks. Another staff member (in the Supervisor permission group) will be taking on this role. Rather than give this staff member Management access, providing them with access to several other things they may not need (e.g. Invoicing and Reports), you can provide them with access for everything related to Bills and nothing else.
|
 |
 (plus button)
By following the below instructions, you'll be giving users access to all aspects of each feature. If you want to further customise permissions, add or edit custom permission groups as normal.
Further customise permissions
For example, give a user access to view something but not delete something, or have different access options, types, fields and filters
Import Feature-based Permission Groups
To make it easy for you, we've created some Feature-based Permission Groups for you to simply upload into your AroFlo site.
See Exporting and Importing Custom Permission Groups for instructions on importing these into your AroFlo site.