

This section will detail the steps involved in performing a stocktake for a particular stock location.
To perform these steps, users must be in a permission group that includes access to Inventory and Purchase Orders.
Printing a Stock Sheet
- Go to Manage > Inventory.
- Click Item List.
- Click Stock Assigned To... and select the stock location. This will be a User, Business Unit or Custom Holder.
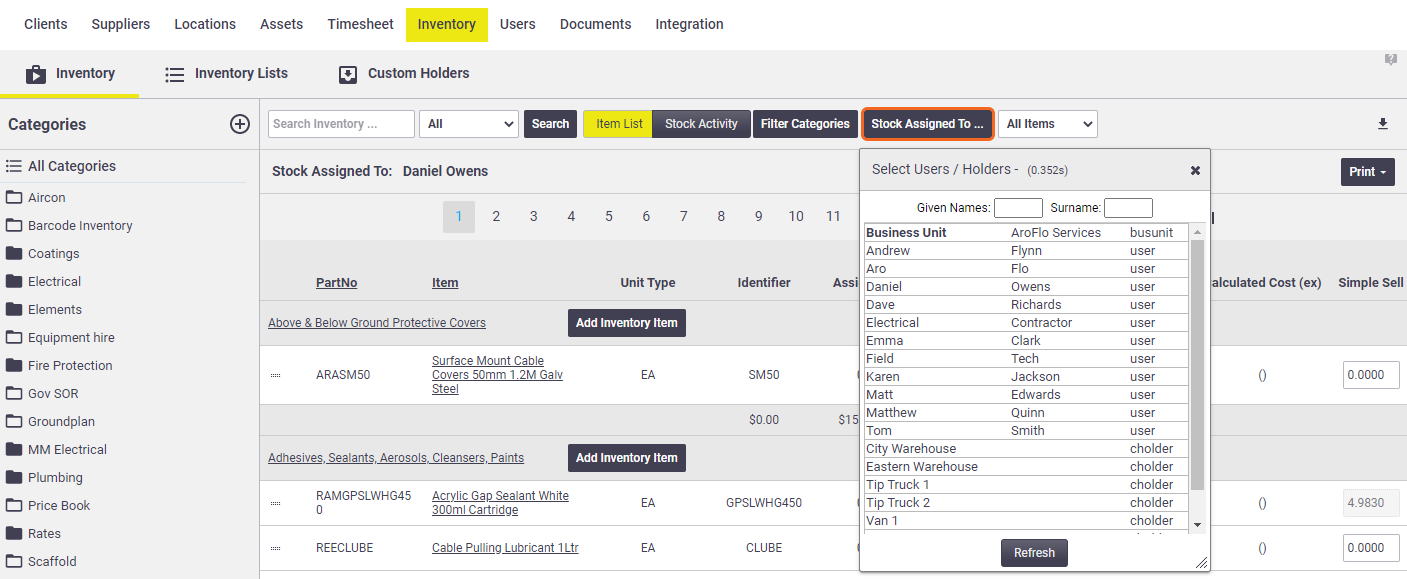
- When the inventory list for the chosen stock location has appeared, click Print (top right of list).
- Choose a print layout that suits your method of stocktake:
More info
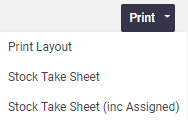
Layout Description Print Layout Print-friendly version of the Inventory list shown. This may be suitable as a reference document. Stock Take Sheet List of the Part Number, Item Description and the Stock Take amount recorded. Use this for a blind Stocktake. Stock Take Sheet (inc Assigned) Same as the Stock Take Sheet above, but also includes the assigned amount (the quantity you should expect when counting). - Right-click to either save or print the Stock Take Sheet.
Updating Stock Levels
Once the stocktake is complete and you're ready to update the figures in AroFlo:
- Go to Manage > Inventory.
- Click Item List.
- Click Stock Assigned To... and select the stock location you've just done the stocktake for.
- For each inventory item listed, enter the actual stock level in the Stock Take field.
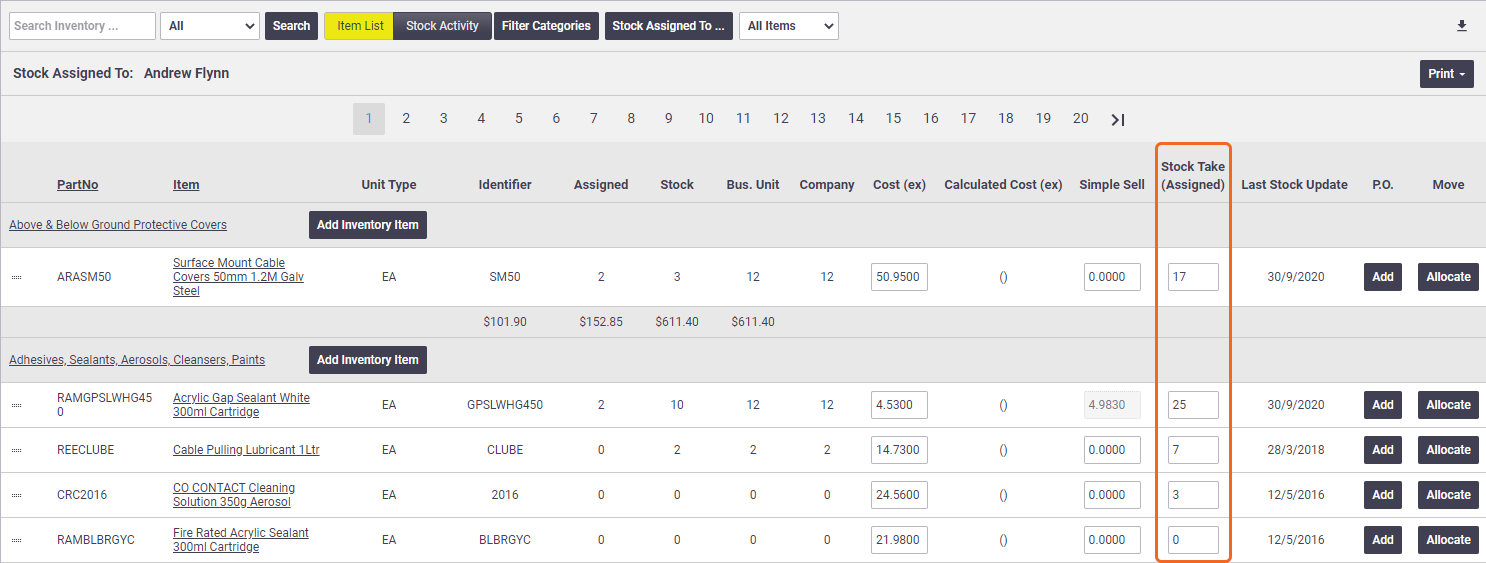
- When you get to the bottom of the page, click Save Inventory, and repeat Steps 3 and 4 for all subsequent pages.
Add an Adjustment Note
After you've entered a value in the Stock Take field and clicked out of the cell, the Adjustment Note field for that item opens at the bottom of the screen. Click Save Inventory after each adjustment note that you enter.
Show me

Adjustment notes appear when you click Stock Activity and select an item to view:
Show me
