

When your supplier issues a credit note for returned purchases, you can record the credit note details against the corresponding bill in AroFlo.
The credit note reduces the total balance due on the bill. If any inventory items were credited, the stock holder's levels for those items will also be reduced, however, it does not reduce the number of items that were automatically recorded on a task from the purchase order. These items will need to be manually adjusted on the Task Worksheet.
Credit note number
The number sequence for credit notes is set within the Integration Menu > Integration Entity Details section. If this number needs to be altered, please contact your Site Administrator. For more information, see Posting Credit Notes.
Create a Credit Note
Create a credit note for a bill
If you want to raise a credit on a specific bill:
- Open the bill.
- Click Create (top right of screen) and select Create Credit Note.
You won't be able to create a credit note if:
- You haven't yet entered a Bill/Supplier Invoice number. Enter the number and Save the bill before you can proceed.
- Your purchase order was created using an Ad-Hoc Supplier. Return to the purchase order and update the supplier and Save, which will update the supplier on the bill as well. Return to the bill to proceed.
- Record the reason for the credit in the Description field, or use a description template.
- Enter a reference number (optional).
After you've saved, you can also upload any internal records, documents or photos (such as credit slips) using the Notes and/or Documents & Photos tab.
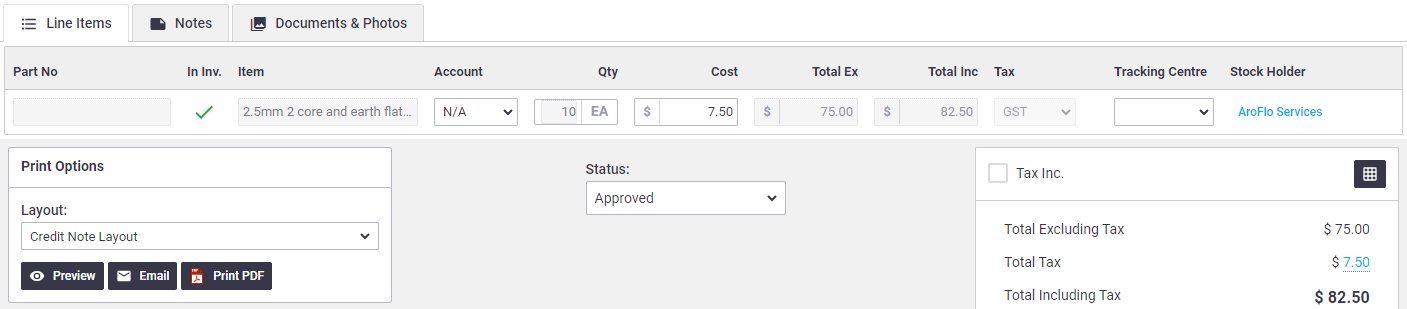
- To add items from the bill, click Multi-Search > Bill Items, select the checkbox next to the items, then click X to close the window.
Alternatively, select items from inventory via Multi-Search > Inventory or manually enter an ad hoc item by clicking Add Line Item.
As you add line items, the value will appear in the Summary area.
- If necessary, enter/edit the Qty and Cost value of items that are being credited.
- To change the Stock Holder, click
 (magnifying glass icon) and double-click to select a stock holder from the list.
 - Save Credit Note.
- Click Allocate if you wish to allocate the credit value to the original bill.
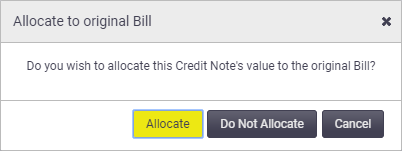
If you click 'Do Not Allocate', the credit value will be held against the supplier for future bill allocations. See Allocate credits, below.
- Change the Status to 'Approved' or whatever you generally use for your workflow, and Save Credit Note.
If your accounting integration link supports credit notes, use the 'Approved' status in order to be able to post credit notes. For more information on posting credits, see Using Cloud-Based Integration.
If you're wanting to allocate the credit note towards a future bill, the credit note must be approved.
Deleting bill items
| You won't be able to delete bill items with a credit note raised against them. | 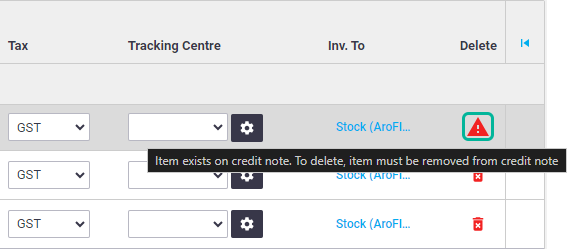 |
View the original bill by:
- clicking View (top right) > Linked Bill, or
- clicking the Bill number.
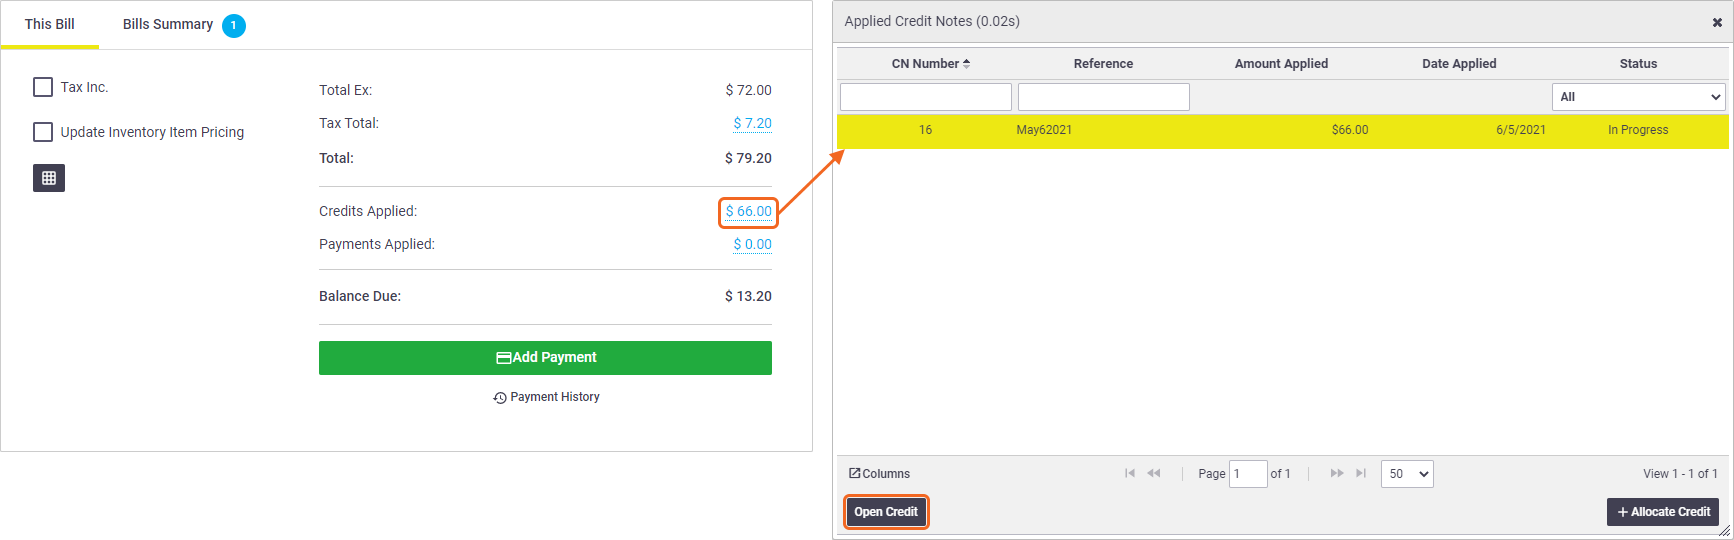
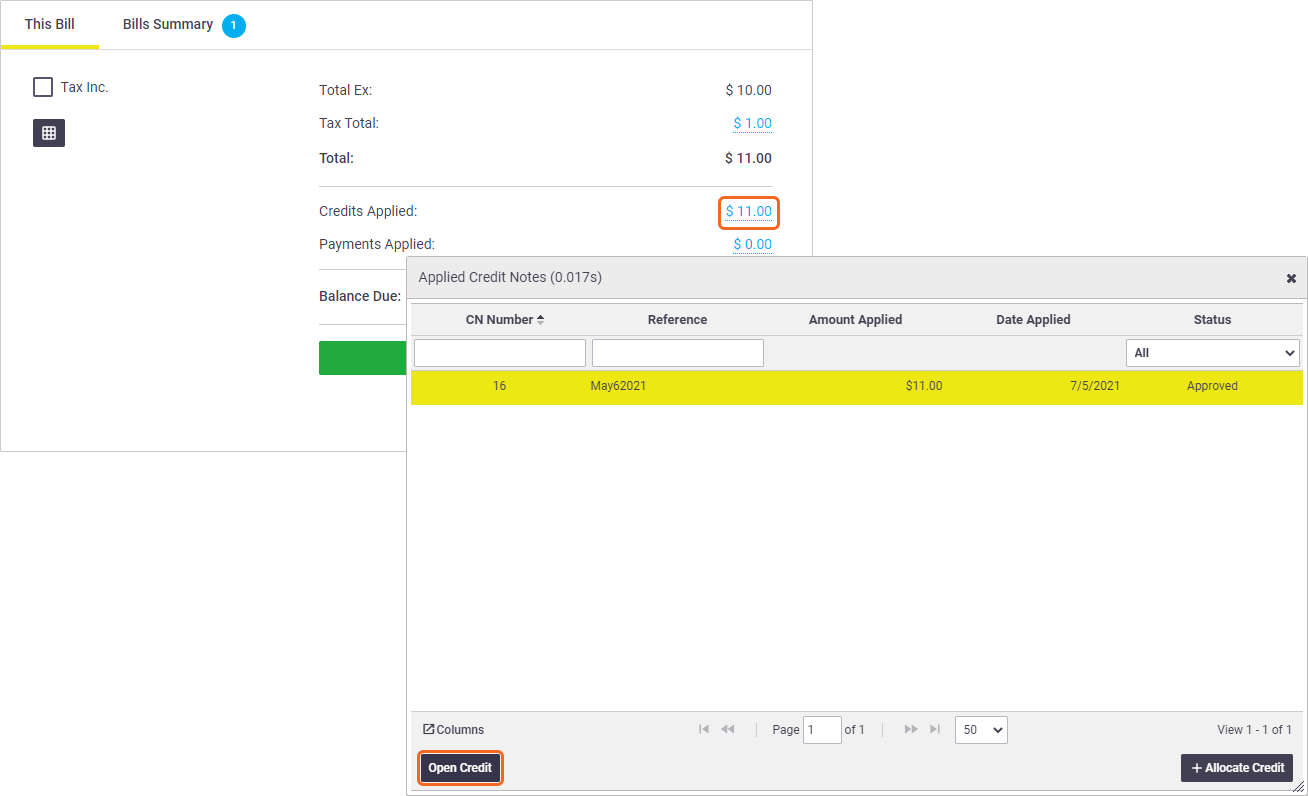
If you allocated the credit note to the bill, the credit will reflect in the 'Credits Applied' section and you can click it to go to the applied credit note.
Tax inclusive pricing
| If the bill against which you created the credit note had the Tax Inc. checkbox ticked, the credit note will also have it ticked. | 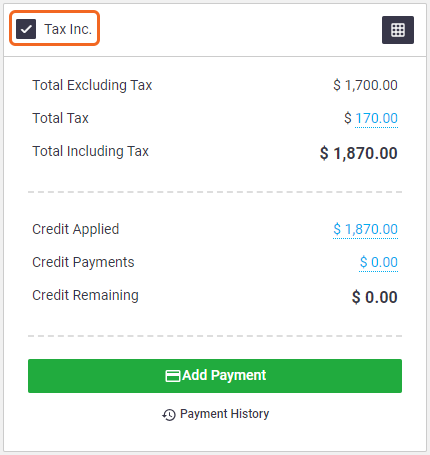 |
Create a credit note for a supplier
If you want to create a credit against a supplier and allocate it to a bill later:
- Go to Create > Credit Note.
- Click Supplier.
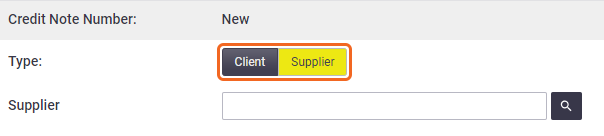
- Type in the supplier's name or click
 (magnifying glass icon) to search and select a supplier.
 - Record the reason for the credit in the Description field, or use a description template.
- Enter a reference (optional).
For example, purchase order numbers if creating a credit note for multiple purchase orders.
- Click Add Line Item.
- Enter the part number, item name, quantity, and cost value.
Alternatively, use Multi-Search > Inventory to search and select items from inventory.
- Mark the status as Approved and Save Credit Note.

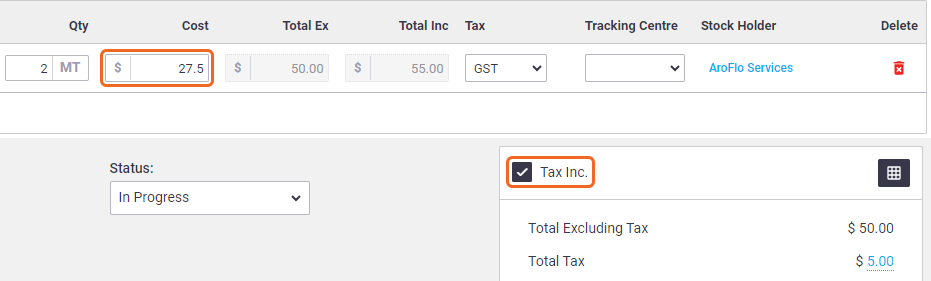
Tax inclusive pricing
If you want your line items to be tax inclusive, click the Tax Inc. checkbox prior to approving the credit note.
Allocate credits
Credits can be allocated to a single bill or spread across multiple bills.
There are two ways to allocate credits:
From a bill
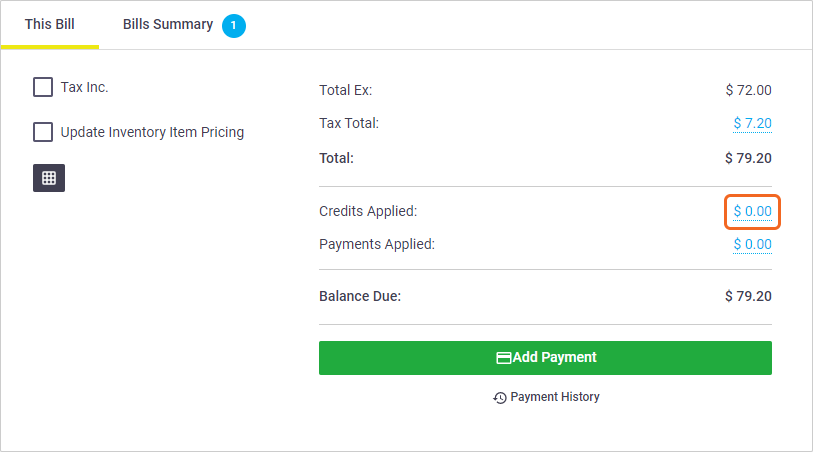
- In the totals area, click the Credits Applied total value link (e.g $0.00)
- Click Allocate Credit.
Credit Notes need to be in an Approved status in order for them to be available to allocate to bills.
- Enter the Allocate amount(s) for this bill.
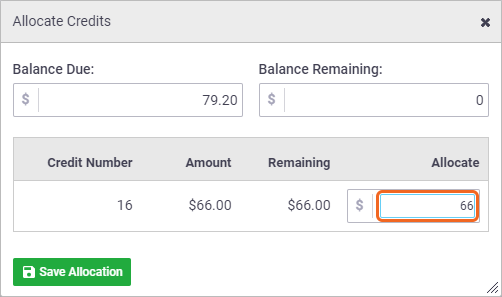
- Click Save Allocation.
- Click X to close the window.
- Save the bill.
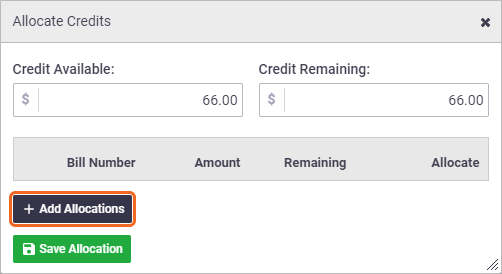
From the credit note
Credit Notes must be Approved in order for them to be available to allocate to bills.
- In the totals area, click the Credit Applied total value link (e.g $0.00).
- Click Add Allocation.
- Click Add Allocations.
- Select the checkbox for each bill to be credited.
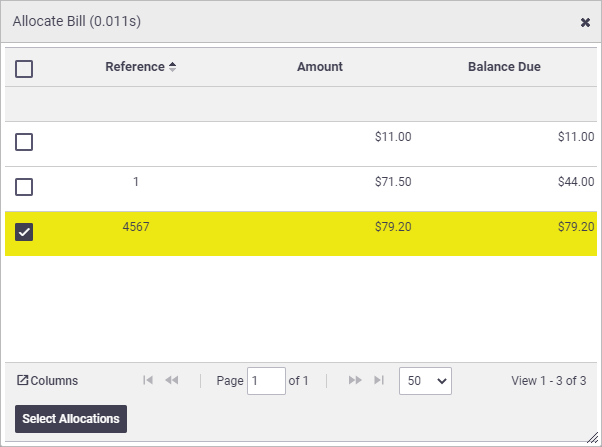
- Click X to close the Allocate Bill window.
- Enter the Allocate amount for each order.
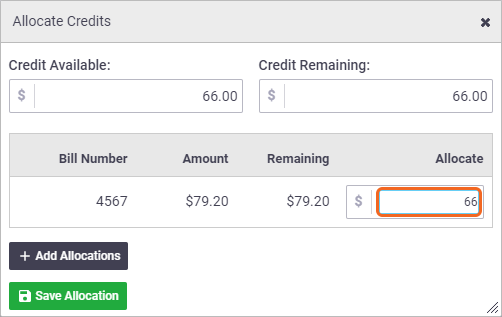
- Click Save Allocation.
- Click X to close the window.
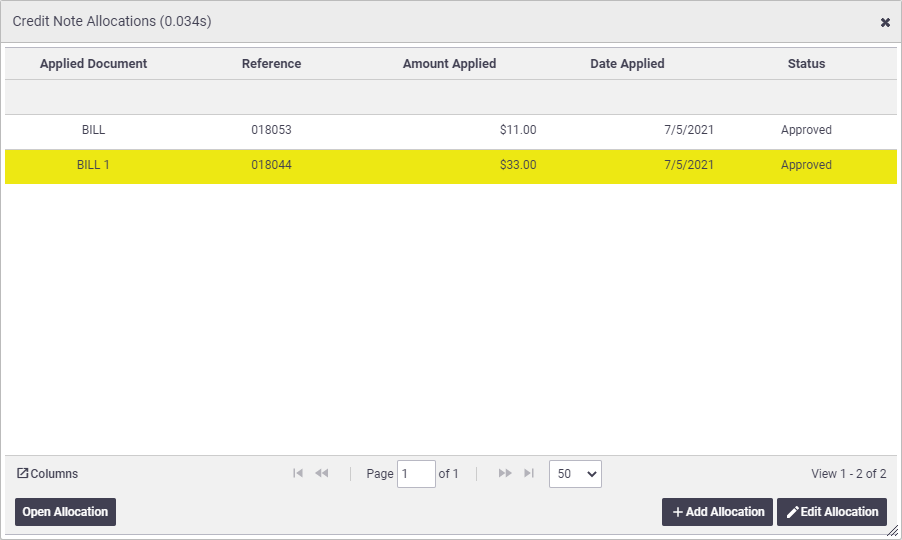
The Credit Note Allocations window will now show the bills and credit amounts that have been applied.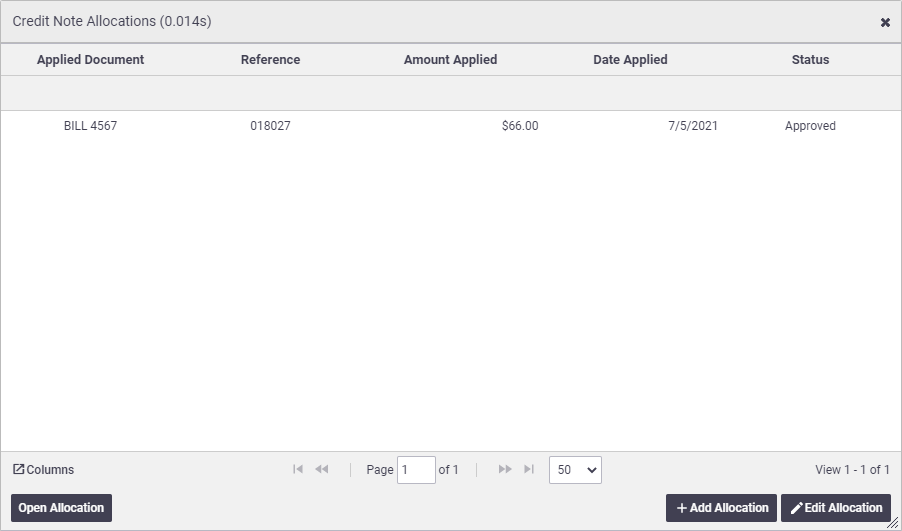
- Save Credit Note.
Delete credit allocations
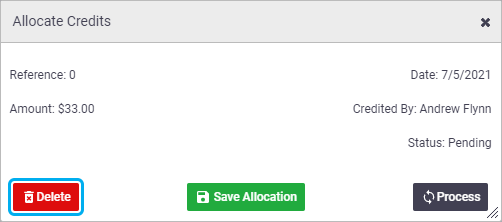
Allocated credits can be deleted if needed.
- Open the credit note.
Open Credit Note from Bill
To open the credit note from the bill, click the Credits Applied link, select the applied credit note and then Open Credit.
- Click the Credit Applied value link
- Click the credit allocation you want to delete.
- Click Edit Allocation.
- Click Delete > OK.
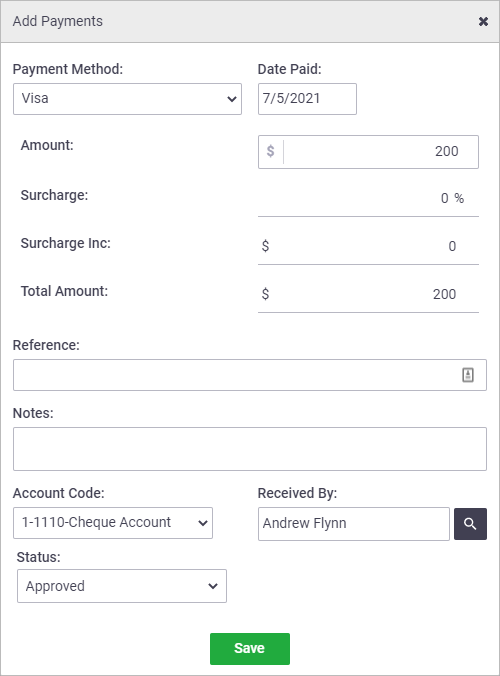
Credit payments
|
To manually record credits paid out to a supplier:
Posting Credit Payments If your accounting integration link supports two-way transfer of payments, you can post credit payments (refunds) from your accounting package against credit notes in AroFlo. For more information, see Using Cloud-Based Integration. |
 |
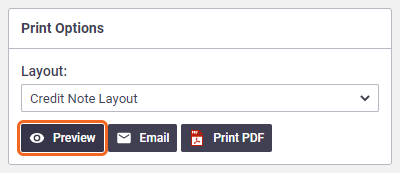
Print/email credit note
|
We recommend that you preview the credit note before printing it or emailing it to your supplier. In the Print Options, click Preview.
|
 |
Customise your credit notes
|
You can customise AroFlo's standard layouts for your business. For more information, see Custom Layouts.
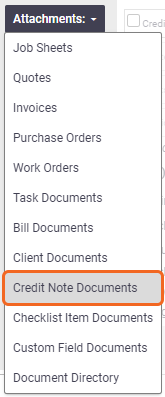
If you have document storage enabled, you can upload a copy of a credit note, photo, or other document to your credit note record. You can then attach these to your email by clicking the Attachments dropdown in the Email window and selecting Credit Note Documents. |
 |