|
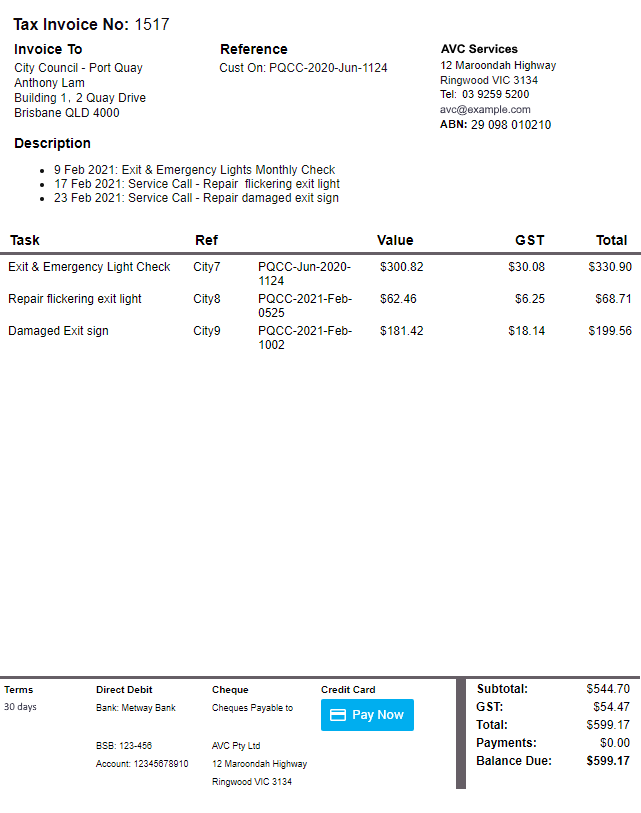
When multiple tasks are linked to a project, you can collate and merge task invoices into one single invoice. This is suitable for companies who have demand maintenance service contracts that are tracked and invoiced as individual jobs but the invoices are collated into one invoice at regular intervals. Example AVC Services have a service contract for the emergency and exit lights at a commercial building. They are required to create individual tasks for each call and keep track of costs expended and ensure no more than 10% mark-up is put on materials. These tasks are invoiced separately as they are completed, and at the end of the month a collated invoice is created of all invoices in the current list. |
 |
 |
Create collated invoice
To create a collated invoice:
|
 |
 |
Add invoices to a collated invoice
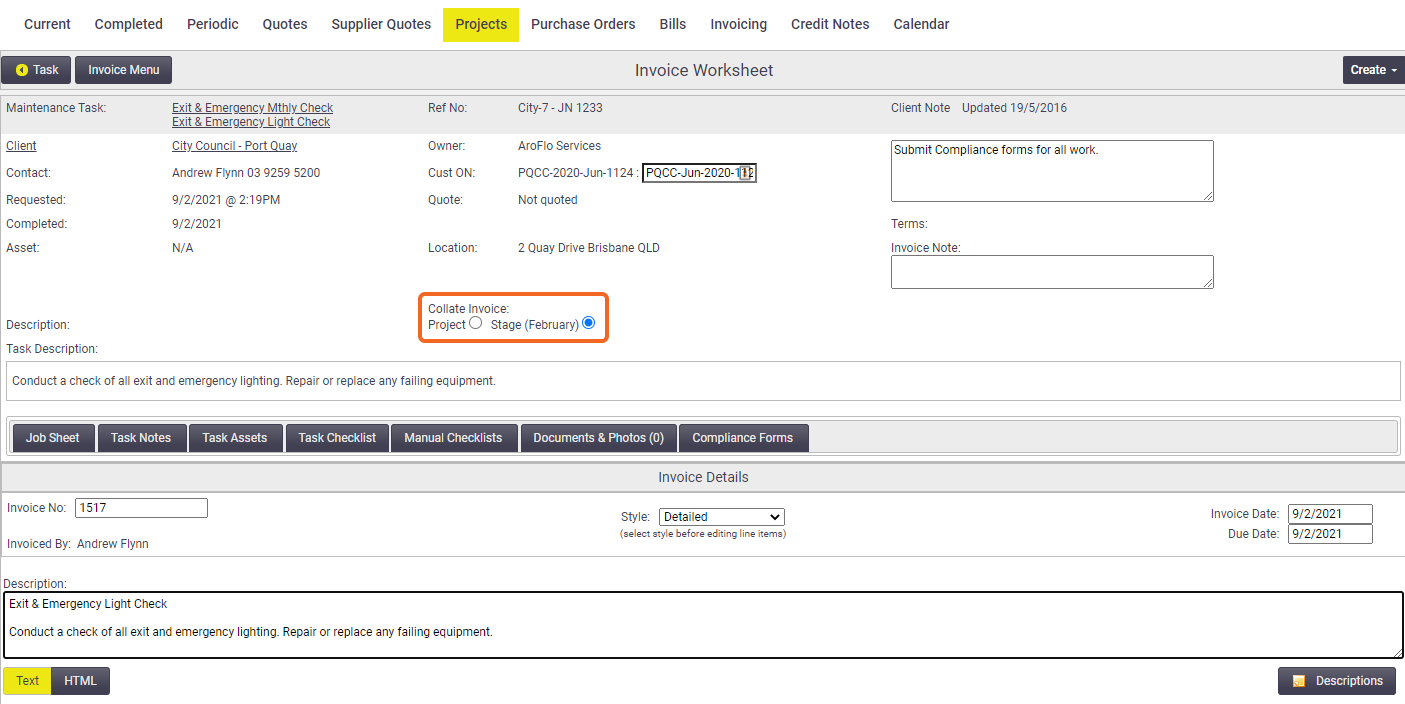
Once you've set a collate option for your first invoice, (step 4, above), continue to invoice each task as they are completed. Each invoice within the stage or whole project (depending on which option you chose) will be added to the grouping.

Tasks marked as a variation
If a task has been marked as a variation, the invoice will not be added to the collated invoice automatically. These invoices will display radio buttons (step 4, above) that allow the invoice to be added to the collated invoice manually.
View a collated invoice
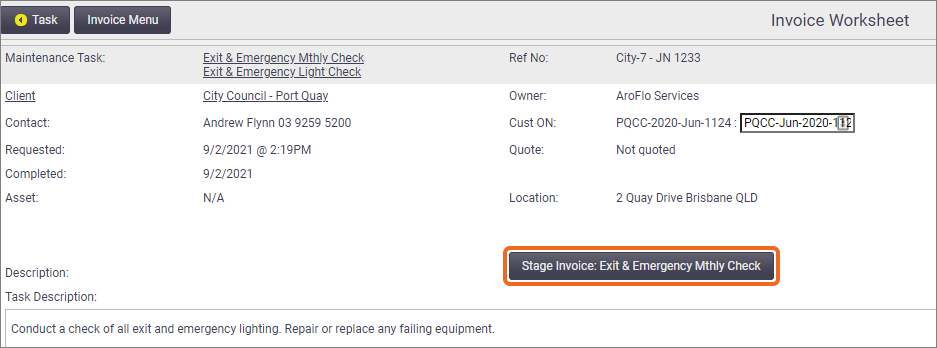
At the end of the month (or the required period), click the button in the centre of the Invoice Worksheet (see previous image) to access your collated invoice.

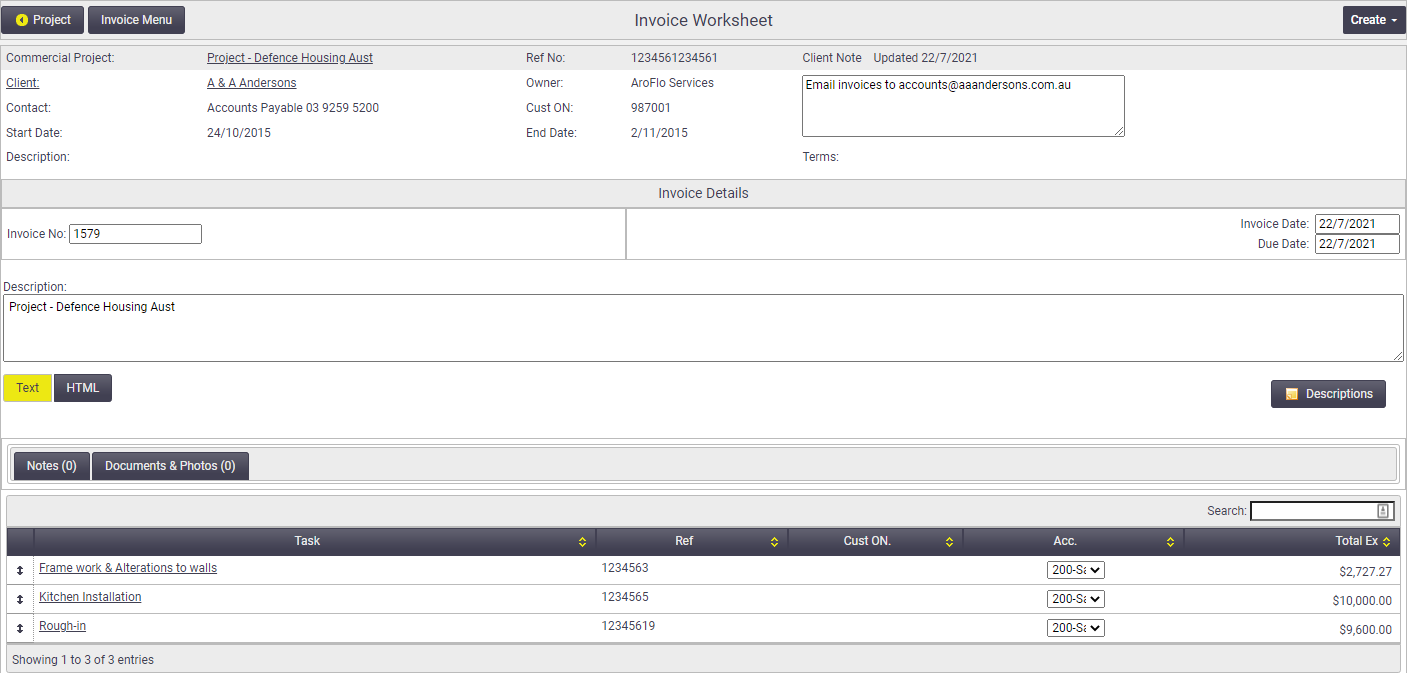
The Project Simple or Project Detailed default layouts are designed for use with collated invoices, or you can create your own layout. See Project Invoice Layouts for more layout tips for project invoices.
Click an invoice from the list to access the individual invoice.
Individual invoices within the grouping can be marked as approved, however, the status of the collated invoice needs to remain as In Progress in order to continue to use the grouping.
Once the collated invoice has been issued to your client, change the Status to 'Approved' to move it to the Pending Invoices list for processing into your accounting package. The next collated invoice you create will capture all new project or stage invoices that have not been set to 'Approved'.
Collated invoices will be added to the Invoicing tab within the project.
Additional tips
- Deleting a collated invoice will delete the grouping only but the individual invoices within it will remain.
- To add an Approved invoice to an existing collated invoice, you'll need to mark it as In Progress and choose a collation option (step 4, above), and then you can mark it as Approved again, if necessary.
Collated Invoices and Integration
|
When you send a collated invoice to your accounting package, you will not be able to see the full breakdown of items on the invoice once it has left AroFlo. You will only be able to see the top-level line items and their totals. This has two potential implications:
|
 |
 |
 (link) symbol to link task items (labour, materials, expenses) to the line item. See