Notes are used to record information for reference and communication purposes. Using AroFlo's notes editor, you can either record notes in plain text or richly formatted HTML. See Add Task Notes for the difference between the two styles.
Each note has its own visibility filter which controls who can view the note (internal, client, contractor, etc).
Task Notes Feature
Clients, Suppliers, Locations and Periodics feature an additional notes section called 'Task Notes'. Notes recorded in this section will automatically appear as task notes on jobs that are created against the client, supplier, location or periodic.
Interested in learning through an interactive course in the AroFlo Academy?
Create note
|
To add a note:
Description Templates Tap Descriptions to use a Description Template. Description Templates are useful if you regularly use the same descriptions in your notes. |
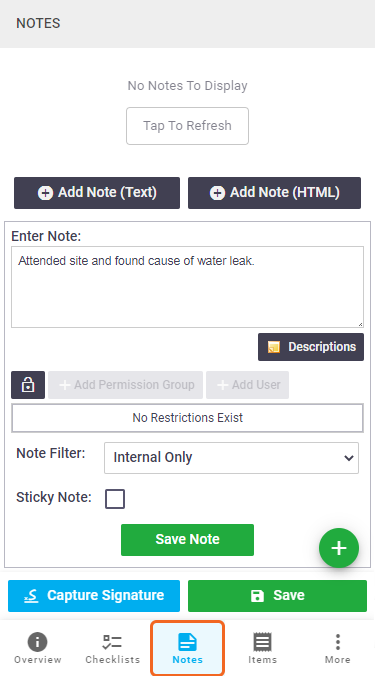 |
 |
Viewing Notes
Tap the Notes tab of what you're on (e.g. a Quote) to view notes.
Things to note
- AroFlo displays the three most recent Notes.
- To view the full list of notes, tap View (X) Previous Notes ..., where (X) denotes how many other notes are recorded.
- To hide all but the last three, tap Hide Previous Notes ... .
- When a note contains a lot of text, you'll see an Expand Note option. Tap this to display the entire note. Tap it again to Collapse the note.
Reply to a note
|
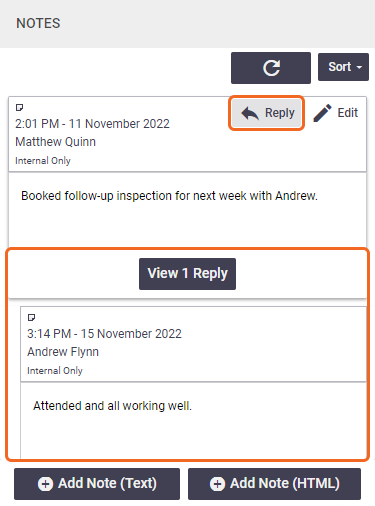
For tasks and quotes, you can reply to a note. This helps you categorise notes as notes with replies that will be displayed as a conversation. This can also be useful for Office staff to communicate with Field staff. Note replies are also used in the Ask a Question feature for online views such as online quotes, invoices, and work orders. Questions from clients are displayed on the quote/invoice/work order in AroFlo as a note, posted by Question.
Your note will be attached to the original note as a reply. Tap View x Replies to display all replies to an original note. |
 |
 |
Note visibility
Access visibility restricts who can view the note. The options available are note restrictions and note filter.
Note Restrictions
|
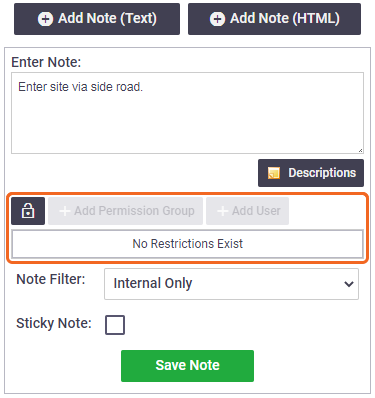
By default, every user in your organisation with access to notes will be able to view your notes. This is indicated by an open padlock icon ( Only the listed users and/or users in the listed permission groups will be able to see the note you're about to create. See the information below if you need to remove the restriction for this instance. |
 |
 |
Create a restriction
|
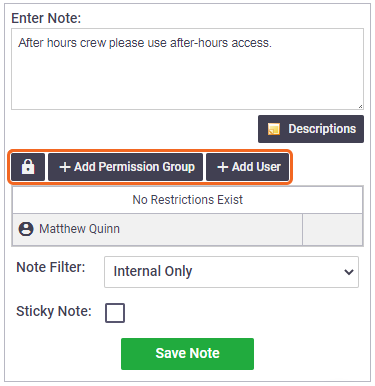
If you only want certain users to be able to view a particular note, for example, the note you're typing is only relevant to certain users or types of user, set a note restriction. Site Administrators can pre-set note restrictions for a particular area. See Default Note Restrictions. To restrict a note:
Only the specified users and/or groups will be able to view the note. |
 |
 |
| Once saved, the note will display with a lock icon to indicate it contains restrictions. | 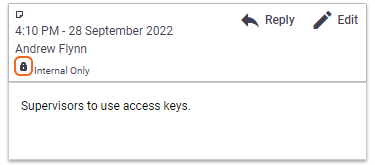 |
 |
Edit restrictions
|
If the note has pre-set restrictions, you can edit them for this instance:
Remove restrictions Alternatively, to remove the restrictions entirely (i.e. you want everyone to be able to view your note), click the You can remove the restrictions before or after the note has been saved. See Edit Notes for instructions on editing an existing note. |
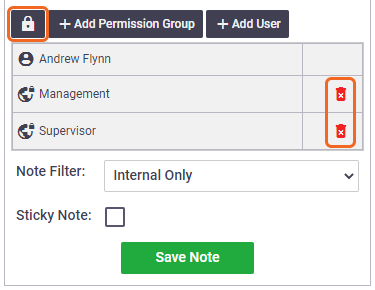 |
 |
Note Filter
|
Note Filters control if a note can be seen outside of your organisation:
Permission Groups If using Permission Groups, the user types shown above also need to be represented by a Permission Group. When using pre-built permission groups:
Custom permissionsIf using a custom permission group, you can define which performer to represent via Settings > General > Permission Groups > (Select Permission Group) > Notes > Filters. |
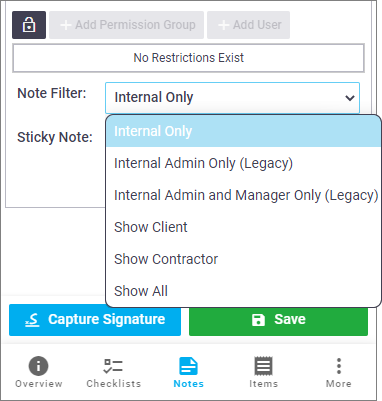 |
||||||||||||||
 |

 ). If you see a closed padlock (
 ), this means that restrictions for this area have been pre-set in Site Admin and names of permission groups and/or users will be displayed. See
  (open padlock icon) to restrict the note to be accessible only to yourself. The icon will change to a closed padlock (
 ).
). (red rubbish bin) next to each permission group and/or user you wish to restrict from having access to the note.
 (closed padlock icon) and Save Note. The note will no longer be restricted and the padlock icon will be open again (