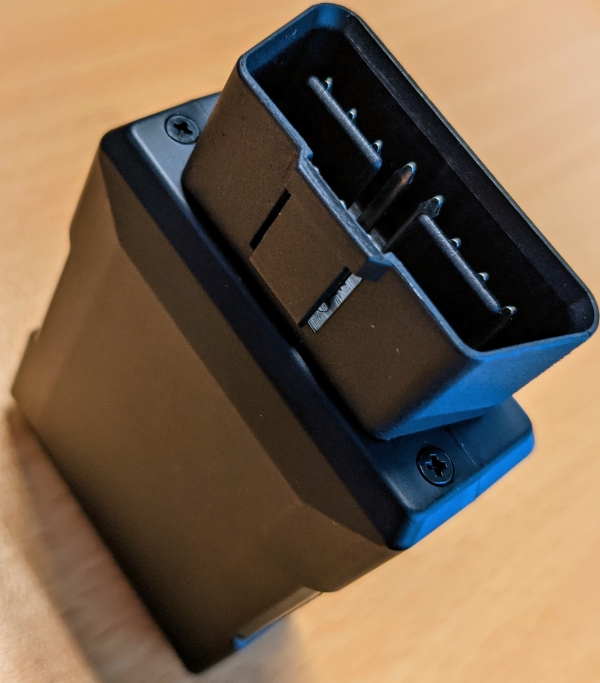
|
Click the relevant link below for instructions on installing or replacing a SIM card in your device:
US availability |
 |
||||
 |
|||||
Changing providers?
If replacing SIM cards and the new SIM card is with a different telecommunications provider, the APN will need to be updated by sending an SMS to the new number.
If the SIM is data-only, this is not possible, so you have three options:
- Enable SMS on that SIM
- Replace the SIM (even temporarily) with one capable of sending SMS
- Send the device back to AroFlo for re-configuration.
ATrack AK11
The ATrack AK11 GPS Tracker requires a full-sized SIM to be installed in the device. This is different to the AX11 which requires a Nano SIM.
1. Prepare the unit
If necessary, unplug the cable from the tracker and remove the unit from the vehicle.
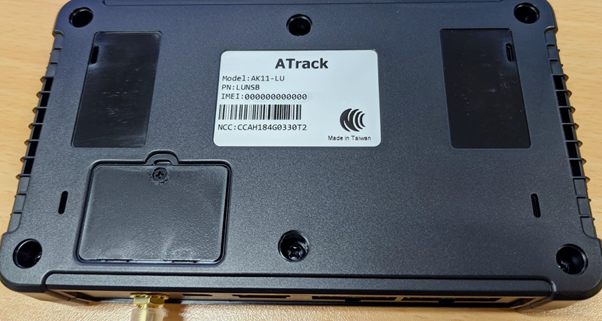
2. Unscrew the panel
Unscrew the rear panel with a small Philips head screwdriver.
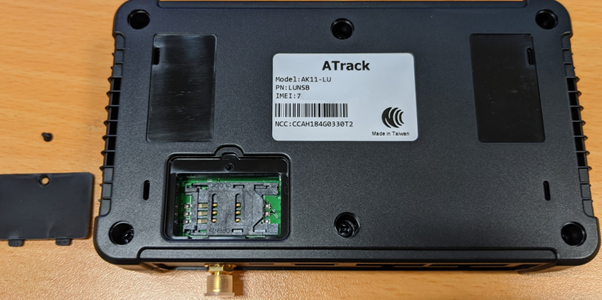
3. Remove the SIM housing
Slide the SIM housing to the left to unlock it, then lift it up.
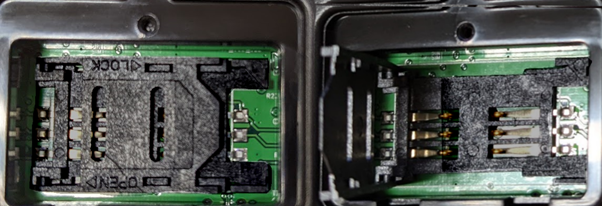
4. Insert the new SIM
Insert the full-sized SIM in the orientation shown, then close the housing and slide to the right to lock.

5. Replace the cover
Replace the panel cover and screw.
ATrack AX11
The ATrack AX11 GPS Tracker requires a Nano SIM to be installed in the device. This is different from most other models which require a full-sized SIM.
1. Prepare the unit
If necessary, unplug the tracker from the vehicle.
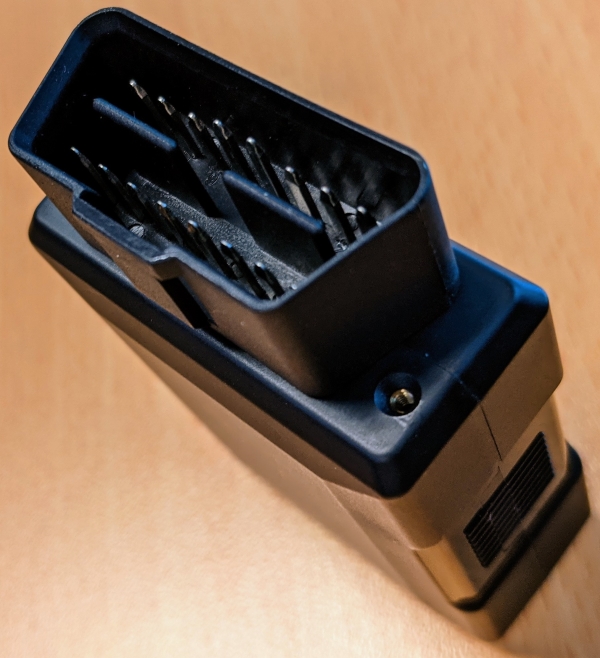
2. Unscrew the connector
Remove the screws either side of the OBD-II connector on the Tracker.
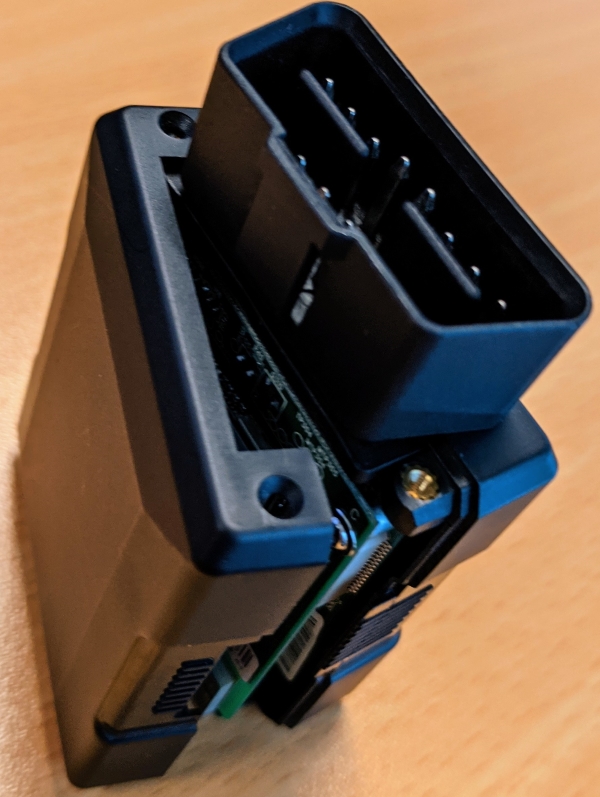
3. Remove the cover
Remove the cover by lifting from the screw-end first.
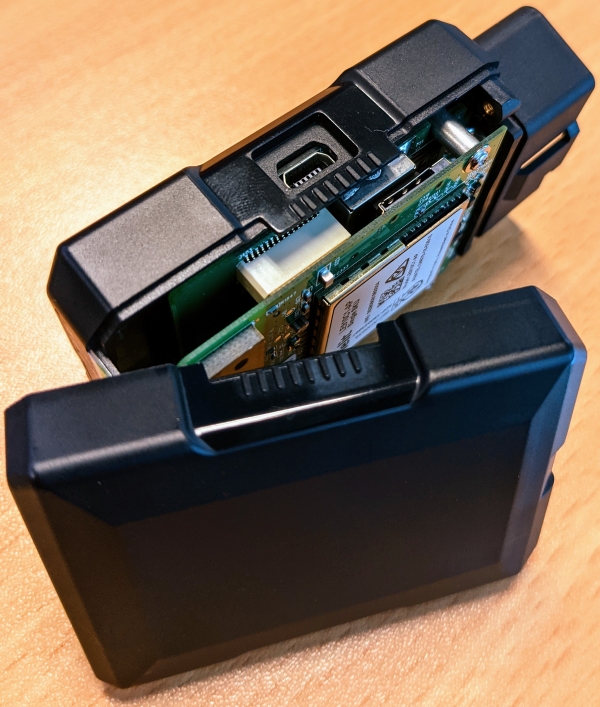
4. Prepare the SIM card slot
Note the position of the Nano SIM slot: below and to the right of the mini-USB port
5. Insert SIM
Insert the Nano SIM notch-down, pushing till it clicks.
SIM orientation
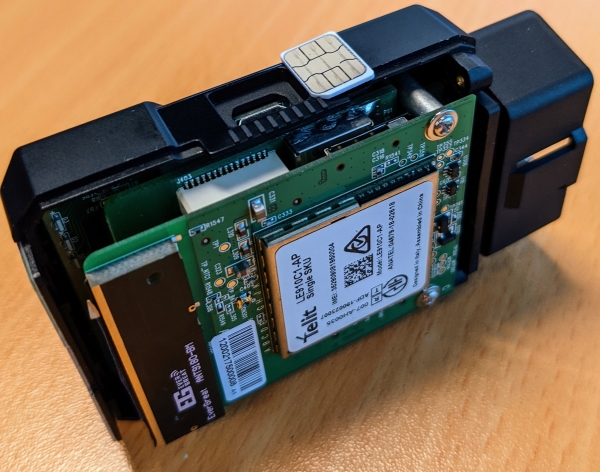
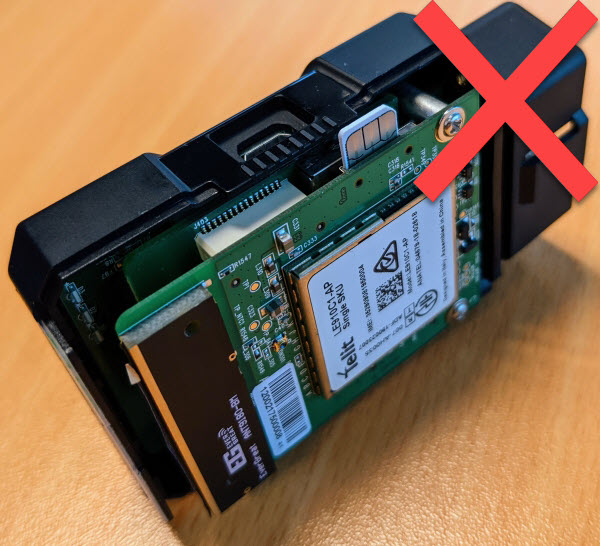
Ensure you insert the SIM card the correct way with the notch-down and the chip side facing towards you. See the below panels for more information.
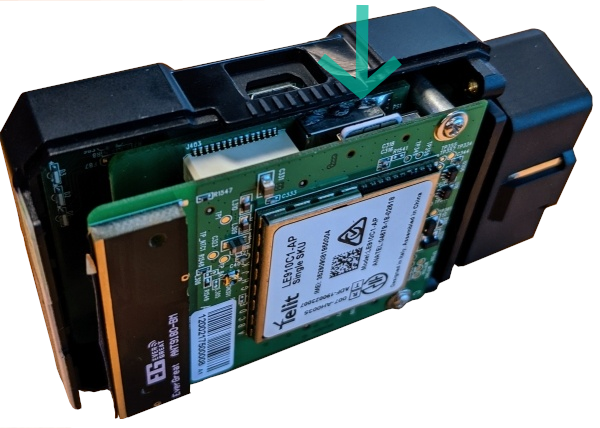
Correct SIM orientation
This image shows the correct SIM orientation. Note it is notch-down with the chip side facing towards you.
Incorrect SIM orientation
Do not install the SIM like this. The notch should be facing down and it should lock into place.
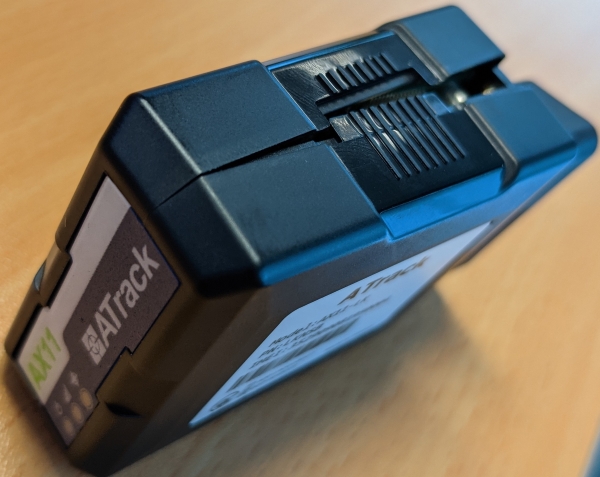
6. Replace the SIM cover
When replacing the cover, click in the back first, then click in the end with the screws.
7. Replace the screws
Once clicked into place, replace the screws.
