

Custom fields, such as canvas and radio buttons, are extra fields that you can create to record additional information.
- Create custom fields against tasks, clients, locations, suppliers, contractors, assets, users, or purchase/work orders.
- Choose from a Text box, Numeric, Date field, Checkbox, Radio, Select, Text area, Barcode and more.
- Set custom fields to be required for task creation or completion.
- Apply custom fields to particular task types or all task types.
- Apply custom fields to assets added to tasks.
- Include data from custom fields in your layouts and reports.
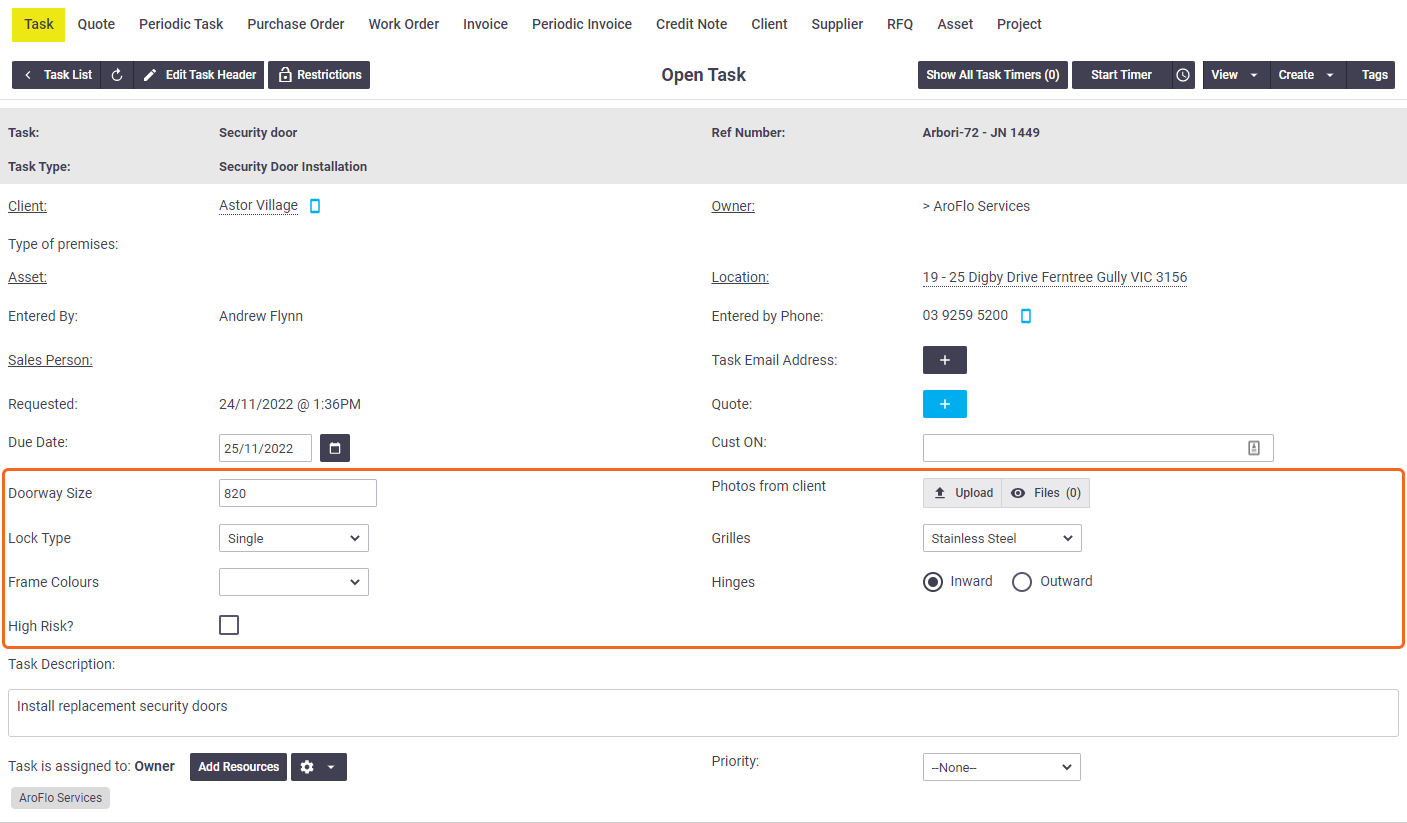
See Task Worksheet - Using Custom Fields? to see some of these fields in action.
Custom Field Types
AroFlo includes different types of custom fields. Click through to see a summary and some examples.
Text Box
|
Allows the user to enter a single line of plain text. You can set a maximum amount of characters to be able to be entered into the text box. See below for character limits. |
 |
Numeric
| Similar to a text box but only allows numeric values to be entered. |  |
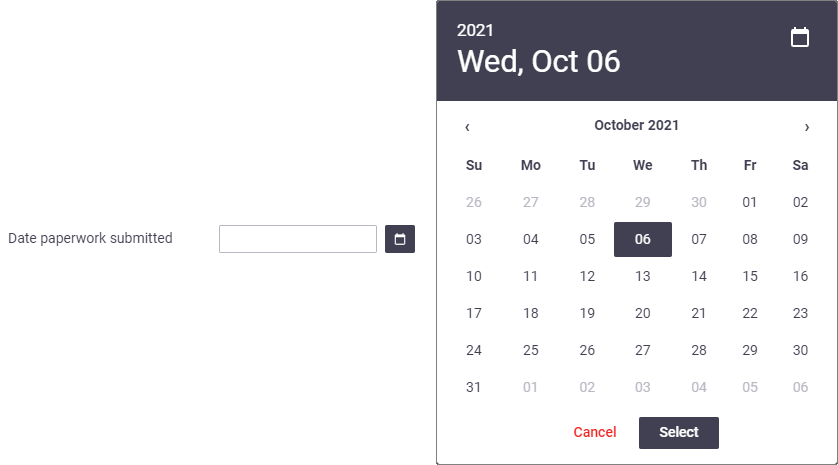
Date field
|
Allows user to select a date from a pop-up calendar. The look of the pop-up calendar may vary depending on the section it appears (e.g. Tasks, Assets, Suppliers). |
 |
Checkbox
| Allows user to select an option by clicking a checkbox. |  |
Radio
| Useful for presenting options where only one answer can be selected, e.g. Yes / No. | 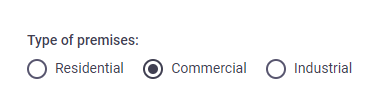 |
Multiselect
|
Similar to a Select field, but allows for multiple options to be displayed and selected. Currently only available for Task custom fields. |
 |
Select
| Allows user to select a response from a dropdown menu. | 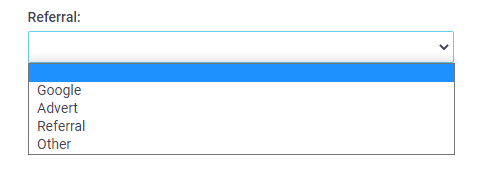 |
Text Area
| Similar to a text box, but provides a lot more space for users to enter multiple lines of text. |  |
Barcode
|
Provides a field for scanning and recording barcodes. This custom field is available on Tasks and Assets. This custom field includes a |
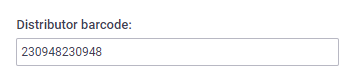 |
 (scan barcode) icon in Field so you can use your phone camera as a barcode scanner.
Canvas
|
Provides a field for creating simple drawings, or uploading an image, and then marking it up. Currently only available for Task custom fields. |
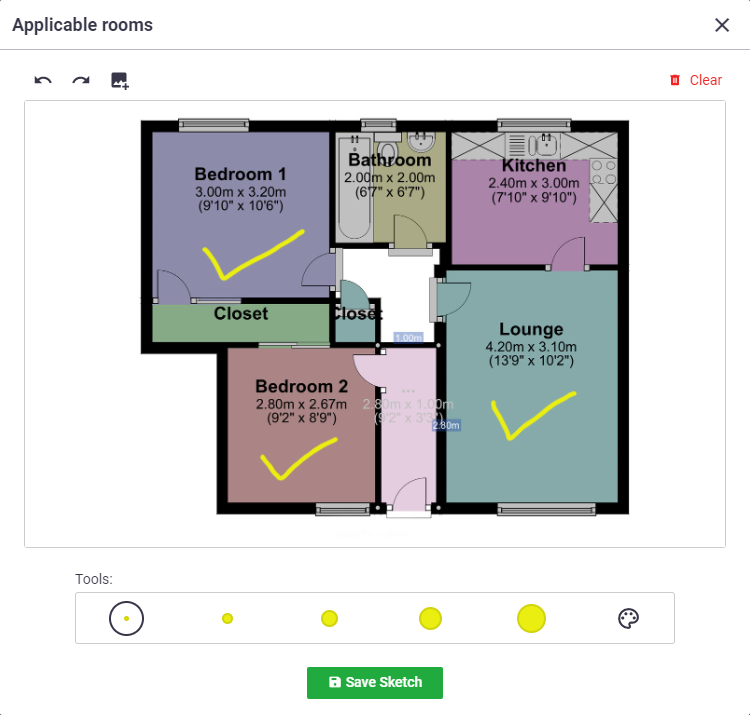 |
Web Link
|
Provides a field for entering a weblink, e.g. a website or social media profile, for easy access. Currently only available for Client custom fields. |
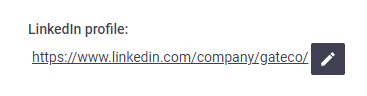 |
Documents and Photos
|
Allows users to upload, search and view documents and photos. This custom field is currently only available on Task custom fields and Task Asset Fields. Photos that have been uploaded to this custom field can be displayed on task emails, layouts and reports. The documents and photos functionality is only available if you have Document Storage enabled for your AroFlo subscription. |
 |
Add a custom field
- In Site Admin, go to Settings.
- Use the search box to find Custom Fields.
- Click the link in the relevant section, e.g. Quotes, Clients, Suppliers, Assets.
- Click Add Custom Field (you may need to scroll to see this button).
- Complete the fields and options as explained in the table below.
- Click Save Custom Fields.
Archived Custom Fields
If you add a new custom field with the same name as an archived field, it will reactivate the archived field.
All custom fields
| Field name/option | Description |
|---|---|
| Field Name | Enter a field name / label that describes what information is required. |
| Type | Select the type of field from the list: Text box, Numeric, Date field, Checkbox, Radio, Multiselect, Select, Text area, Barcode, Canvas, Web Link, Documents and Photos. |
| Radio/Select Val | This is primarily used for Radio and Select types. Enter a list of values you want to appear as a radio button or list selection. These values must be separated with a comma, e.g. Yes,No,N/A |
| Length | Set a character limit for the custom field. The character limit for text fields is 2000 characters, except for Task custom fields which is 999. |
| Show in Field |
Allow field users to access custom fields according to the following levels of access:
|
| Required | Select this option to make the custom field a 'required' field when creating a new record, i.e: Client, Location, Supplier, Asset or User. |
| Archive |
Click to archive the custom field if no longer required. Custom field information will be retained in existing records. |
Task custom fields
| Field name/option | Description |
|---|---|
| Required (Creation) |
Select this option to make the custom field a 'required' field when creating a task. This setting cannot be used for Documents and Photos or Canvas custom fields. |
| Required (Completion) | Select this option to make the custom field a 'required' field when completing a task. |
| Task Types | Click this button to apply the custom field to all task types or a particular task type (must select at least 1). |
Client custom fields
| Field name/option | Description |
|---|---|
| Show on Task Sheet | Select this option to display the custom field on the Task sheet (only displays on an open Task). |
Asset custom fields
| Field name/option | Description |
|---|---|
| Asset Type |
Click this button to apply the custom field to particular asset types. If you don't choose an asset type, the custom field will be applied to all asset types. You can select multiple asset types for each custom field. See Asset Types for more information. |
Add existing custom fields to tasks
Task Custom Fields can be unique to each Business Unit.
|
This depends on the Site Administrator Task Setting 'Use individual Custom Fields for each Business Unit [system-wide]'. If you have individual custom fields and want to add custom fields from another Business unit:
|
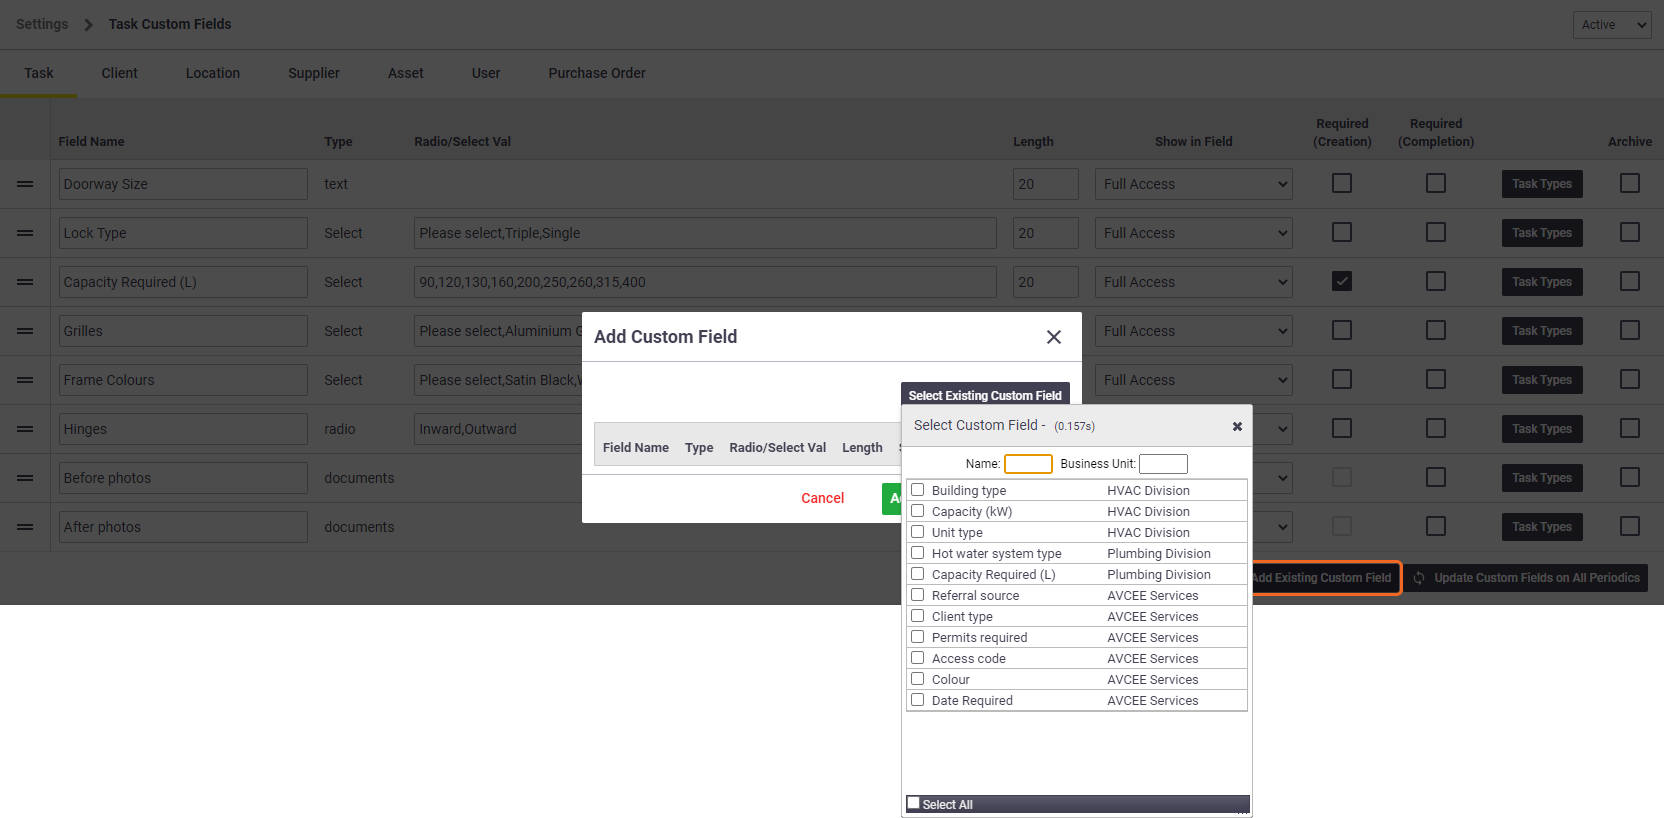 |
Update custom fields
When custom fields are set up, they will automatically appear on any new entries created (i.e. Task, Client, Location, Supplier, Asset and User entries). Existing entries can be updated by clicking the Update Custom Fields on All ... button.
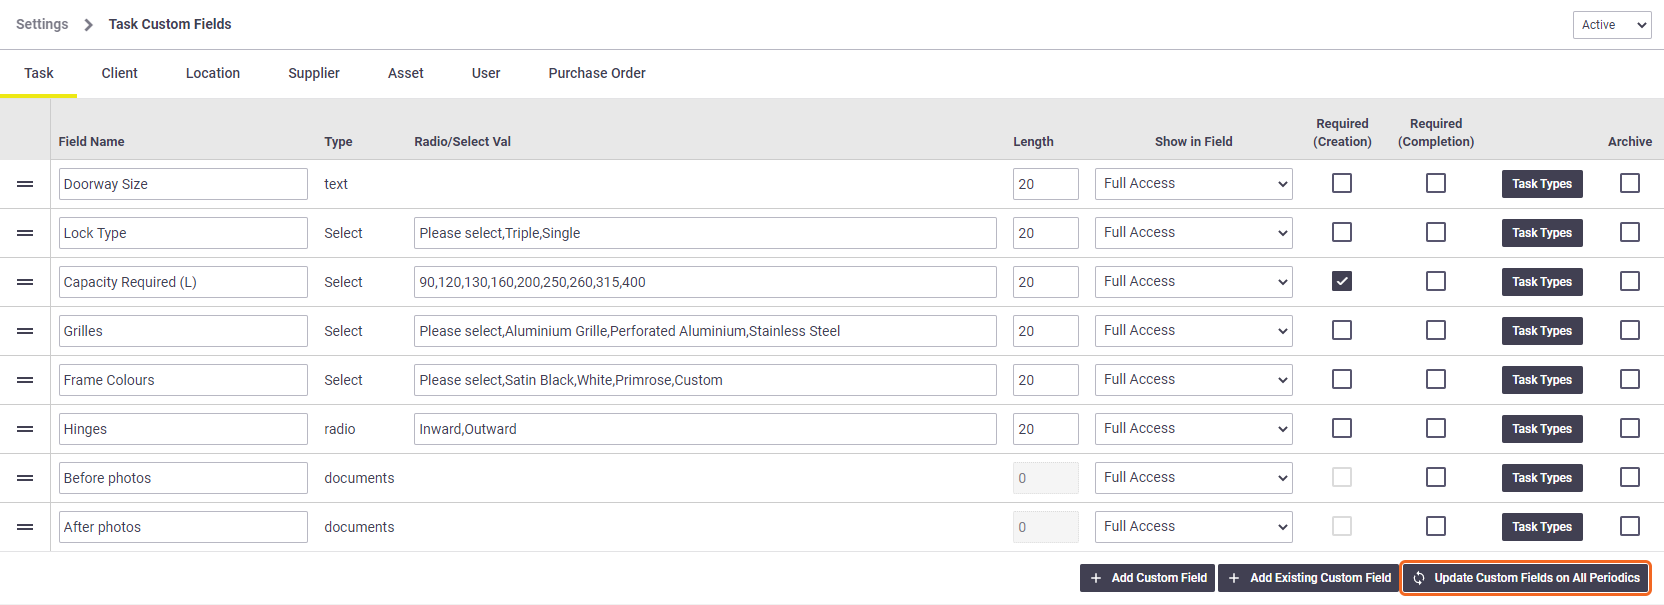
On the Task Custom Fields page, the Update Custom Fields on All ... button applies to Periodics only. New custom fields are not applied to existing Tasks.
You can also update individual Client, Supplier, Contractor, and Asset cards with their relevant custom fields by using the Update Custom Fields button located within the card.
Changing task types
| If you change the task type on an existing task, you will be given an option on how you want to proceed, depending on the scenario. You can choose more than one option, or choose 'None of the above'. | 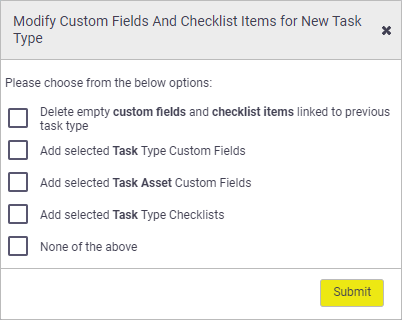 |
Options
| Option | Description |
|---|---|
| Delete empty custom fields and checklist items linked to previous task type | Blank custom fields and unchecked checklist items will not carry across to the task. |
| Add selected Task Type Custom Fields | Custom fields belonging to the new task type will be added. Any of the previous task type's completed custom fields will remain visible, so no data is lost. |
| Add selected Task Asset Custom Fields | Task asset fields belonging to the new task type will be added. Any of the previous task type's completed task asset fields will remain visible, so no data is lost. |
| Add selected Task Type Checklists | Checklists belonging to the new task type will be added. Any of the previous task type's completed checklist items will remain visible, so no data is lost. |
| None of the above | Saves the new task type only and does not add any custom fields or checklists related to the new task type. |
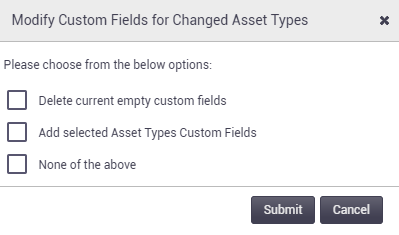
Changing asset types
|
If you change the asset type on an existing task, you will be given an option on how you want to proceed, depending on the scenario.
You can choose more than one option, or choose 'None of the above'. |
 |
Options
Option |
Description |
|---|---|
| Delete current empty custom fields | Blank custom fields from the previous asset type will be removed from the asset card. |
| Add selected Asset Type Custom Fields | Custom fields belonging to the new asset type will be added to the asset card. Any of the previous asset type's completed custom fields will remain visible, so no data is lost. |
| None of the above | Saves the new asset type only and does not add any custom fields related to the new asset type. |
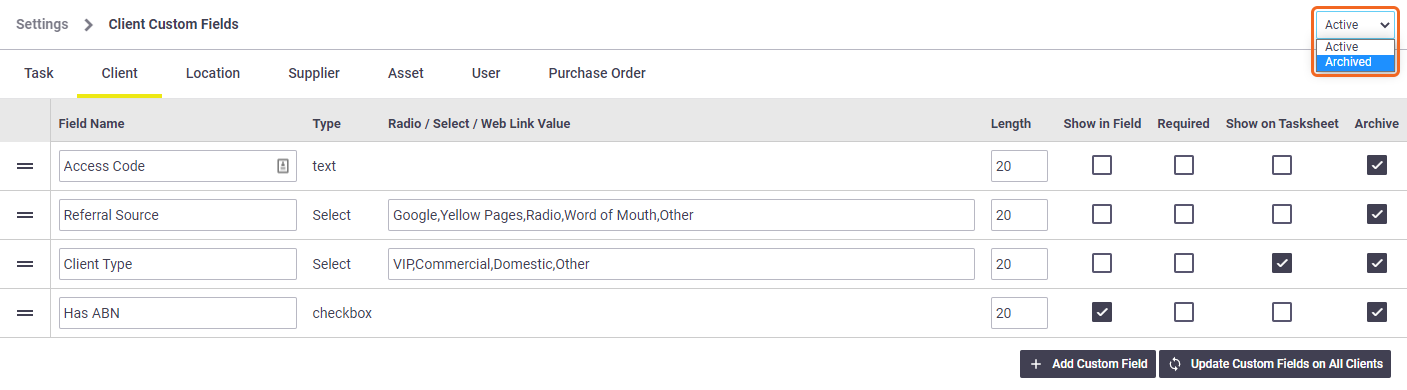
Archive custom fields
To archive a custom field, click the checkbox under the Archive column and Save.
To restore a custom field that has been archived, click the dropdown filter at the top right of the screen and select Archived. Uncheck the Archive checkbox and Save.
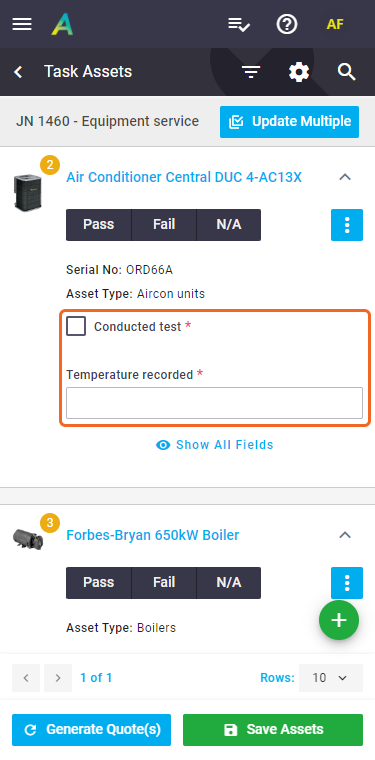
Task Asset Fields
|
You can also create custom fields specific to assets added to a task. This is a great way to record extra information on assets, based on that particular visit.
See Task Asset Fields for information on how to set these up. |
 |