

A job is called a 'task' in AroFlo, and there are various ways to create a task in AroFlo Office. You can use:
- the Create menu
- the Workflow menu
- an existing task (to create a linked task)
- the calendar.
A Quote also becomes a task once it is Approved. See Track Quote Status - Commencing Quoted Work.
Navigation tips
- To view more information than appears by default in any of the Search
 results windows, click
  and select the additional columns you need.
 - To remove a value from the Location, Asset, Sales Person, or Project fields, click and the relevant Set No button (e.g. Set No Location, Set No Asset).
- To search for a location across all clients, remove the client name from the Client filter (top row of Search Locations window).
- To request a change to the options available in the Task Type and Priority fields, contact your System Administrator.
Create a task via the Create menu
|
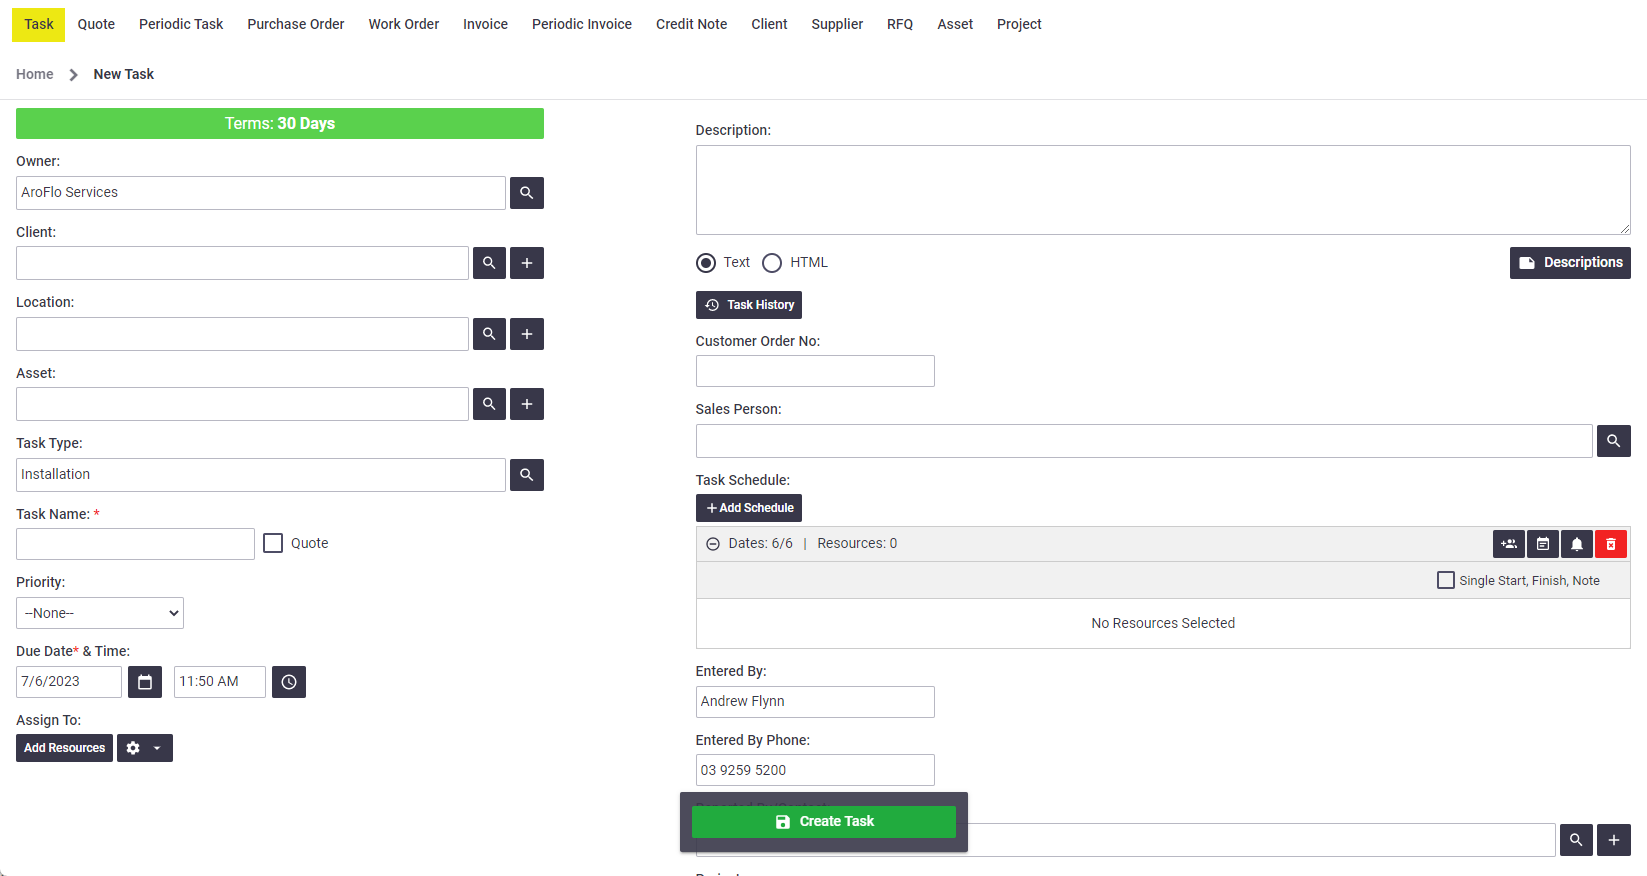 |
Field Descriptions
| Field/Button | Description |
|---|---|
| Owner | If you have multiple business units, this field will populate and default to the current business unit. To select a different business unit, click This can be helpful if you want to use task types and custom fields belonging to a different business unit. After saving the task, the task will be listed in the relevant owner's Workflow > Open menu.
If you want your business unit to have visibility over the task but want another business unit to be responsible for it, use the Assign To function (see below). |
| Client | This field either defaults to the current business unit or is left blank (see Task Settings - Default Task Client).
To select a client, click
To add a new client:
For complete instructions, see Create a Client. |
| Location | This field is used when the work site location is different from the client's office location. This is useful for clients that have multiple offices or locations, such as real estate agents and strata management companies.
Click
To add a new location:
For complete instructions, see Add a Location. |
| Asset | This field is used to link a piece of equipment that is being worked on for this job. It is an optional field, usually used for scheduled maintenance work.
Click
To add a new asset:
For complete instructions, see Create an Asset. |
| Task Type | The task type defines:
Click and double-click to select a task type. Alternatively, start typing the task type name and select from the list. Task types are set up and edited by your Site Administrator. See Task Types. |
| Task Name* |
(*Required Field) This is used to help Office and Field staff easily identify the job by the task name. By default, the task identification field will be pre-filled with either the client's address, or the work site address if a Location has been set for the task. You can always overwrite the address with something more meaningful.
If a task was generated from a periodic task template, the name will include the frequency. Character limit The maximum amount of characters is 50. |
| Quote checkbox | Checking this box converts the task to a quote; there is a link to the task that is hidden until the quote is accepted. Only use this option if you want to create a quote. Refer to Quotes for more information. |
| Priority | Used to set a priority level for the job. This is an optional field that is used internally to advise either the scheduler or field staff of urgency. |
| Due Date & Time* | (*Required Field) Used to record the date that the customer needs this work completed by. By default, tomorrow's date will be auto-populated. You can type in a due date (DD/MM/YYYY format), or click on the date field and select a date using the pop-up calendar.
If you have Priority Tracking enabled, the due date may update on-screen when a specific priority is selected. If a priority is set, the Time field will be disabled. To use the Time field, set the Priority field to --None--. |
Assign To |
Add ResourcesThe Add Resources button is used to assign one or more resources, business units, or contractors, to the job. They may not necessarily be the person performing the work, i.e. the 'scheduled' resource.
Click Add Resources to select the resource you want to assign the task to. If you don't see the name you need, start typing the name and select it from the list. You can select multiple resources if needed.
Click Select Resources to add the resources' names to the task. When you Save, the resources' names become links to their user, client or contractor card (if the resource is a business unit there is no link). Assign to MyselfTo quickly assign the task to yourself: click |
| Description |
This is where you enter the details of the problem or request. You can create description templates for common phrases or job information using the Descriptions button located under the description field. The description can be created in text or HTML format. Select HTML if you need to use bullet points, bold/coloured fonts, paragraphs (show carriage returns) or tables. Default Task Descriptions to HTML Once you select the HTML option for your Task Description, AroFlo will store this preference in your browser. Each task created after this will default to using HTML Descriptions and show you the editor. If you move to a different computer, a different browser, or clear your cookies and cache, you will need to set your preference again the next time you create a task. |
| Task History |
This shows a history of all tasks in the system for this client. Click the
Double-click a row to open the task. Show me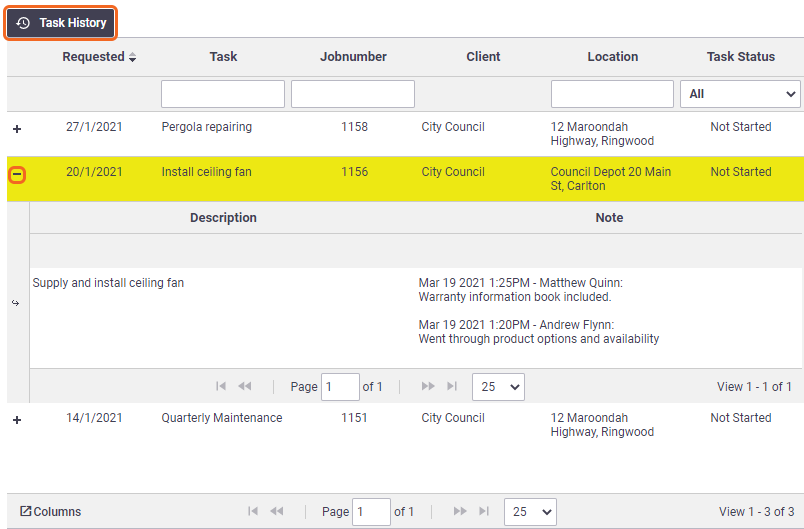 |
| Customer Order No | Used for recording a customer order number such as work order number or contract number (if applicable). |
| Sales Person | Assign a sales person to the task (if applicable) (see Task Settings). |
| Task Schedule | This function allows you to schedule the job to a resource when creating the task.
To add a schedule:
Show me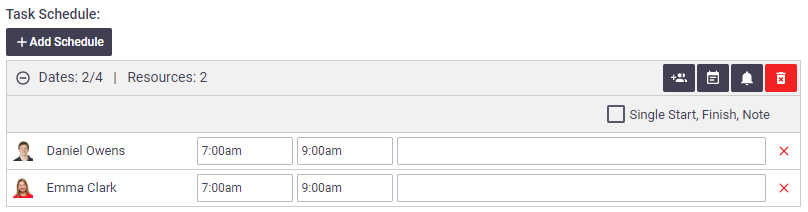 To add further schedules, click Add Schedule and repeat the above steps. |
| Entered By | This is auto-filled with the current user's name. |
| Entered By Phone | This is auto-filled with the current user's phone number. |
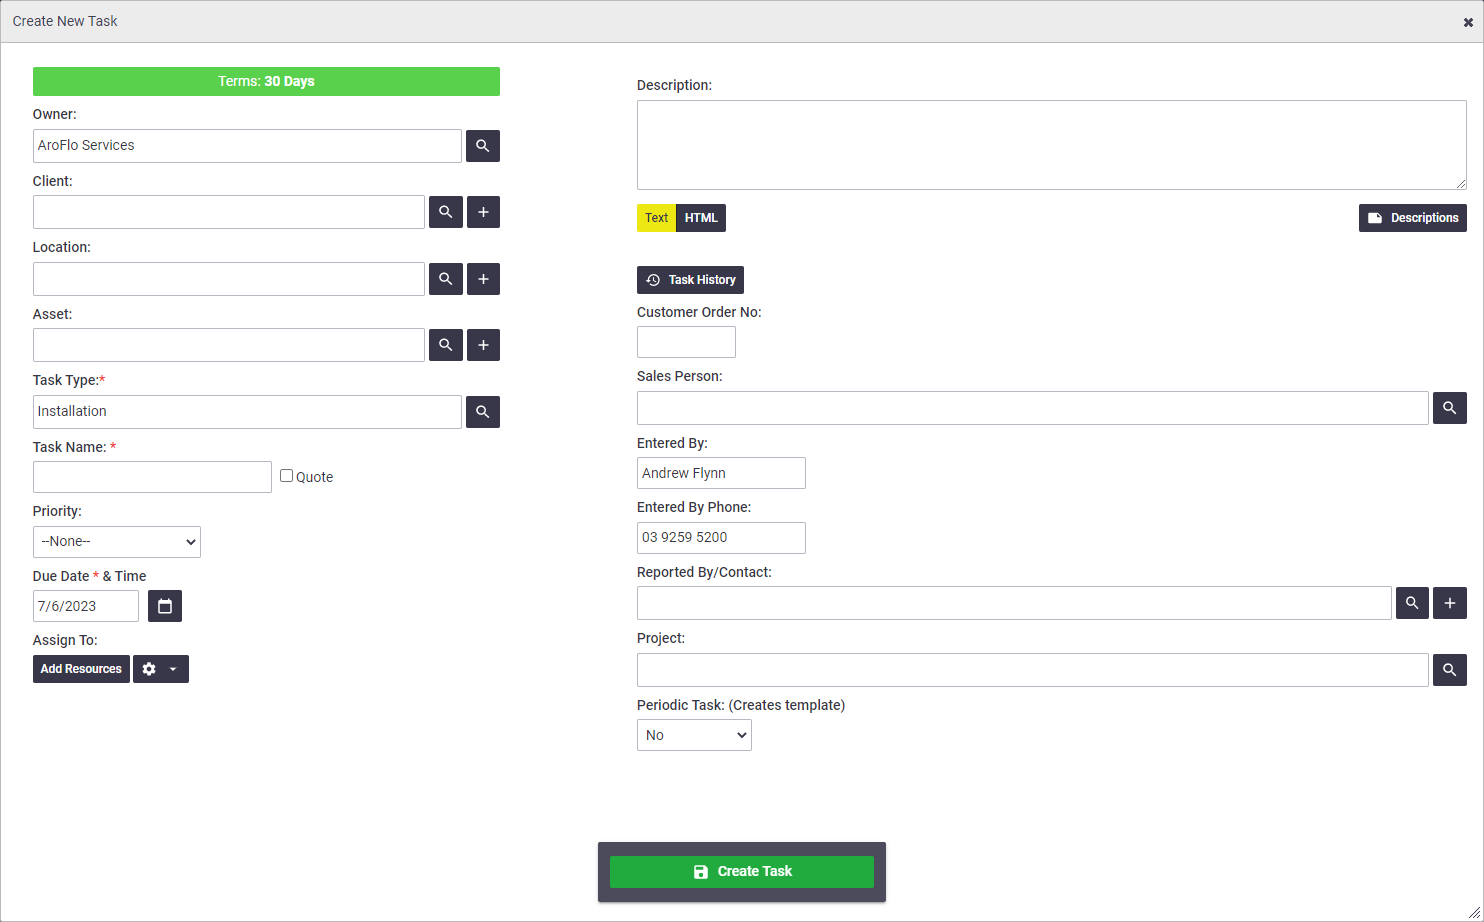
| Reported By/Contact | Used for recording the contact who requested the work. Click the
To add a new contact:
|
| Project | This option is only used if projects exist for the client. It is used for allocating tasks to a project. Refer to Projects for more information. |
| Periodic Task | Only use this option if you want to set up automatic tasks for recurring work. Refer to Create a Periodic Task for more information. |
|
Create Task / Quote / Periodic |
This is the save button for the Create Task, Create Quote or Create Periodic screens. Click this button when you've entered all the necessary information. |
 (magnifier) and double-click the relevant one.
 (magnifier) and double-click to select a client from the list. Alternatively, start typing the client’s name and select from the list.
 (plus sign) next to the Client field.
 and double-click to select a location from the list. Alternatively, start typing the location name and select from the list.
 (plus sign) next to the Location field.
 and double-click to select an asset from the list. Alternatively, start typing the asset name and select from the list.
 (plus sign) next to the Asset field.
 (down arrow icon), then Assign To Myself.
 and select a
  and select a date.
 to select a contact from a list.
 next to the Reported By/Contact field.
Creating a task via the Calendar
|
The calendar also lets you create and schedule new tasks simultaneously.
|
 |
Troubleshooting
| Client terms set to 'Do Not Trade' |
| If you create a task against a client set as Do Not Trade, a pop-up warning will appear next to the client's name and the trading terms note set against that client. You can override the message and create the task. See Transaction Terms for more information. |